Quantcast
Channel: Andrew Lock | .NET Escapades
Viewing all 743 articles
Browse latest View live

Optimising ASP.NET Core apps in Docker - avoiding manually copying csproj files

$
0
0
Optimising ASP.NET Core apps in Docker - avoiding manually copying csproj files

This post builds on my previous posts on building ASP.NET Core apps in Docker and using Cake in Docker. In this post I show how you can optimise your Dockerfiles for dotnet restore, without having to manually specify all your app's .csproj files in the Dockerfile.

Background - optimising your Dockerfile for dotnet restore

When building ASP.NET Core apps using Docker, there are many best-practices to consider. One of the most important aspects is using the correct base image - in particular, a base image containing the .NET SDK to build your app, and a base image containing only the .NET runtime to run your app in production.

In addition, there are a number of best practices which apply to Docker and the way it caches layers to build your app. I discussed this process in a previous post on building ASP.NET Core apps using Cake in Docker, so if that's new to you, i suggest checking it out.

A common way to take advantage of the build cache when building your ASP.NET Core in, is to copy across only the .csproj, .sln and nuget.config files for your app before doing a restore, rather than the entire source code for your app. The NuGet package restore can be one of the slowest parts of the build, and it only depends on these files. By copying them first, Docker can cache the result of the restore, so it doesn't need to run twice, if all you do is change a .cs file.

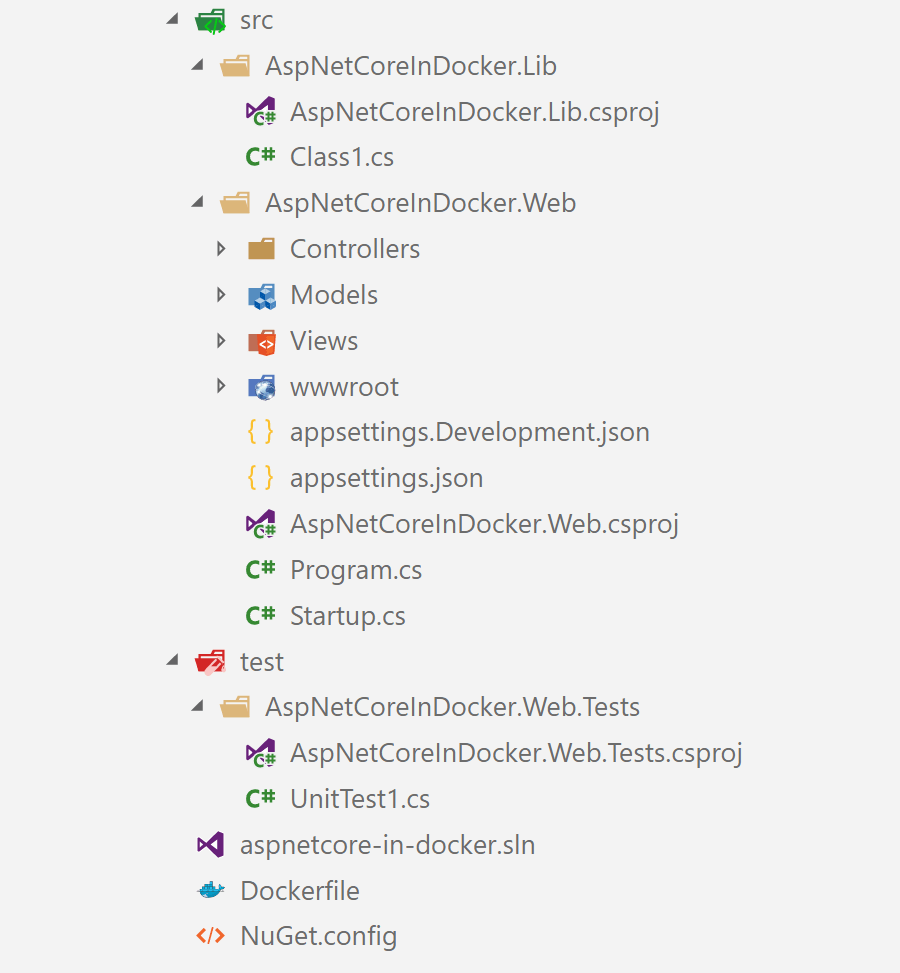
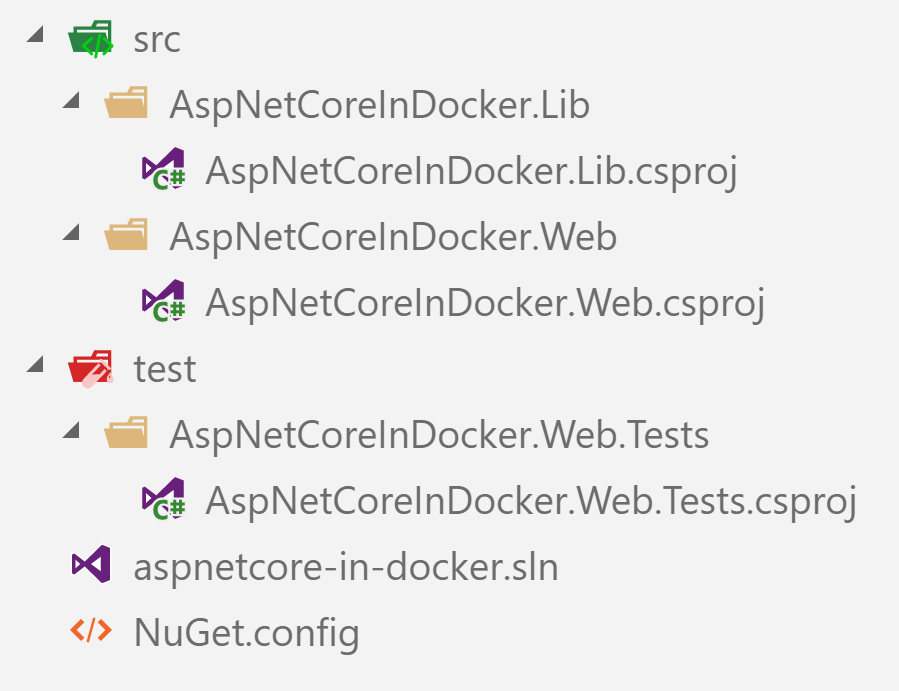
For example, in a previous post I used the following Docker file for building an ASP.NET Core app with three projects - a class library, an ASP.NET Core app, and a test project:

# Build image
FROM microsoft/dotnet:2.0.3-sdk AS builder  
WORKDIR /sln  
COPY ./aspnetcore-in-docker.sln ./NuGet.config  ./

# Copy all the csproj files and restore to cache the layer for faster builds
# The dotnet_build.sh script does this anyway, so superfluous, but docker can 
# cache the intermediate images so _much_ faster
COPY ./src/AspNetCoreInDocker.Lib/AspNetCoreInDocker.Lib.csproj  ./src/AspNetCoreInDocker.Lib/AspNetCoreInDocker.Lib.csproj  
COPY ./src/AspNetCoreInDocker.Web/AspNetCoreInDocker.Web.csproj  ./src/AspNetCoreInDocker.Web/AspNetCoreInDocker.Web.csproj  
COPY ./test/AspNetCoreInDocker.Web.Tests/AspNetCoreInDocker.Web.Tests.csproj  ./test/AspNetCoreInDocker.Web.Tests/AspNetCoreInDocker.Web.Tests.csproj  
RUN dotnet restore

COPY ./test ./test  
COPY ./src ./src  
RUN dotnet build -c Release --no-restore

RUN dotnet test "./test/AspNetCoreInDocker.Web.Tests/AspNetCoreInDocker.Web.Tests.csproj" -c Release --no-build --no-restore

RUN dotnet publish "./src/AspNetCoreInDocker.Web/AspNetCoreInDocker.Web.csproj" -c Release -o "../../dist" --no-restore

#App image
FROM microsoft/aspnetcore:2.0.3  
WORKDIR /app  
ENV ASPNETCORE_ENVIRONMENT Local  
ENTRYPOINT ["dotnet", "AspNetCoreInDocker.Web.dll"]  
COPY --from=builder /sln/dist .  

As you can see, the first things we do are copy the .sln file and nuget.config files, followed by all the .csproj files. We can then run dotnet restore, before we copy the /src and /test folders.

While this is great for optimising the dotnet restore point, it has a couple of minor downsides:

  1. You have to manually reference every .csproj (and .sln) file in the Dockerfile
  2. You create a new layer for every COPY command. (This is a very minor issue, as the layers don't take up much space, but it's a bit annoying)

The ideal solution

My first thought for optimising this process was to simply use wildcards to copy all the .csproj files at once. This would solve both of the issues outlined above. I'd hoped that all it would take would be the following:

# Copy all csproj files (WARNING, this doesn't work!)
COPY ./**/*.csproj ./  

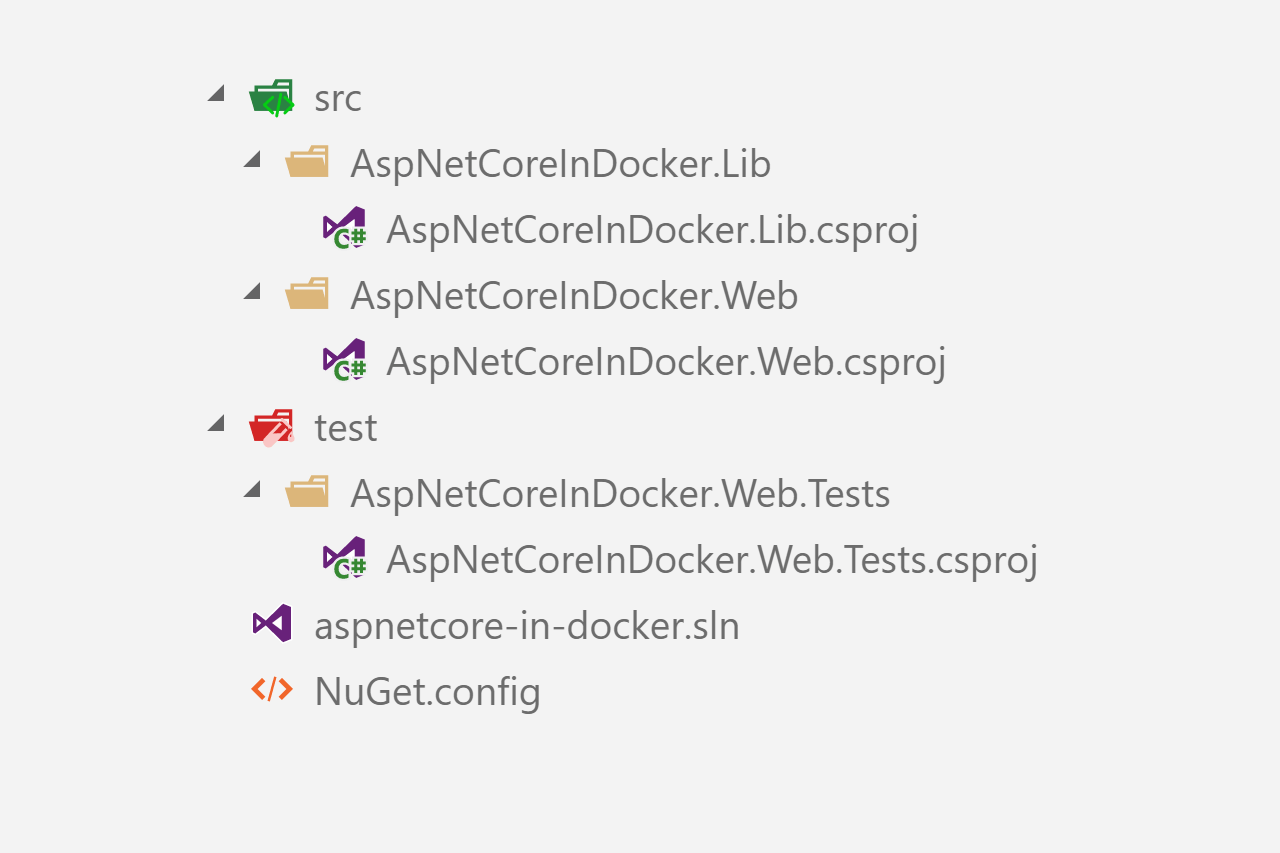
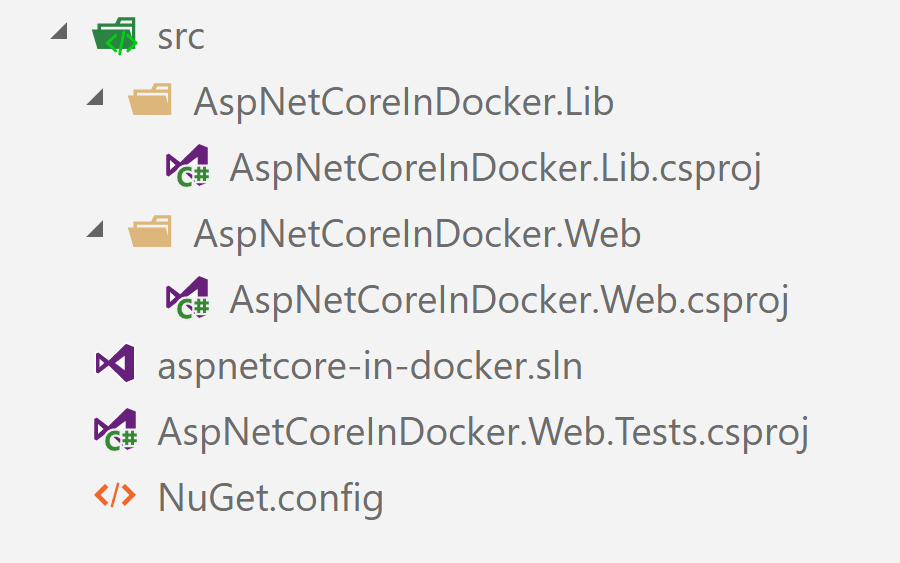
Unfortunately, while COPY does support wildcard expansion, the above snippet doesn't do what you'd like it to. Instead of copying each of the .csproj files into their respective folders in the Docker image, they're dumped into the root folder instead!
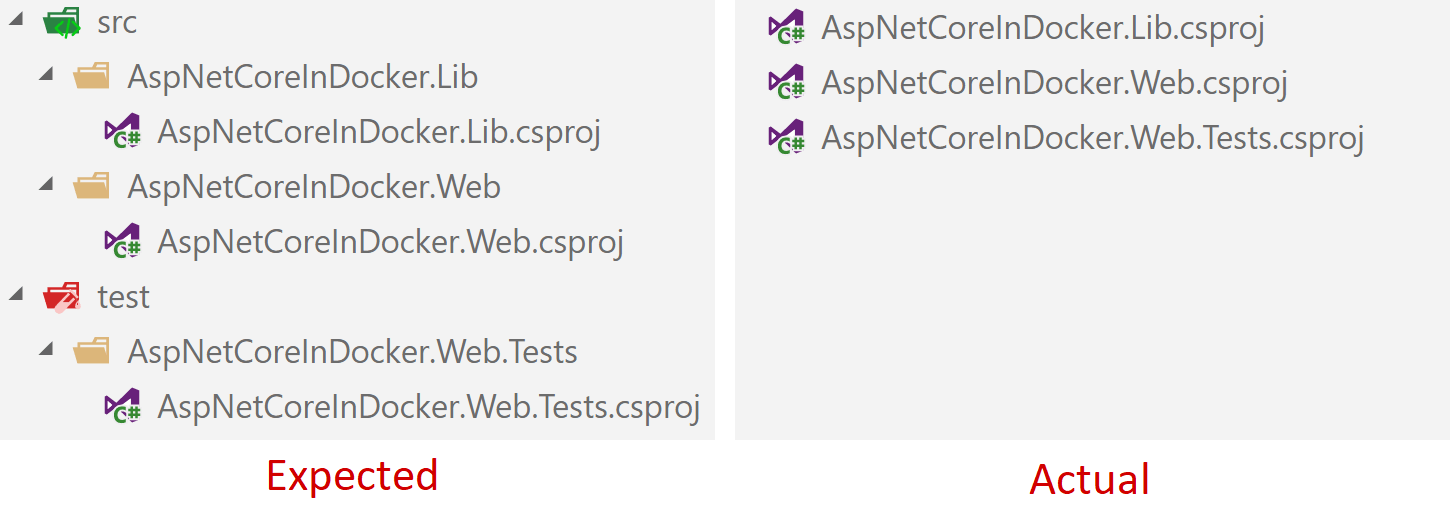
Optimising ASP.NET Core apps in Docker - avoiding manually copying csproj files

The problem is that the wildcard expansion happens before the files are copied, rather than by the COPY file itself. Consequently, you're effectively running:

# Copy all csproj files (WARNING, this doesn't work!)
# COPY ./**/*.csproj ./
COPY ./src/AspNetCoreInDocker.Lib/AspNetCoreInDocker.Lib.csproj ./src/AspNetCoreInDocker.Web/AspNetCoreInDocker.Web.csproj ./test/AspNetCoreInDocker.Web.Tests/AspNetCoreInDocker.Web.Tests.csproj ./  

i.e. copy the three .csproj files into the root folder. It sucks that this doesn't work, but you can read more in the issue on GitHub, including how there's no plans to fix it 🙁

The solution - tarball up the csproj

The solution I'm using to the problem is a bit hacky, and has some caveats, but it's the only one I could find that works. It goes like this:

  1. Create a tarball of the .csproj files before calling docker build.
  2. In the Dockerfile, expand the tarball into the root directory
  3. Run dotnet restore
  4. After the docker file is built, delete the tarball

Essentially, we're using other tools for bundling up the .csproj files, rather than trying to use the capabilities of the Dockerfile format. The big disadvantage with this approach is that it makes running the build a bit more complicated. You'll likely want to use a build script file, rather than simplu calling docker build .. Similarly, this means you won't be able to use the automated builds feature of DockerHub.

For me, those are easy tradeoffs, as I typically use a build script anyway. The solution in this post just adds a few more lines to it.

1. Create a tarball of your project files

If you're not familiar with Linux, a tarball is simply a way of packaging up multiple files into a single file, just like a .zip file. You can package and unpackage files using the tar command, which has a daunting array of options.

There's a plethora of different ways we could add all our .csproj files to a .tar file, but the following is what I used. I'm not a Linux guy, so any improvements would be greatly received 🙂

find . -name "*.csproj" -print0 \  
    | tar -cvf projectfiles.tar --null -T -

Note: Don't use the -z parameter here to GZIP the file. Including it causes Docker to never cache the COPY command (shown below) which completely negates all the benefits of copying across the .csproj files first!

This actually uses the find command to iterate through sub directories, list out all the .csproj files, and pipe them to the tar command. The tar command writes them all to a file called projectfiles.tar in the root directory.

2. Expand the tarball in the Dockerfile and call dotnet run

When we call docker build . from our build script, the projectfiles.tar file will be available to copy in our Dockerfile. Instead of having to individually copy across every .csproj file, we can copy across just our .tar file, and the expand it in the root directory.

The first part of our Dockerfile then becomes:

FROM microsoft/aspnetcore-build:2.0.3 AS builder  
WORKDIR /sln  
COPY ./aspnetcore-in-docker.sln ./NuGet.config  ./

COPY projectfiles.tar .  
RUN tar -xvf projectfiles.tar  
RUN dotnet restore

# The rest of the build process

Now, it doesn't matter how many new projects we add or delete, we won't need to touch the Dockerfile

3. Delete the old projectfiles.tar

The final step is to delete the old projectfiles.tar after the build has finished. This is sort of optional - if the file already exists the next time you run your build script, tar will just overwrite the existing file.

If you want to delete the file, you can use

rm projectfiles.tar  

at the end of your build script. Either way, it's best to add projectfiles.tar as an ignored file in your .gitignore file, to avoid accidentally committing it to source control.

Further optimisation - tar all the things!

We've come this far, why not go a step further! As we're already taking the hit of using tar to create and extract an archive, we may as well package everything we need to run dotnet restore i.e. the .sln and _NuGet.config files!. That lets us do a couple more optimisations in the Docker file.

All we need to change, is to add "OR" clauses to the find command of our build script (urgh, so ugly):

find . \( -name "*.csproj" -o -name "*.sln" -o -name "NuGet.config" \) -print0 \  
    | tar -cvf projectfiles.tar --null -T -

and then we can remove the COPY ./aspnetcore-in-docker.sln ./NuGet.config ./ line from our Dockerfile.

The very last optimisation I want to make is to combine the layer that expands the .tar file with the line that runs dotnet restore by using the && operator. Given the latter is dependent on the first, there's no advantage to caching them separately, so we may as well inline it:

RUN tar -xvf projectfiles.tar && dotnet restore  

Putting it all together - the build script and Dockerfile

And we're all done! For completeness, the final build script and Dockerfile are shown below. This is functionally identical to the Dockerfile we started with, but it's now optimised to better handle changes to our ASP.NET Core app. If we add or remove a project from our app, we won't have to touch the Dockerfile, which is great! 🙂

The build script:

#!/bin/bash
set -eux

# tarball csproj files, sln files, and NuGet.config
find . \( -name "*.csproj" -o -name "*.sln" -o -name "NuGet.config" \) -print0 \  
    | tar -cvf projectfiles.tar --null -T -

docker build  .

rm projectfiles.tar  

The Dockerfile

# Build image
FROM microsoft/aspnetcore-build:2.0.3 AS builder  
WORKDIR /sln

COPY projectfiles.tar .  
RUN tar -xvf projectfiles.tar && dotnet restore

COPY ./test ./test  
COPY ./src ./src  
RUN dotnet build -c Release --no-restore

RUN dotnet test "./test/AspNetCoreInDocker.Web.Tests/AspNetCoreInDocker.Web.Tests.csproj" -c Release --no-build --no-restore

RUN dotnet publish "./src/AspNetCoreInDocker.Web/AspNetCoreInDocker.Web.csproj" -c Release -o "../../dist" --no-restore

#App image
FROM microsoft/aspnetcore:2.0.3  
WORKDIR /app  
ENV ASPNETCORE_ENVIRONMENT Local  
ENTRYPOINT ["dotnet", "AspNetCoreInDocker.Web.dll"]  
COPY --from=builder /sln/dist .  

Summary

In this post I showed how you can use tar to package up your ASP.NET Core .csproj files to send to Docker. This lets you avoid having to manually specify all the project files explicitly in your Dockerfile.

Gotchas upgrading from IdentityServer 3 to IdentityServer 4

$
0
0
Gotchas upgrading from IdentityServer 3 to IdentityServer 4

This post covers a couple of gotchas I experienced upgrading an IdentityServer 3 implementation to IdentityServer 4. I've written about a previous issue I ran into with an OWIN app in this scenario - where JWTs could not be validated correctly after upgrading. In this post I'll discuss two other minor issues I ran into:

  1. The URL of the JSON Web Key Set (JWKS) has changed from /.well-known/jwks to .well-known/openid-configuration/jwks.
  2. The KeyId of the X509 certificate signing material (used to validate the identity token) changes between IdentityServer 3 and IdentityServer 4. That means a token issued by IdentityServer 3 will not be validated using IdentityServer 4, leaving users stuck in a redirect loop.

Both of these issues are actually quite minor, and weren't a problem for us to solve, they just caused a bit of confusion initially! This is just a quick post about these problems - if you're looking for more information on upgrading from IdentityServer 3 to 4 in general, I suggest checking out the docs, the announcement post, or this article by Scott Brady.

1. The JWKS URL has changed

OpenID Connect uses a "discovery document" to describe the capabilities and settings of the server - in this case, IdentityServer. This includes things like the Claims and Scopes that are available and the supported grants and response types. It also includes a number of URLs indicating other available endpoints. As a very compressed example, it might look like the following:

{
    "issuer": "https://example.com",
    "jwks_uri": "https://example.com/.well-known/openid-configuration/jwks",
    "authorization_endpoint": "https://example.com/connect/authorize",
    "token_endpoint": "https://example.com/connect/token",
    "userinfo_endpoint": "https://example.com/connect/userinfo",
    "end_session_endpoint": "https://example.com/connect/endsession",
    "scopes_supported": [
        "openid",
        "profile",
        "email"
    ],
    "claims_supported": [
        "sub",
        "name",
        "family_name",
        "given_name"
    ],
    "grant_types_supported": [
        "authorization_code",
        "client_credentials",
        "refresh_token",
        "implicit"
    ],
    "response_types_supported": [
        "code",
        "token",
        "id_token",
        "id_token token",
    ],
    "id_token_signing_alg_values_supported": [
        "RS256"
    ],
    "code_challenge_methods_supported": [
        "plain",
        "S256"
    ]
}

The discovery document is always located at the URL /.well-known/openid-configuration, so a new client connecting to the server knows where to look, but the other endpoints are free to move, as long as the discovery document reflects that.

In our move from IdentityServer 3 to IdentityServ4, the JSWKs URL did just that - it moved from /.well-known/jwks to /.well-known/openid-configuration/jwks. The discovery document obviously reflected that, and all of the IdentityServer .NET client libraries for doing token validation, both with .NET Core and for OWIN, switched to the correct URLs without any problems.

What I didn't appreciate, was that we had a Python app which was using IdentityServer for authentication, but which wasn't using the discovery document. Rather than go to the effort of calling the discovery document and parsing out the URL, and knowing that we controlled the IdentityServer implementation, the /.well-known/jwks URL was hard coded.

Oops!

Obviously it was a simple hack to update the hard coded URL to the new location, though a much better solution would be to properly parse the discovery document.

2. The KeyId of the signing material has changed

This is a slightly complex issue, and I confess, this has been on my backlog to write up for so long that I can't remember all the details myself! I do, however, remember the symptom quite vividly - a crazy, endless, redirect loop on the client!

The sequence of events looked something like this:

  1. The client side app authenticates with IdentityServer 3, obtaining an id and access token.
  2. Upgrade IdentityServer to IdentityServer 4.
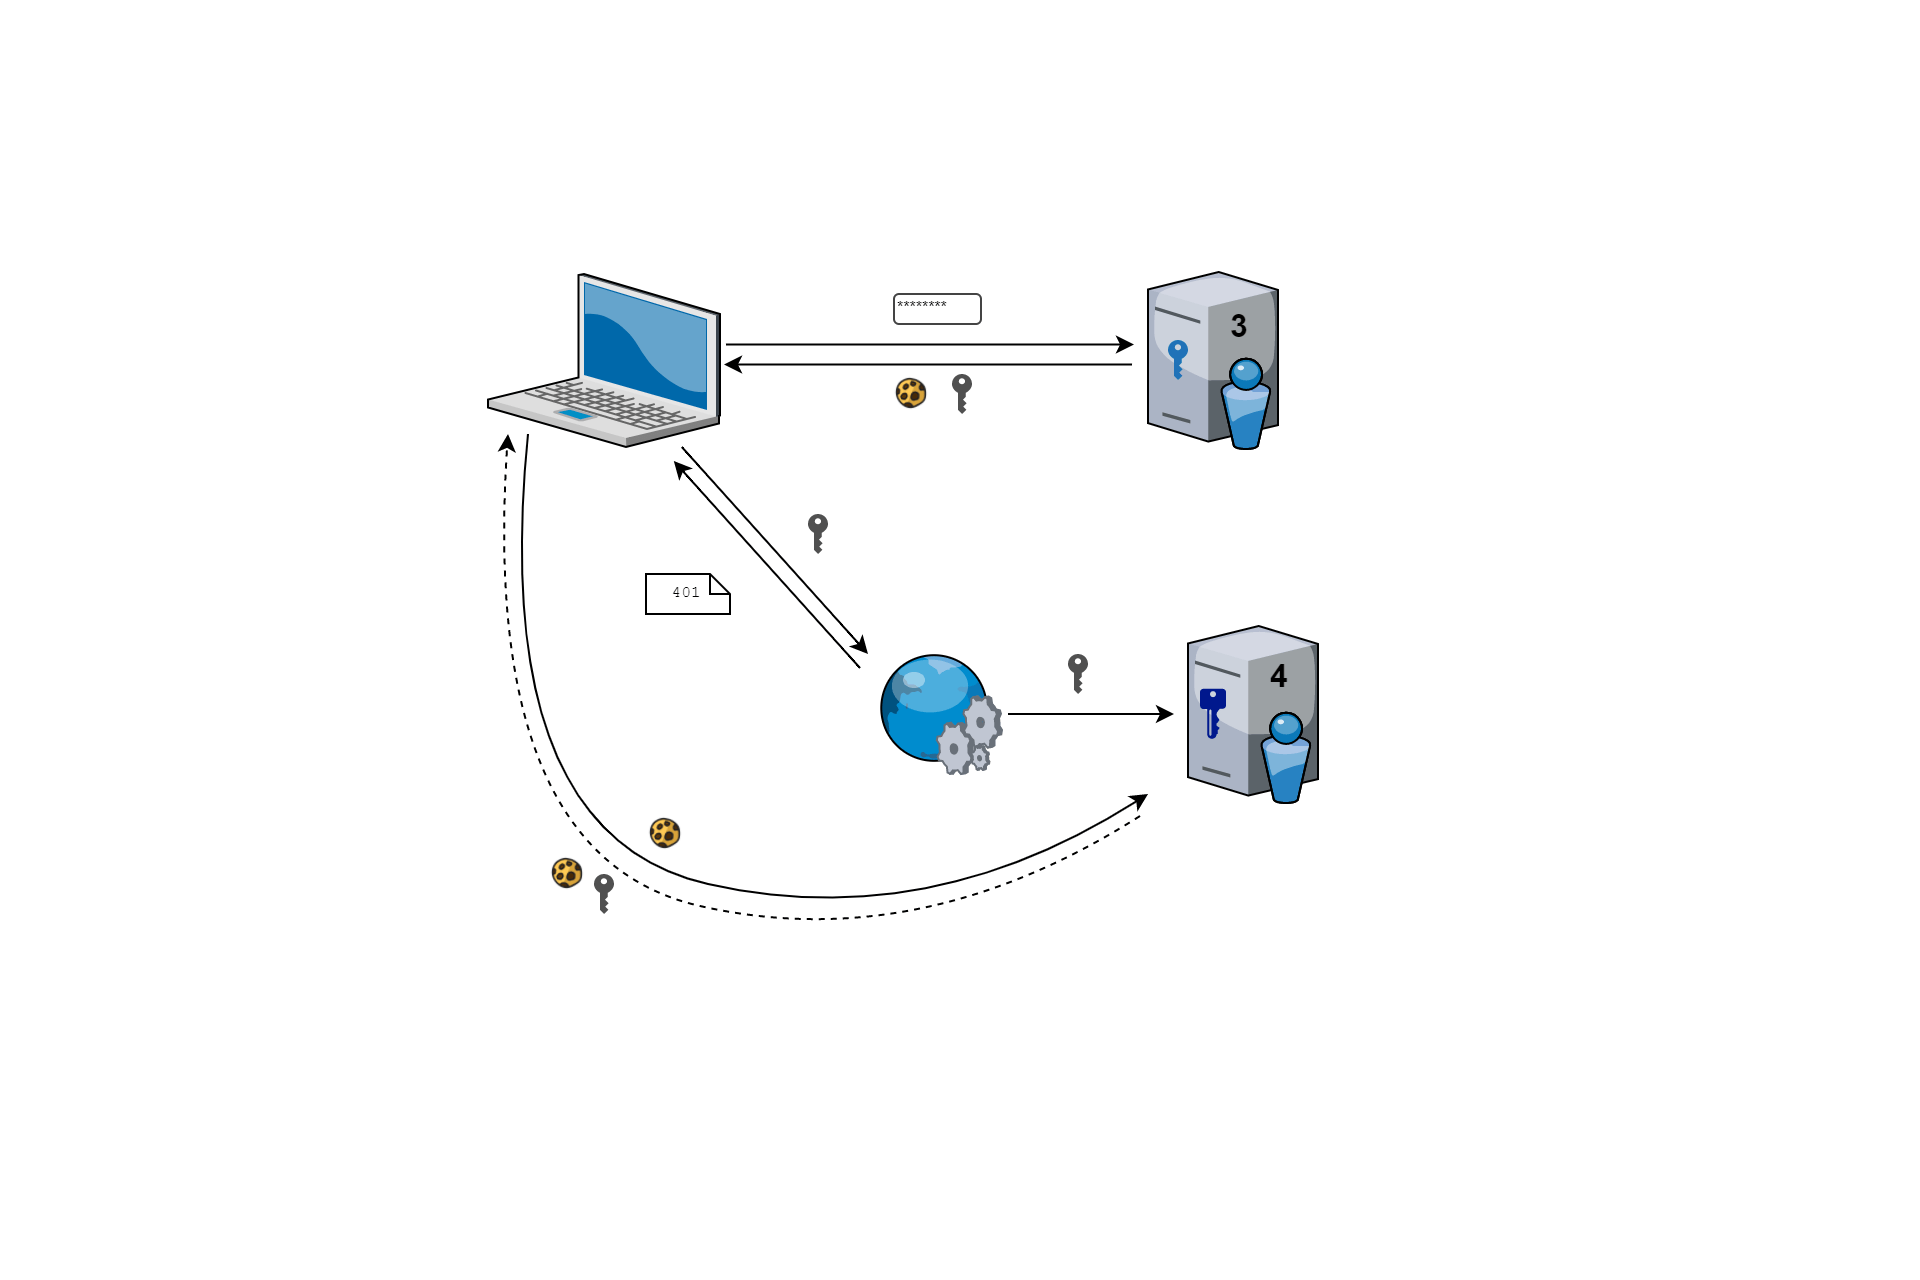
  3. The client side app calls the API, which tries to validate the token using the public keys exposed by IdenntityServer 4. However IdentityServer 4 can't seem to find the key that was used to sign the token, so this validation fails causing a 401 redirect.
  4. The client side app handles the 401, and redirects to IdentityServer 4 to login.
  5. However, you're already logged in (the cookie persists across IdentityServer versions), so IdentityServer 4 redirects you back.
  6. Go to 4.

Gotchas upgrading from IdentityServer 3 to IdentityServer 4

It's possible that this issue manifested as it did due to something awry in the client side app, but the root cause of the issue was the fact a token issued by IdentityServer 3 could not be validated using the exposed public keys of IdentityServer 4, even though both implementations were using the same signing material - an X509 certificate.

The same public and private keypair is used in both IdentityServer 3 and IdentityServer4, but they have different identifiers, so IdentityServer thinks they are different keys.

In order to validate an access token, an app must obtain the public key material from IdentityServer, which it can use to confirm the token was signed with the associated private key. The public keys are exposed at the jwks endpoint (mentioned earlier), something like the following (truncated for brevity):

{
  "keys": [
    {
      "kty": "RSA",
      "use": "sig",
      "kid": "E23F0643F144C997D6FEEB320F00773286C2FB09",
      "x5t": "4j8GQ_FEyZfW_usyDwB3MobC-wk",
      "e": "AQAB",
      "n": "rHRhPtwUwp-i3lA_CINLooJygpJwukbw",
      "x5c": [
        "MIIDLjCCAhagAwIBAgIQ9tul\/q5XHX10l7GMTDK3zCna+mQ="
      ],
      "alg": "RS256"
    }
  ]
}

As you can see, this JSON object contains a keys property which is an array of objects (though we only have one here). Therefore, when validating an access token, the API server needs to know which key to use for the validation.

The JWT itself contains metadata indicating which signing material was used:

{
  "alg": "RS256",
  "kid": "E23F0643F144C997D6FEEB320F00773286C2FB09",
  "typ": "JWT",
  "x5t": "4j8GQ_FEyZfW_usyDwB3MobC-wk"
}

As you can see, there's a kid property (KeyId) which matches in both the jwks response and the value in the JWT header. The API token validator uses the kid contained in the JWT to locate the appropriate signing material from the jwks endpoint, and can confirm the access token hasn't been tampered with.

Unfortunately, the kid was not consistent across IdentityServer 3 and IdentityServer 4. When trying to use a token issued by IdentityServer 3, IdentityServer 4 was unable to find a matching token, and validation failed.

For those interested, IdentityServer3 uses the bae 64 encoded certificate thumbprint as the KeyId - Base64Url.Encode(x509Key.Certificate.GetCertHash()). IdentityServer 4 [uses X509SecurityKey.KeyId] (https://github.com/IdentityServer/IdentityServer4/blob/993103d51bff929e4b0330f6c0ef9e3ffdcf8de3/src/IdentityServer4/ResponseHandling/DiscoveryResponseGenerator.cs#L316) which is slightly different - a base 16 encoded version of the hash.

Our simple solution to this was to do the upgrade of IdentityServer out of hours - in the morning, the IdentityServer cookies had expired and so everyone had to re-authenticate anyway. IdentityServer 4 issued new access tokens with a kid that matched its jwks values, so there were no issues 🙂

In practice, this solution might not work for everyone, for example if you're not able to enforce a period of downtime. There are other options, like explicitly providing the kid material yourself as described in this issue if you need it. If the kid doesn't change between versions, you shouldn't have any issues validating old tokens in the upgrade.

Alternatively, you could add the signing material to IdentityServer 4 using both the old and new kids. That way, IdentityServer 4 can validate tokens issued by IdentityServer 3 (using the old kid), while also issuing (and validating) new tokens using the new kid.

Summary

This post describes a couple of minor issues upgrading a deployment from IdentityServer 3 to IdentitySerrver4. The first issue, the jwks URL changing, is not an issue I expect many people to run into - if you're using the discovery document you won't have this problem. The second issue is one you might run into when upgrading from IdentityServer 3 to IdentityServer 4 in production; even if you use the same X509 certificate in both implementations, tokens issued by IdentityServer 3 can not be validated by IdentityServer 4 due to mis-matching kids.

Coming in ASP.NET Core 2.1 - top-level MVC parameter validation

$
0
0
Coming in ASP.NET Core 2.1 - top-level MVC parameter validation

This post looks at a feature coming in ASP.NET Core 2.1 related to Model Binding in ASP.NET Core MVC/Web API Controllers. I say it's a feature, but from my point of view it feels more like a bug-fix!

Note, ASP.NET Core 2.1 isn't actually in preview yet, so this post might not be accurate! I'm making a few assumptions from looking at the code and issues, I haven't tried it out myself yet.

Model validation in ASP.NET Core 2.0

Model validation is an important part of the MVC pipeline in ASP.NET Core. There are many ways you can hook into the validation layer (using FluentValidation for example), but probably the most common approach is to decorate your binding models with validation attributes from the System.ComponentModel.DataAnnotations namespace. For example:

public class UserModel  
{
    [Required, EmailAddress]
    public string Email { get; set; }

    [Required, StringLength(1000)]
    public string Name { get; set; }
}

If you use the UserModel in a controller's action method, the MvcMiddleware will automatically create a new instance of the object, bind the properties of the model, and validate it using three sources:

  1. Form values – Sent in the body of an HTTP request when a form is sent to the server using a POST
  2. Route values – Obtained from URL segments or through default values after matching a route
  3. Querystring values – Passed at the end of the URL, not used during routing.

Note, currently, data sent as JSON isn't bound by default. If you wish to bind JSON data in the body, you need to decorate your model with the [FromBody] attribute as described here.

In your controller action, you can simply check the ModelState property, and find out if the data provided was valid:

public class CheckoutController : Controller  
{
    public IActionResult SaveUser(UserModel model)
    {
        if(!ModelState.IsValid)
        {
            // Something wasn't valid on the model
            return View(model);
        }

        // The model passed validation, do something with it
    }
}

This is all pretty standard MVC stuff, but what if you don't want to create a whole binding model, but you still want to validate the incoming data?

Top-level parameters in ASP.NET Core 2.0

The DataAnnotation attributes used by the default MVC validation system don't have to be applied to the properties of a class, they can also be applied to parameters. That might lead you to think that you could completely replace the UserModel in the above example with the following:

public class CheckoutController : Controller  
{
    public IActionResult SaveUser(
        [Required, EmailAddress] string Email 
        [Required, StringLength(1000)] string Name)
    {
        if(!ModelState.IsValid)
        {
            // Something wasn't valid on the model
            return View(model);
        }

        // The model passed validation, do something with it
    }
}

Unfortunately, this doesn't work! While the properties are bound, the validation attributes are ignored, and ModelState.IsValid is always true!

Top level parameters in ASP.NET Core 2.1

Luckily, the ASP.NET Core team were aware of the issue, and a fix has been merged as part of ASP.NET Core 2.1. As a consequence, the code in the previous section behaves as you'd expect, with the parameters validated, and the ModelState.IsValid updated accordingly.

As part of this work you will now also be able to use the [BindRequired] attribute on parameters. This attribute is important when you're binding non-nullable value types, as using the [Required] attribute with these doesn't give the expected behaviour.

That means you can now do the following for example, and be sure that the testId parameter was bound correctly from the route parameters, and the qty parameter was bound from the querystring. Before ASP.NET Core 2.1 this won't even compile!

[HttpGet("test/{testId}")]
public IActionResult Get([BindRequired, FromRoute] Guid testId, [BindRequired, FromQuery] int qty)  
{
    if(!ModelState.IsValid)
    {
        return BadRequest(ModelState);
    }
    // Valid and bound
}

For an excellent description of this problem and the difference between Required and BindRequired, see this article by Filip.

Summary

In ASP.NET Core 2.0 and below, validation attributes applied to top-level parameters are ignored, and the ModelState is not updated. Only validation parameters on complex model types are considered.

In ASP.NET Core 2.1 validation attributes will now be respected on top-level parameters. What's more, you'll be able to apply the [BindReqired] attribute to parameters.

ASP.NET Core 2.1 looks to be shaping up to have a ton of new features. This is one of those nice little improvements that just makes things a bit easier, a little bit more consistent - just the sort of changes I like 🙂

ASP.NET Core in Action - Filters

$
0
0
ASP.NET Core in Action - Filters

In February 2017, the Manning Early Access Program (MEAP) started for the ASP.NET Core book I am currently writing - ASP.NET Core in Action. This post is a sample of what you can find in the book. If you like what you see, please take a look - for now you can even get a 37% discount with the code lockaspdotnet!

The Manning Early Access Program provides you full access to books as they are written, You get the chapters as they are produced, plus the finished eBook as soon as it’s ready, and the paper book long before it's in bookstores. You can also interact with the author (me!) on the forums to provide feedback as the book is being written.

The book is now finished and completely available in the MEAP, so now is the time to act if you're interested! Thanks 🙂

Understanding filters and when to use them

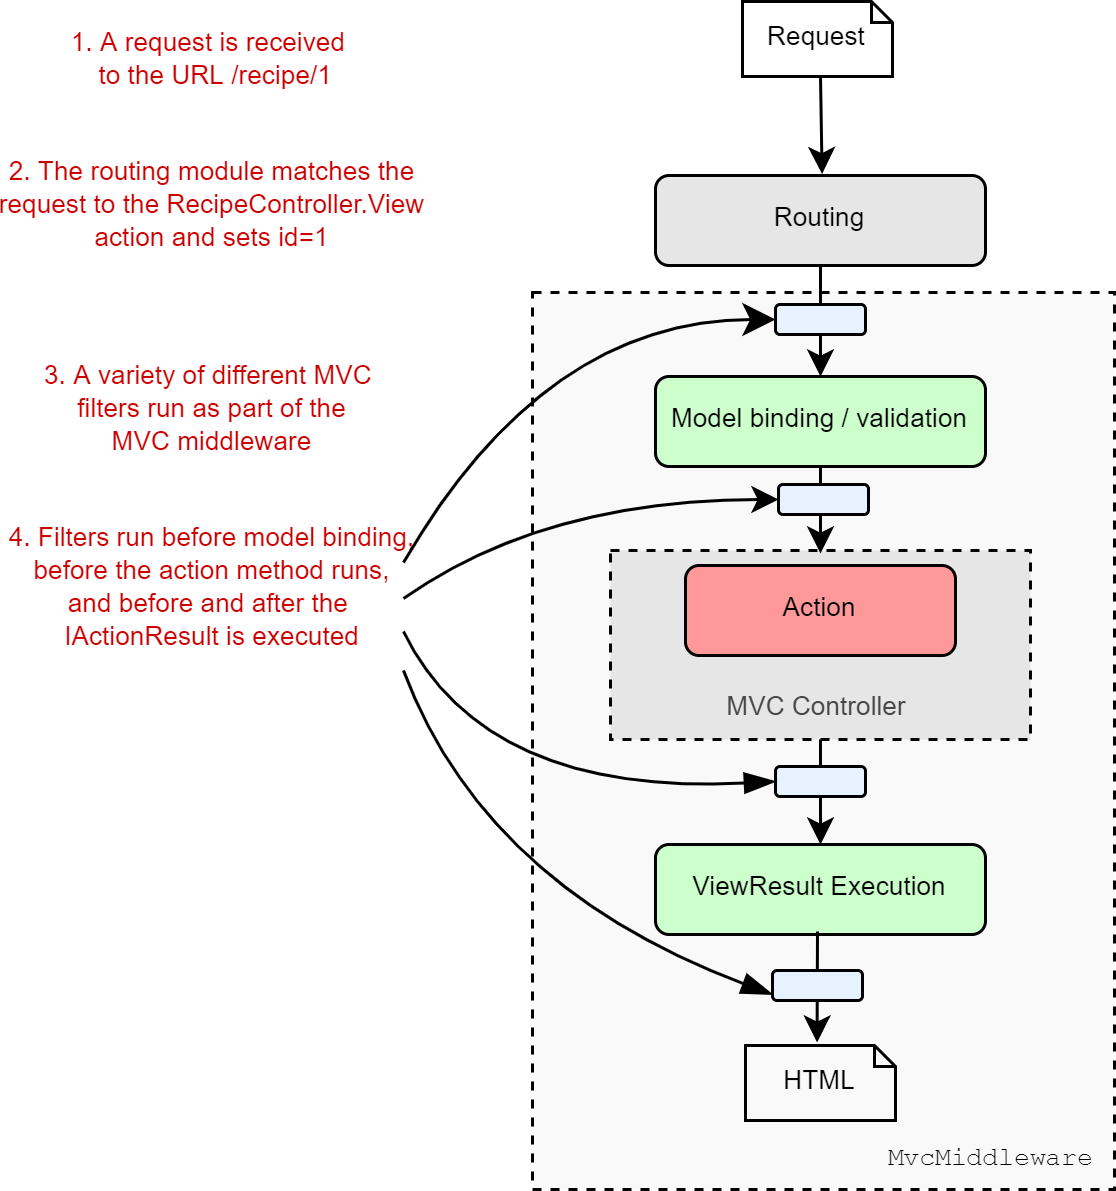
The MVC filter pipeline is a relatively simple concept, in that it provides “hooks” into the normal MVC request as shown in figure 1. For example, say you wanted to ensure that users can only create or edit products on an ecommerce app if they’re logged in. The app would redirect anonymous users to a login page instead of executing the action.

Without filters, you’d need to include the same code to check for a logged in user at the start of each specific action method. With this approach, the MvcMiddleware still executes the model binding and validation, even if the user wasn’t logged in.

With filters, you can use the “hooks” into the MVC request to run common code across all, or a sub-set of requests. This way you can do a wide range of things, such as:

  • Ensure a user is logged in before an action method, model binding or validation runs
  • Customize the output format of particular action methods
  • Handle model validation failures before an action method is invoked
  • Catch exceptions from an action method and handle them in a special way

ASP.NET Core in Action - Filters

Figure 1 Filters run at multiple points in the MvcMiddleware in the normal handling of a request.

In many ways, the MVC filter pipeline is like a middleware pipeline, but restricted to the MvcMiddleware only. Like middleware, filters are good for handling cross-cutting concerns for your application, and are a useful tool for reducing code duplication in many cases.

The MVC filter pipeline

As you saw in figure 1, MVC filters run at a number of different points in the MVC request. This “linear” view of an MVC request and the filter pipeline that we’ve used this far doesn’t quite match up with how these filters execute. Five different types of filter, each of which runs at a different “stage” in the MvcMiddleware, are shown in figure 2.

Each stage lends itself to a particular use case, thanks to its specific location in the MvcMiddleware, with respect to model binding, action execution, and result execution.

  • Authorization filters – These run first in the pipeline, and are useful for protecting your APIs and action methods. If an authorization filter deems the request unauthorized, it short-circuits the request, preventing the rest of the filter pipeline from running.
  • Resource filters – After authorization, resource filters are the next filters to run in the pipeline. They can also execute at the end of the pipeline, in much the same way middleware components can handle both the incoming request and the outgoing response. Alternatively, they can completely short-circuit the request pipeline, and return a response directly. Thanks to their early position in the pipeline, resource filters can have a variety of uses. You could add metrics to an action method, prevent an action method from executing if an unsupported content type is requested, or, as they run before model binding, control the way model binding works for that request.
  • Action filters – Action filters run before and after an action is executed. As model binding has already happened, action filters let you manipulate the arguments to the method, before it executes, or they can short-circuit the action completely and return a different IActionResult. As they also run after the action executes, they can optionally customize the IActionResult before it’s executed.
  • Exception filters – Exception filters can catch exceptions that occur in the filter pipeline, and handle them appropriately. They let you write custom MVC-specific error handling code, which can be useful in some situations. For example, you could catch exceptions in Web API actions and format them differently to exceptions in your MVC actions.
  • Result filters – Result filters run before and after an action method’s IActionResult is executed. This lets you control the execution of the result, or even short-circuit the execution of the result.

ASP.NET Core in Action - Filters

Figure 2 The MVC filter pipeline, including the five different filters stages. Some filter stages (Resource, Action, Result filters) run twice, before and after the remainder of the pipeline.

Exactly which filter you pick to implement depends on the functionality you’re trying to introduce. Want to short-circuit a request as early as possible? Resource filters are a good fit. Need access to the action method parameters? Use an action filter.

You can think of the filter pipeline as a small middleware pipeline that lives by itself in the MvcMiddleware. Alternatively, you could think of them as “hooks” into the MVC action invocation process, which let you run code at a particular point in a request’s “lifecycle.”

That’s all for this article. For more information, read the free first chapter of ASP.NET Core in Action and see this Slideshare presentation.

Fixing Nginx "upstream sent too big header" error when running an ingress controller in Kubernetes

$
0
0
Fixing Nginx

In this post I describe a problem I had running IdentityServer 4 behind an Nginx reverse proxy. In my case, I was running Nginx as an ingress controller for a Kubernetes cluster, but the issue is actually not specific to Kubernetes, or IdentityServer - it's an Nginx configuration issue.

The error: "upstream sent too big header while reading response header from upstream"

Initially, the Nginx ingress controller appeared to be configured correctly. I could view the IdentityServer home page, and could click login, but when I was redirected to the authorize endpoint (as part of the standard IdentityServer flow), I would get a 502 Bad Gateway error and a blank page.

Looking through the logs, IdentityServer showed no errors - as far as it was concerned there were no problems with the authorize request. However, looking through the Nginx logs revealed this gem (formatted slightly for legibility):

2018/02/05 04:55:21 [error] 193#193:  
    *25 upstream sent too big header while reading response header from upstream, 
client:  
    192.168.1.121, 
server:  
    example.com, 
request:  
  "GET /idsrv/connect/authorize/callback?state=14379610753351226&nonce=9227284121831921&client_id=test.client&redirect_uri=https%3A%2F%2Fexample.com%2Fclient%2F%23%2Fcallback%3F&response_type=id_token%20token&scope=profile%20openid%20email&acr_values=tenant%3Atenant1 HTTP/1.1",
upstream:  
  "http://10.32.0.9:80/idsrv/connect/authorize/callback?state=14379610753351226&nonce=9227284121831921&client_id=test.client&redirect_uri=https%3A%2F%2Fexample.com%2F.client%2F%23%

Apparently, this is a common problem with Nginx, and is essentially exactly what the error says. Nginx sometimes chokes on responses with large headers, because its buffer size is smaller than some other web servers. When it gets a response with large headers, as was the case for my IdentityServer OpenID Connect callback, it falls over and sends a 502 response.

The solution is to simply increase Nginx's buffer size. If you're running Nginx on bare metal you could do this by increasing the buffer size in the config file, something like:

proxy_buffers         8 16k;  # Buffer pool = 8 buffers of 16k  
proxy_buffer_size     16k;    # 16k of buffers from pool used for headers  

However, in this case, I was working with Nginx as an ingress controller to a Kubernetes cluster. The question was, how do you configure Nginx when it's running in a container?

How to configure the Nginx ingress controller

Luckily, the Nginx ingress controller is designed for exactly this situation. It uses a ConfigMap of values that are mapped to internal Nginx configuration values. By changing the ConfigMap, you can configure the underlying Nginx Pod.

The Nginx ingress controller only supports changing a subset of options via the ConfigMap approach, but luckily proxy‑buffer‑size is one such option! There's two things you need to do to customise the ingress:

  1. Deploy the ConfigMap containing your customisations
  2. Point the Nginx ingress controller Deployment to your ConfigMap

I'm just going to show the template changes in this post, assuming you have a cluster created using kubeadm and kubectl

Creating the ConfigMap

The ConfigMap is one of the simplest resources in kubernets; it's essentially just a collection of key-value pairs. The following manifest creates a ConfigMap called nginx-configuration and sets the proxy-buffer-size to "16k", to solve the 502 errors I was seeing previously.

kind: ConfigMap  
apiVersion: v1  
metadata:  
  name: nginx-configuration
  namespace: kube-system
  labels:
    k8s-app: nginx-ingress-controller
data:  
  proxy-buffer-size: "16k"

If you save this to a file nginx-configuration.yaml then you can apply it to your cluster using

kubectl apply -f nginx-configuration.yaml  

However, you can't just apply the ConfigMap and have the ingress controller pick it up automatically - you have to update your Nginx Deployment so it knows which ConfigMap to use.

Configuring the Nginx ingress controller to use your ConfigMap

In order for the ingress controller to use your ConfigMap, you must pass the ConfigMap name (nginx-configuration) as an argument in your deployment. For example:

args:  
  - /nginx-ingress-controller
  - --default-backend-service=$(POD_NAMESPACE)/default-http-backend
  - --configmap=$(POD_NAMESPACE)/nginx-configuration

Without this argument, the ingress controller will ignore your ConfigMap. The complete deployment manifest will look something like the following (adapted from the Nginx ingress controller repo)

apiVersion: extensions/v1beta1  
kind: Deployment  
metadata:  
  name: nginx-ingress-controller
  namespace: ingress-nginx 
spec:  
  replicas: 1
  template:
    metadata:
      labels:
        app: ingress-nginx
      annotations:
        prometheus.io/port: '10254'
        prometheus.io/scrape: 'true' 
    spec:
      initContainers:
      - command:
        - sh
        - -c
        - sysctl -w net.core.somaxconn=32768; sysctl -w net.ipv4.ip_local_port_range="1024 65535"
        image: alpine:3.6
        imagePullPolicy: IfNotPresent
        name: sysctl
        securityContext:
          privileged: true
      containers:
        - name: nginx-ingress-controller
          image: quay.io/kubernetes-ingress-controller/nginx-ingress-controller:0.10.2
          args:
            - /nginx-ingress-controller
            - --default-backend-service=$(POD_NAMESPACE)/default-http-backend
            - --configmap=$(POD_NAMESPACE)/nginx-configuration
          env:
            - name: POD_NAME
              valueFrom:
                fieldRef:
                  fieldPath: metadata.name
            - name: POD_NAMESPACE
              valueFrom:
                fieldRef:
                  fieldPath: metadata.namespace
          ports:
          - name: http
            containerPort: 80
          - name: https
            containerPort: 443
          livenessProbe:
            failureThreshold: 3
            httpGet:
              path: /healthz
              port: 10254
              scheme: HTTP
            initialDelaySeconds: 10
            periodSeconds: 10
            successThreshold: 1
            timeoutSeconds: 1
          readinessProbe:
            failureThreshold: 3
            httpGet:
              path: /healthz
              port: 10254
              scheme: HTTP
            periodSeconds: 10
            successThreshold: 1
            timeoutSeconds: 1

Summary

While deploying a local Kubernetes cluster locally, the Nginx ingess controller was returning 502 errors for some requests. This was due to the headers being too large for Nginx to handle. Increasing the proxy_buffer_size configuration parmeter solved the problem. To achieve this with the ingress controller, you must provide a ConfigMap and point your ingress controller to it by passing an additional arg in your Deployment.

Exploring the Microsoft.AspNetCore.App shared framework in ASP.NET Core 2.1 (preview 1)

$
0
0
Exploring the Microsoft.AspNetCore.App shared framework in ASP.NET Core 2.1 (preview 1)

In ASP.NET core 2.1 (currently in preview 1) Microsoft have changed the way the ASP.NET core framework is deployed for .NET Core apps, by moving to a system of shared frameworks instead of using the runtime store.

In this post, I look at some of the history and motivation for this change, the changes that you'll see when you install the ASP.NET Core 2.1 SDK or runtime on your machine, and what it all means for you as an ASP.NET Core developer.

If you're not interested in the history side, feel free to skip ahead to the impact on you as an ASP.NET Core developer:

The Microsoft.AspNetCore.All metapackage and the runtime store

In this section, I'll recap over some of the problems that the Microsoft.AspNetCore.All was introduced to solve, as well as some of the issues it introduces. This is entirely based on my own understanding of the situation (primarily gleaned from these GitHub issues), so do let me know in the comments if I've got anything wrong or misrepresented the situation!

In the beginning, there were packages. So many packages.

With ASP.NET Core 1.0, Microsoft set out to create a highly modular, layered, framework. Instead of the monolithic .NET framework that you had to install in it's entirety in a central location, you could reference individual packages that provide small, discrete piece of functionality. Want to configure your app using JSON files? Add the Microsoft.Extensions.Configuration.Json package. Need environment variables? That's a different package (Microsoft.Extensions.Configuration.EnvironmentVariables).

This approach has many benefits, for example:

  • You get a clear "layering" of dependencies
  • You can update packages independently of others
  • You only have to include the packages that you actually need, reducing the published size of your app.

Unfortunately, these benefits diminished as the framework evolved.

Initially, all the framework packages started at version 1.0.0, and it was simply a case of adding or removing packages as necessary for the required functionality. But bug fixes arrived shortly after release, and individual packages evolved at different rates. Suddenly .csproj files were awash with different version numbers, 1.0.1, 1.0.3, 1.0.2. It was no longer easy to tell at a glance whether you were on the latest version of a package, and version management became a significant chore. The same was true when ASP.NET Core 1.1 was released - a brief consolidation was followed by diverging package versions:

Exploring the Microsoft.AspNetCore.App shared framework in ASP.NET Core 2.1 (preview 1)

On top of that, the combinatorial problem of testing every version of a package with every other version, meant that there was only one "correct" combination of versions that Microsoft would support. For example, using the 1.1.0 version of the StaticFiles middleware with the 1.0.0 MVC middleware was easy to do, and would likely work without issue, but was not a configuration Microsoft could support.

It's worth noting that the Microsoft.AspNetCore metapackage partially solved this issue, but it only included a limited number of packages, so you would often still be left with a degree of external consolidation required.

Add to that the discoverability problem of finding the specific package that contains a given API, slow NuGet restore times due to the sheer number of packages, and a large published output size (as all packages are copied to the bin folder) and it was clear a different approach was required.

Unifying package versions with a metapackage

In ASP.NET Core 2.0, Microsoft introduced the Microsoft.AspNetCore.All metapackage and the .NET Core runtime store. These two pieces were designed to workaround many of the problems that we've touched on, without sacrificing the ability to have distinct package dependency layers and a well factored framework.

I discussed this metapackage and the runtime store in a previous post, but I'll recap here for convenience.

The Microsoft.AspNetCore.All metapackage solves the issue of discoverability and inconsistent version numbers by including a reference to every package that is part of ASP.NET Core 2.0, as well as third-party packages referenced by ASP.NET Core. This includes both integral packages like Newtonsoft.Json, but also packages like StackExchange.Redis that are used by somewhat-peripheral packages like Microsoft.Extensions.Caching.Redis.

On the face of it, you might expect shipping a larger metapackage to cause everything to get even slower - there would be more packages to restore, and a huge number of packages in your app's published output.

However, .NET Core 2.0 includes a new feature called the runtime store. This essentially lets you pre-install packages on a machine, in a central location, so you don't have to include them in the publish output of your individual apps. When you install the .NET Core 2.0 runtime, all the packages required by the Microsoft.AspNetCore.All metapackage are installed globally (at C:\Program Files\dotnet\store. on Windows):

Exploring the Microsoft.AspNetCore.App shared framework in ASP.NET Core 2.1 (preview 1)

When you publish your app, the Microsoft.AspNetCore.All metapackage trims out all the dependencies that it knows will be in the runtime store, significantly reducing the number of dlls in your published app's folder.

The runtime store has some additional benefits. It can use "ngen-ed" libraries that are already optimised for the the target machine, improving start up time. You can also use the store to "light-up" features at runtime such as Application insights, but you can create your own manifests too.

Unfortunately, there are a few downsides to the store...

The ever-growing runtime stores

By design, if your app is built using the Microsoft.AspNetCore.All metapacakge, and hence uses the runtime store output-trimming, you can only run your app on a machine that has the correct version of the runtime store installed (via the .NET Core runtime installer).

For example, if you use the Microsoft.AspNetCore.All metapackage for version 2.0.1, you must have the runtime store for 2.0.1 installed, version 2.0.0 and 2.0.2 are no good. That means if you need to fix a critical bug in production, you would need to install the next version of the runtime store, and you would need to update, recompile, and republish all of your apps to use it. This generally leads to runtime stores growing, as you can't easily delete old versions.

This problem is a particular issue if you're running a platform like Azure, so Microsoft are acutely aware of the issue. If you deploy your apps using Docker for example, this doesn't seem like as big of a problem.

The solution Microsoft have settled on is somewhat conceptually similar to the runtime store, but it actually goes deeper than that.

Introducing Shared Frameworks in ASP.NET Core 2.1

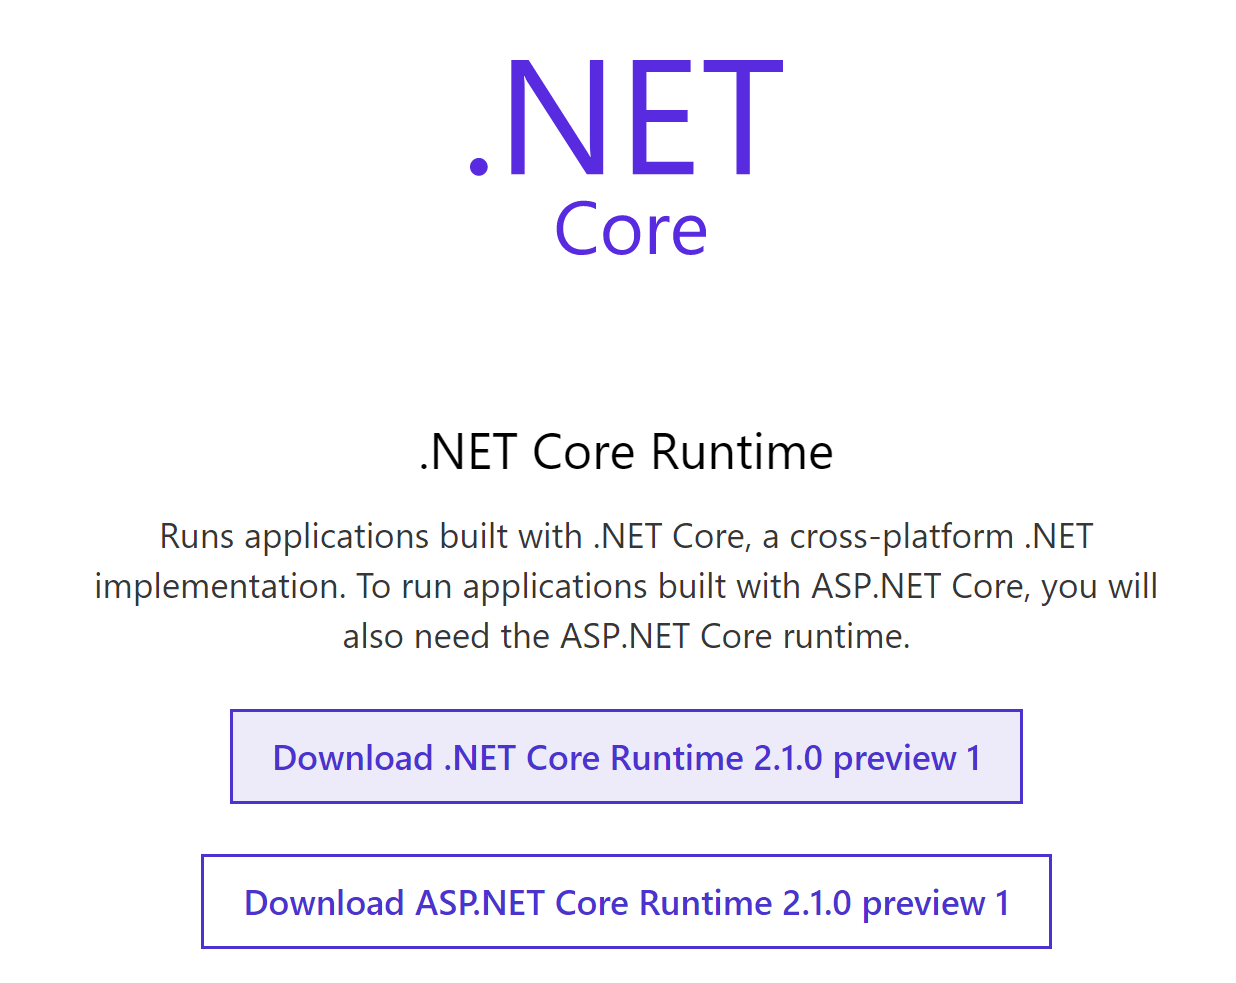
In ASP.NET Core 2.1 (currently at preview 1), ASP.NET Core is now a Shared Framework, very similar to the existing Microsoft.NETCore.App shared framework that effectively "is" .NET Core. When you install the .NET Core runtime you can also install the ASP.NET Core runtime:

Exploring the Microsoft.AspNetCore.App shared framework in ASP.NET Core 2.1 (preview 1)

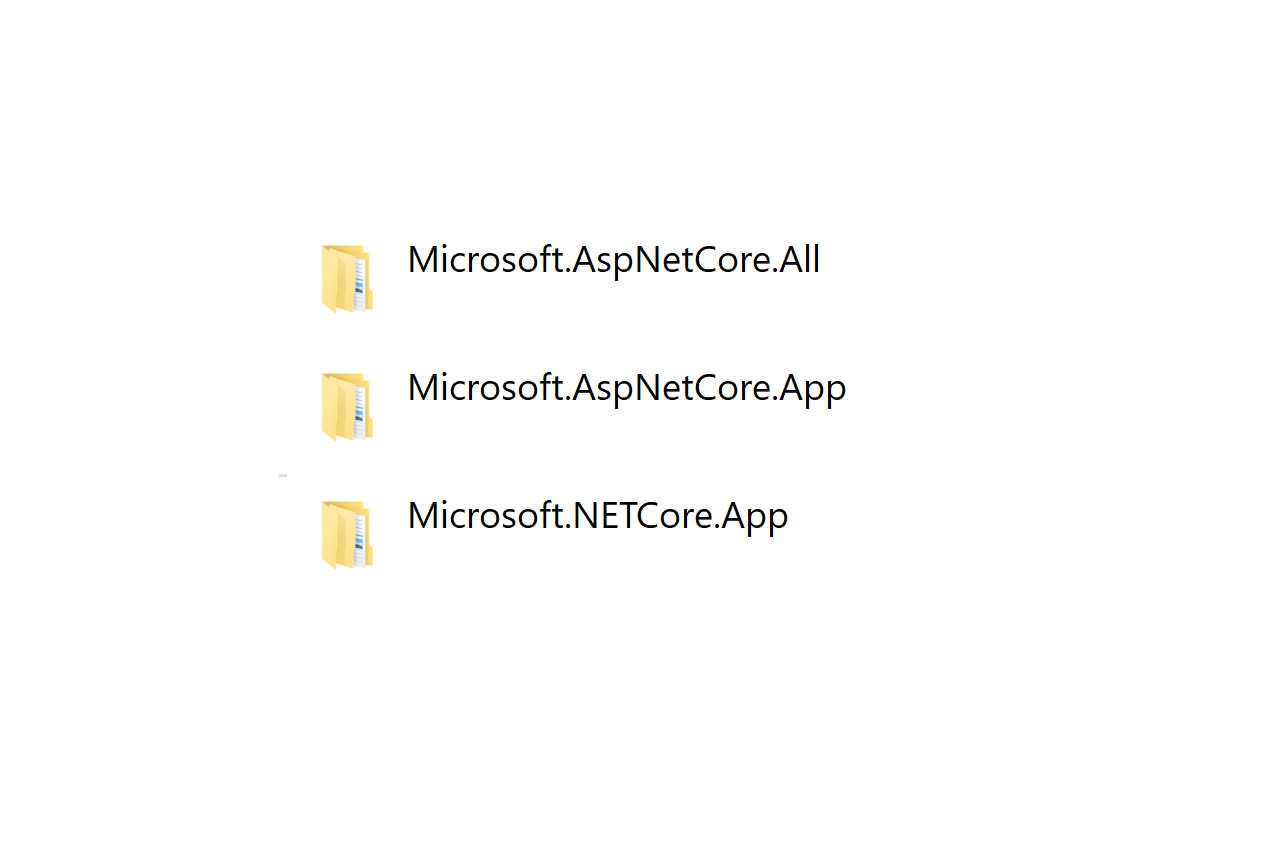
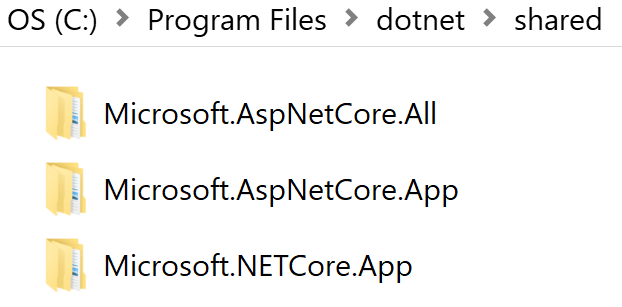
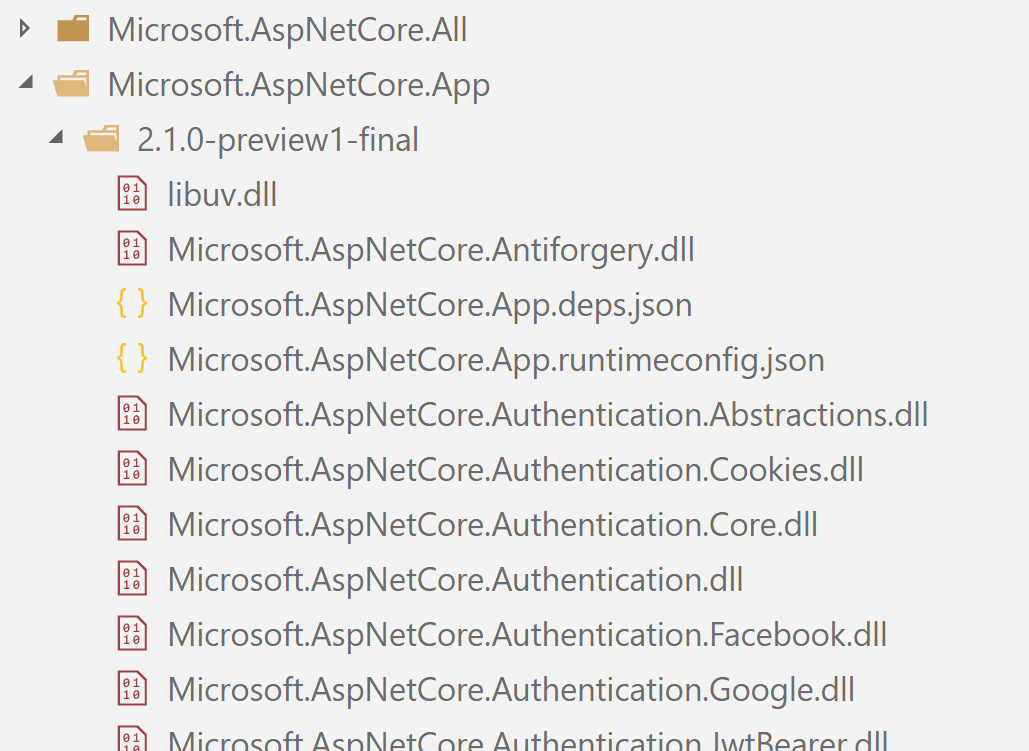
After you install the preview, you'll find you have three folders in C:\Program Files\dotnet\shared (on Windows):

Exploring the Microsoft.AspNetCore.App shared framework in ASP.NET Core 2.1 (preview 1)

These are the three Shared frameworks for ASP.NET Core 2.1:

  • Microsoft.NETCore.App - the .NET Core framework that previously was the only framework installed
  • Microsoft.AspNetCore.App - all the dlls from packages that make up the "core" of ASP.NET Core, with as many packages that have third-party dependencies removed
  • Microsoft.AspNetCore.All - all the packages that were previously referenced by the Microsoft.AspNetCore.All metapackage, including all their dependencies.

Each of these frameworks "inherits" from the last, so there's no duplication of libraries between them, but the folder layout is much simpler - just a flat list of libraries:

Exploring the Microsoft.AspNetCore.App shared framework in ASP.NET Core 2.1 (preview 1)

So why should I care?

That's all nice and interesting, but how does it affect how we develop ASP.NET Core applications? Well for the most part, things are much the same, but there's a few points to take note of.

Reference Microsoft.AspNetCore.App in your apps

As described in this issue, Microsoft have introduced another metapackage called Microsoft.AspNetCore.App with ASP.NET Core 2.1. This contains all of the libraries that make up the core of ASP.NET Core that are shipped by the .NET and ASP.NET team themselves. Microsoft recommend using this package instead of the All metapackage, as that way they can provide direct support, instead of potentially having to rely on third-party libraries (like StackExchange.Redis or SQLite).

In terms of behaviour, you'll still effectively get the same publish output dependency-trimming that you do currently (though the mechanism is slightly different), so there's no need to worry about that. If you need some of the extra packages that aren't part of the new Microsoft.AspNetCore.App metapackage, then you can just reference them individually.

Note that you are still free to reference the Microsoft.AspNetCore.All metapackage, it's just not recommended as it locks you into specific versions of third-party dependencies. As you saw previously, the All shared framework inherits from the App shared framework, so it should be easy enough to switch between them

Framework version mismatches

By moving away from the runtime store, and instead moving to a shared-framework approach, it's easier for the .NET Core runtime to handle mis-matches between the requested runtime and the installed runtimes.

With ASP.NET Core prior to 2.1, the runtime would automatically roll-forward patch versions if a newer version of the runtime was installed on the machine, but it would never roll forward minor versions. For example, if versions 2.0.2 and 2.0.3 were installed, then an app targeting 2.0.2 would use 2.0.3 automatically. However if only version 2.1.0 was installed and the app targeted version 2.0.0, the app would fail to start.

With ASP.NET Core 2.1, the runtime can roll-forward by using a newer minor version of the framework than requested. So in the previous example, an app targeting 2.0.0 would be able to run on a machine that only has 2.1.0 or 2.2.1 installed for example.

An exact minor match is always chosen preferentially; the minor version only rolls-forward when your app would otherwise be unable to run.

Exact dependency ranges

The final major change introduced in Microsoft.AspNetCore.App is the use of exact-version requirements for referenced NuGet packages. Typically, most NuGet packages specify their dependencies using "at least" ranges, where any dependent package will satisfy the requirement.

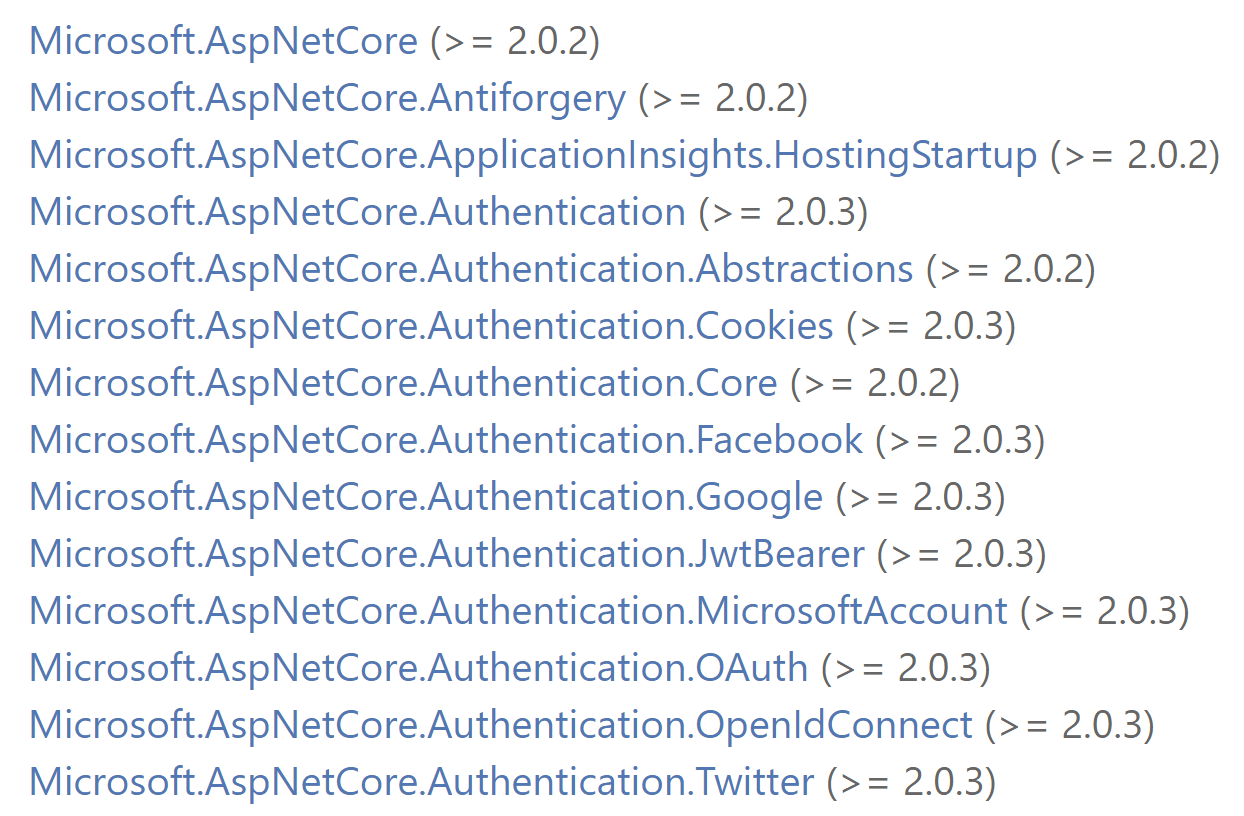
For example, the image below shows some of the dependencies of the Microsoft.AspNetCore.All (version 2.0.6) package.

Exploring the Microsoft.AspNetCore.App shared framework in ASP.NET Core 2.1 (preview 1)

Due to the way these dependencies are specified, it would be possible to silently "lift" a dependency to a higher version than that specified. For example, if you added a package which depended on a newer version, say 2.1.0 of Microsoft.AspNetCore.Authentication, to an app using version 2.0.0 of the All package then NuGet would select 2.1.0 as it satisfies all the requirements. That could result in you trying to use using untested combinations of the ASP.NET Core framework libraries.

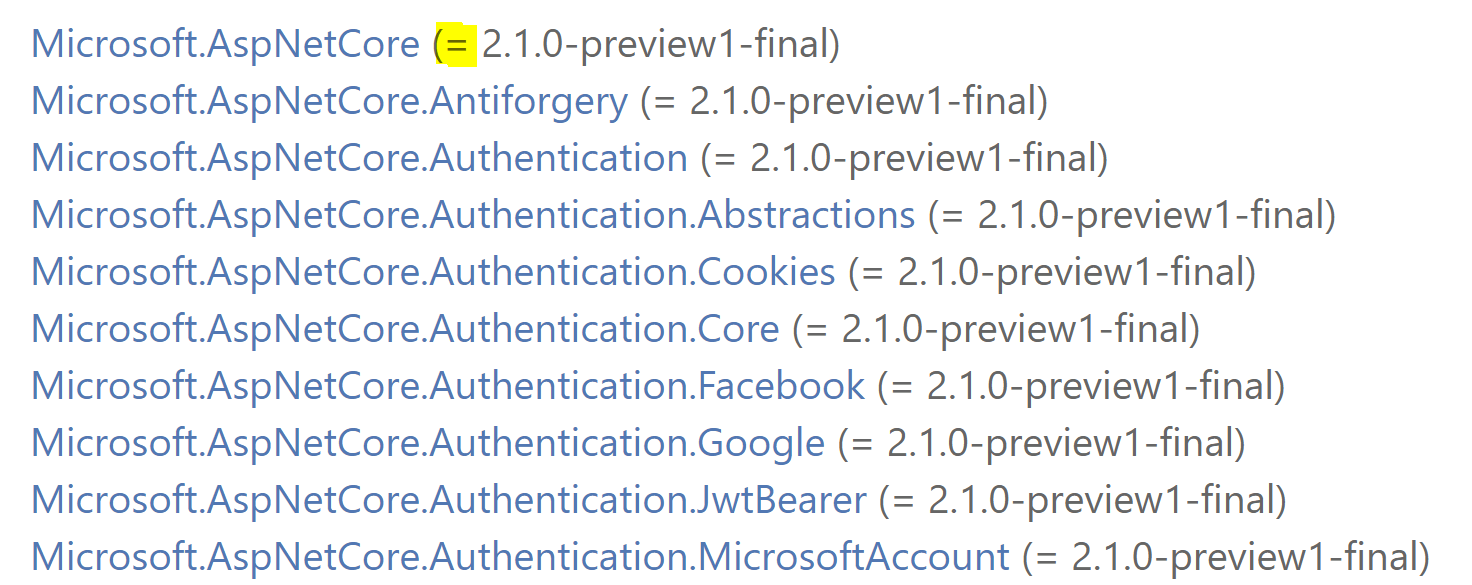
Consequently, the Microsoft.AspNetCore.App package specifies exact versions for it's dependencies (note the = instead of >=)

Exploring the Microsoft.AspNetCore.App shared framework in ASP.NET Core 2.1 (preview 1)

Now if you attempt to pull in a higher version of a framework library transitively, you'll get an error from NuGet when it tries to restore, warning you about the issue. So if you attempt to use version 2.2.0 of Microsoft.AspNetCore.Antiforgery with version 2.1.0 of the App metapackage for example, you'll get an error.

It's still possible to pull in a higher version of a framework package if you need to, by referencing it directly and overriding the error, but at that point you're making a conscious decision to head into uncharted waters!

Summary

ASP.NET Core 2.1 brings a surprising number of fundamental changes under the hood for a minor release, and fundamentally re-architects the way ASP.NET Core apps are delivered. However as a developer you don't have much to worry about. Other than switching to the Microsoft.AspNetCore.App metapackage and making some minor adjustments, the upgrade from 2.0 to 2.1 should be very smooth. If you're interested in digging further into the under-the-hood changes, I recommend checking out the links below:

How to create a Helm chart repository using Amazon S3

$
0
0
How to create a Helm chart repository using Amazon S3

Helm is a package manager for Kubernetes. You can bundle Kubernetes resources together as charts that define all the necessary resources and dependencies of an application. You can then use the Helm CLI to install all the pods, services, and ingresses for an application in one simple command.

Just like Docker or NuGet, there's a common public repository for Helm charts that the helm CLI uses by default. And just like Docker and NuGet, you can host your own Helm repository for your charts.

In this post, I'll show how you can use an AWS S3 bucket to host a Helm chart repository, how to push custom charts to it, and how to install charts from the chart repository. I won't be going into Helm or Kubernetes in depth, I suggest you check the Helm quick start guide if they're new to you.

If you're not using AWS, and you'd like to store your charts on Azure, Michal Cwienczek has a post on how to create a Helm chart repository using Blob Storage instead.

Installing the prerequisites

Before you start working with Helm properly, youu need to do some setup. The Helm S3 plugin you'll be using later requires that you have the AWS CLI installed and configured on your machine. You'll also need an S3 bucket to use as your repository.

Installing the AWS CLI

I'm using an Ubuntu 16.04 virtual machine for this post, so all the instructions assume you have the same setup.

The suggested approach to install the AWS CLI is to use pip, the Python package index. This obviously requires Python, which you can confirm is installed using:

$ python -V
Python 2.7.12  

According to the pip website:

pip is already installed if you are using Python 2 >=2.7.9 or Python 3 >=3.4

However, running which pip returned nothing for me, so I installed it anyway using

$ sudo apt-get install python-pip

Finally, we can install the AWS CLI using:

$ pip install awscli

The last thing to do is to configure your environment to access your AWS account. Add the ~./aws/config and ~./aws/credentials files to your home directory with the appropriate access keys, as described in the docs

Creating the repository S3 bucket

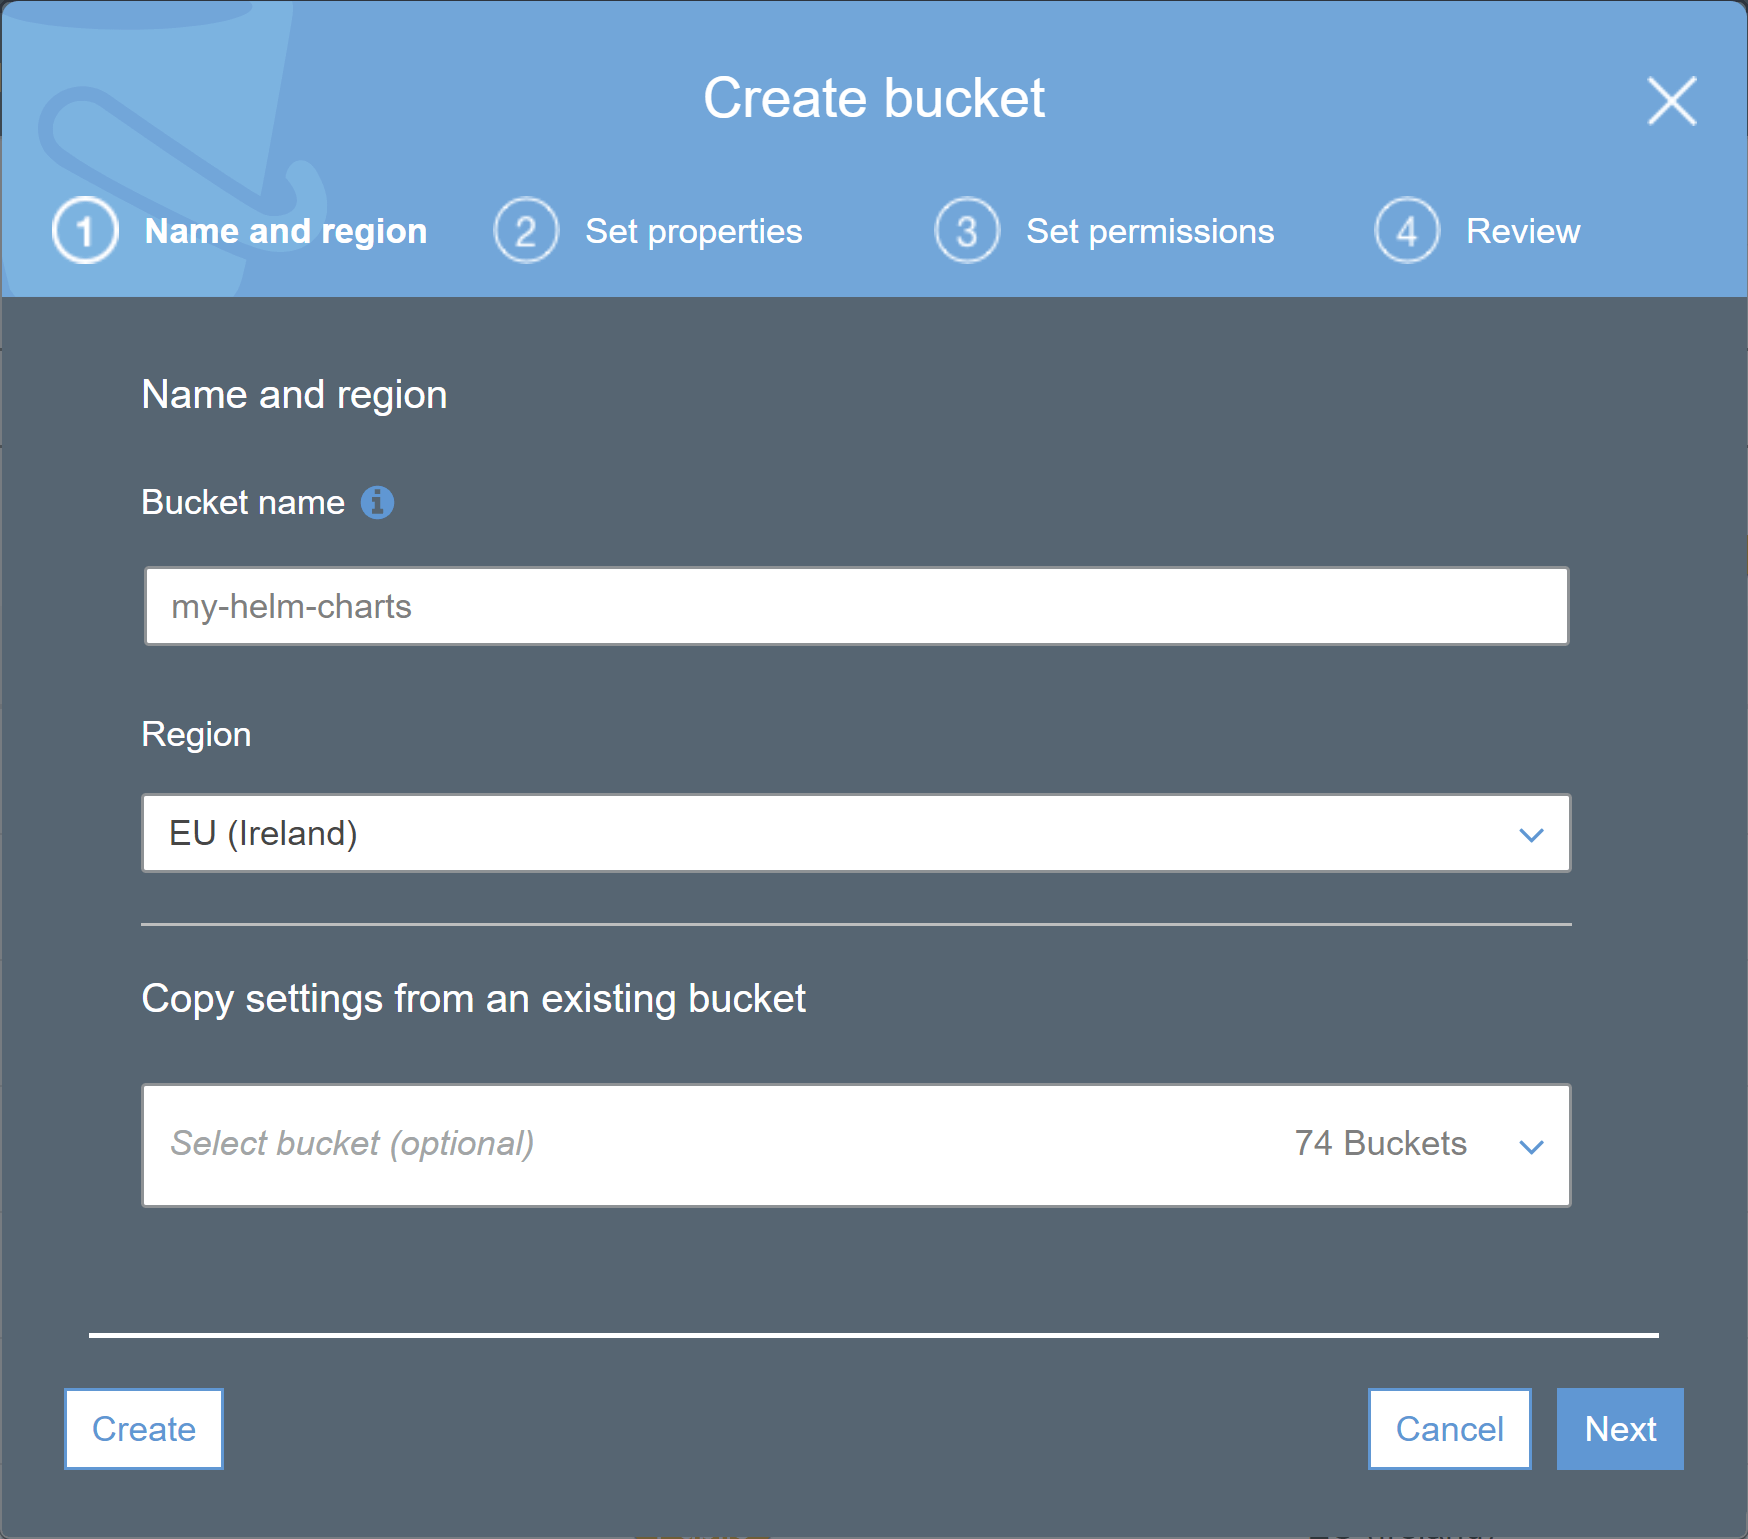
You're going to need an S3 bucket to store your charts. You can create the bucket anyway you like, either using the AWS CLI, or using the AWS Management Console. I used the Management Console to create a bucket called my-helm-charts:

How to create a Helm chart repository using Amazon S3

Whenever you create a new bucket, it's a good idea to think about who is able to access it, and what they're able to do. You can control this using IAM policies or S3 policies, whatever works for you. Just make sure you've looked into it!

The policy below, for example, grants read and write access to the IAM user andrew.

Once your repository is working correctly, you might want to update this so that only your CI/CD pipeline can push charts to your repository, but that any of your users can list and fetch charts. It may also be wise to remove the delete action completely.

{
  "Version": "2012-10-17",
  "Statement": [
    {
      "Sid": "AllowListObjects",
      "Effect": "Allow",
      "Principal": {
        "AWS": ["arn:aws:iam::111122223333:user/andrew"]
      },
      "Action": [
        "s3:ListBucket"
      ],
      "Resource": "arn:aws:s3:::my-helm-charts"
    },
    {
      "Sid": "AllowObjectsFetchAndCreate",
      "Effect": "Allow",
      "Principal": {
        "AWS": ["arn:aws:iam::111122223333:user/andrew"]
      },
      "Action": [
        "s3:DeleteObject",
        "s3:GetObject",
        "s3:PutObject"
      ],
      "Resource": "arn:aws:s3:::my-helm-charts/*"
    }
  ]
}

Installing the Helm S3 plugin

You're almost set now. If you've haven't already, install Helm using the instructions in the quick start guide.

The final prerequisite is the Helm S3 plugin. This acts as an intermediary between Helm and your S3 bucket. It's not the only way to create a custom repository, but it simplifies a lot of things.

You can install the plugin from the GitHub repo by running:

$ helm plugin install https://github.com/hypnoglow/helm-s3.git
Downloading and installing helm-s3 v0.5.2 ...  
Installed plugin: s3  

This downloads the latest version of the plugin from GitHub, and registers it with Helm.

Creating your Helm chart repository

You're finally ready to start playing with charts properly!

The first thing to do is to turn the my-helm-charts bucket into a valid chart repository. This requires adding an index.yaml to it. The Helm S3 plugin has a helper method to do that for you, which generates a valid index.yaml and uploads it to your S3 bucket:

$ helm S3 init s3://my-helm-charts/charts
Initialized empty repository at s3://my-helm-charts/charts  

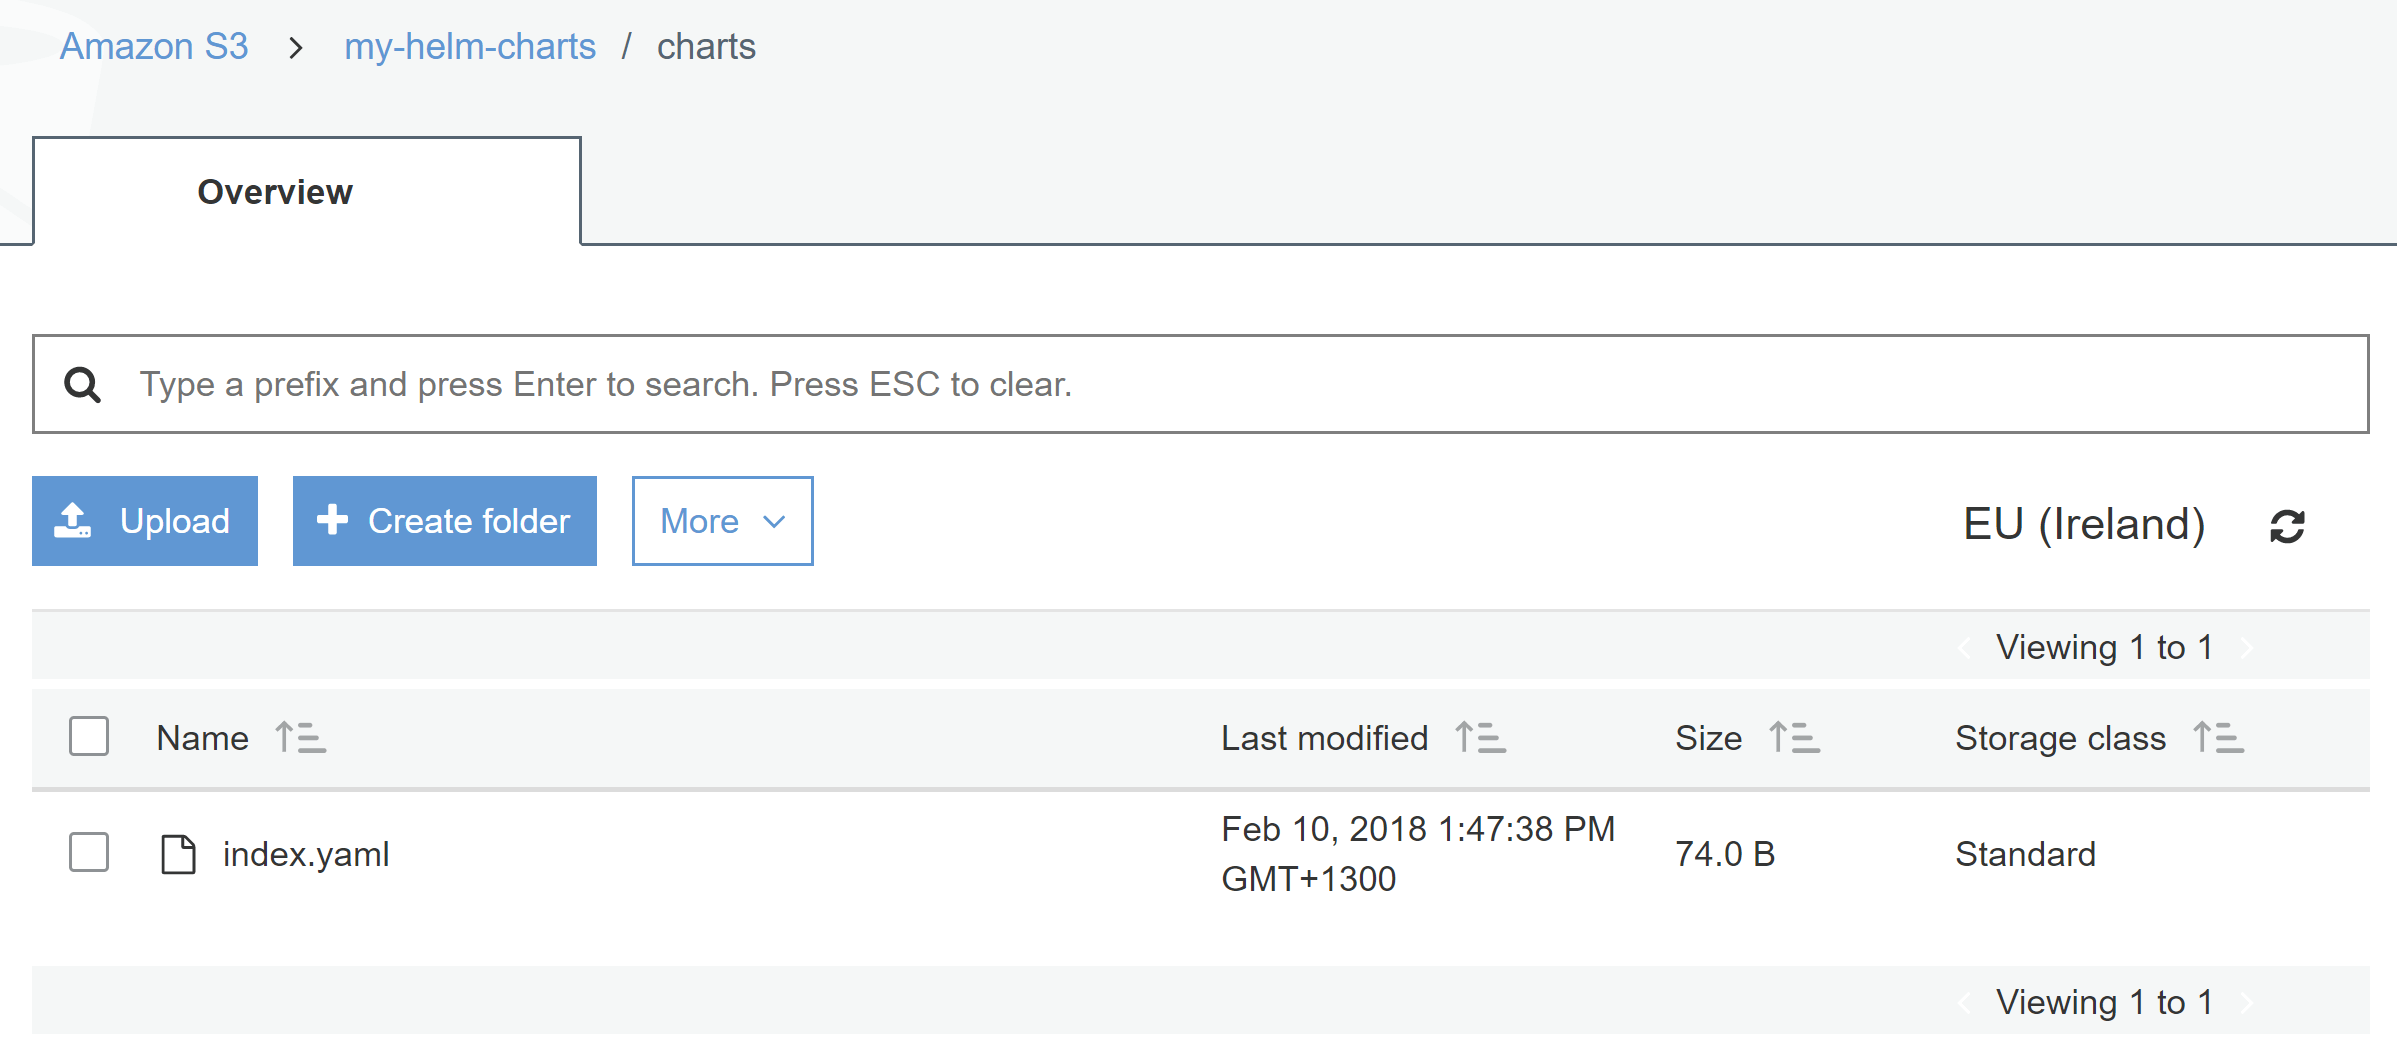
If you fetch the contents of the bucket now, you'll find an index.yamlfile under the /charts key

How to create a Helm chart repository using Amazon S3

Note, the /charts prefix is entirely optional. If you omit the prefix, the Helm chart repository will be in the root of the bucket. I just included it for demonstration purposes here.

The contents of the index.yaml file is very basic at the moment:

apiVersion: v1  
entries: {}  
generated: 2018-02-10T15:27:15.948188154-08:00  

To work with the chart repository by name instead of needing the whole URL, you can add an alias. For example, to create a my-charts alias:

$ helm repo add my-charts s3://my-helm-charts/charts
"my-charts" has been added to your repositories

If you run helm repo list now, you'll see your repo listed (along with the standard stable and local repos:

$ helm repo list
NAME            URL  
stable          https://kubernetes-charts.storage.googleapis.com  
local           http://127.0.0.1:8879/charts  
my-charts       s3://my-helm-charts/charts  

You now have a functioning chart repository, but it doesn't have any charts yet! In the next section I'll show how to push charts to, and install charts from, your S3 repository.

Uploading a chart to the repository

Before you can push a chart to the repository, you need to create one. If you already have one, you could use that, or you could copy one of the standard charts from the stable repository. For the sake of completion, I'll create a basic chart, and use that for the rest of the post.

Creating a simple test Helm chart

I used the example from the Helm docs for this test, which creates one of the simplest templates, a ConfigMap, and adds it at the path test-chart/templates/configmap.yaml:

$ helm create test-chart
Creating test-chart  
# Remove the initial cruft
$ rm -rf test-chart/templates/*.*
# Create a ConfigMap template at test-chart/templates/configmap.yaml
$ cat >test-chart/templates/configmap.yaml <<EOL
apiVersion: v1  
kind: ConfigMap  
metadata:  
  name: test-chart-configmap
data:  
  myvalue: "Hello World"
EOL  

You can install this chart into your kubernetes cluster using:

$ helm install ./test-chart
NAME:   zeroed-armadillo  
LAST DEPLOYED: Fri Feb  9 17:10:38 2018  
NAMESPACE: default  
STATUS: DEPLOYED

RESOURCES:  
==> v1/ConfigMap
NAME               DATA  AGE  
test-chart-configmap  1     0s  

and remove it again completely using the release name presented when you installed it (zeroed-armadillo) :

# --purge removes the release from the "store" completely
$ helm delete --purge zeroed-armadillo
release "zeroed-armadillo" deleted  

Now you have a chart to work with it's time to push it to your repository.

Uploading the test chart to the chart repository

To push the test chart to your repository you must first package it. This takes all the files in your ./test-chart repository and bundles them into a single .tgz file:

$ helm package ./test-chart
Successfully packaged chart and saved it to: ~/test-chart-0.1.0.tgz  

Once the file is packaged, you can push it to your repository using the S3 plugin, by specifying the packaged file name, and the my-charts alias you specified earlier.

$ helm s3 push ./test-chart-0.1.0.tgz my-charts

Note that without the plugin you would normally have to "manually" sync your local and remote repos, merging the remote repository with your locally added charts. The S3 plugin handles all that for you.

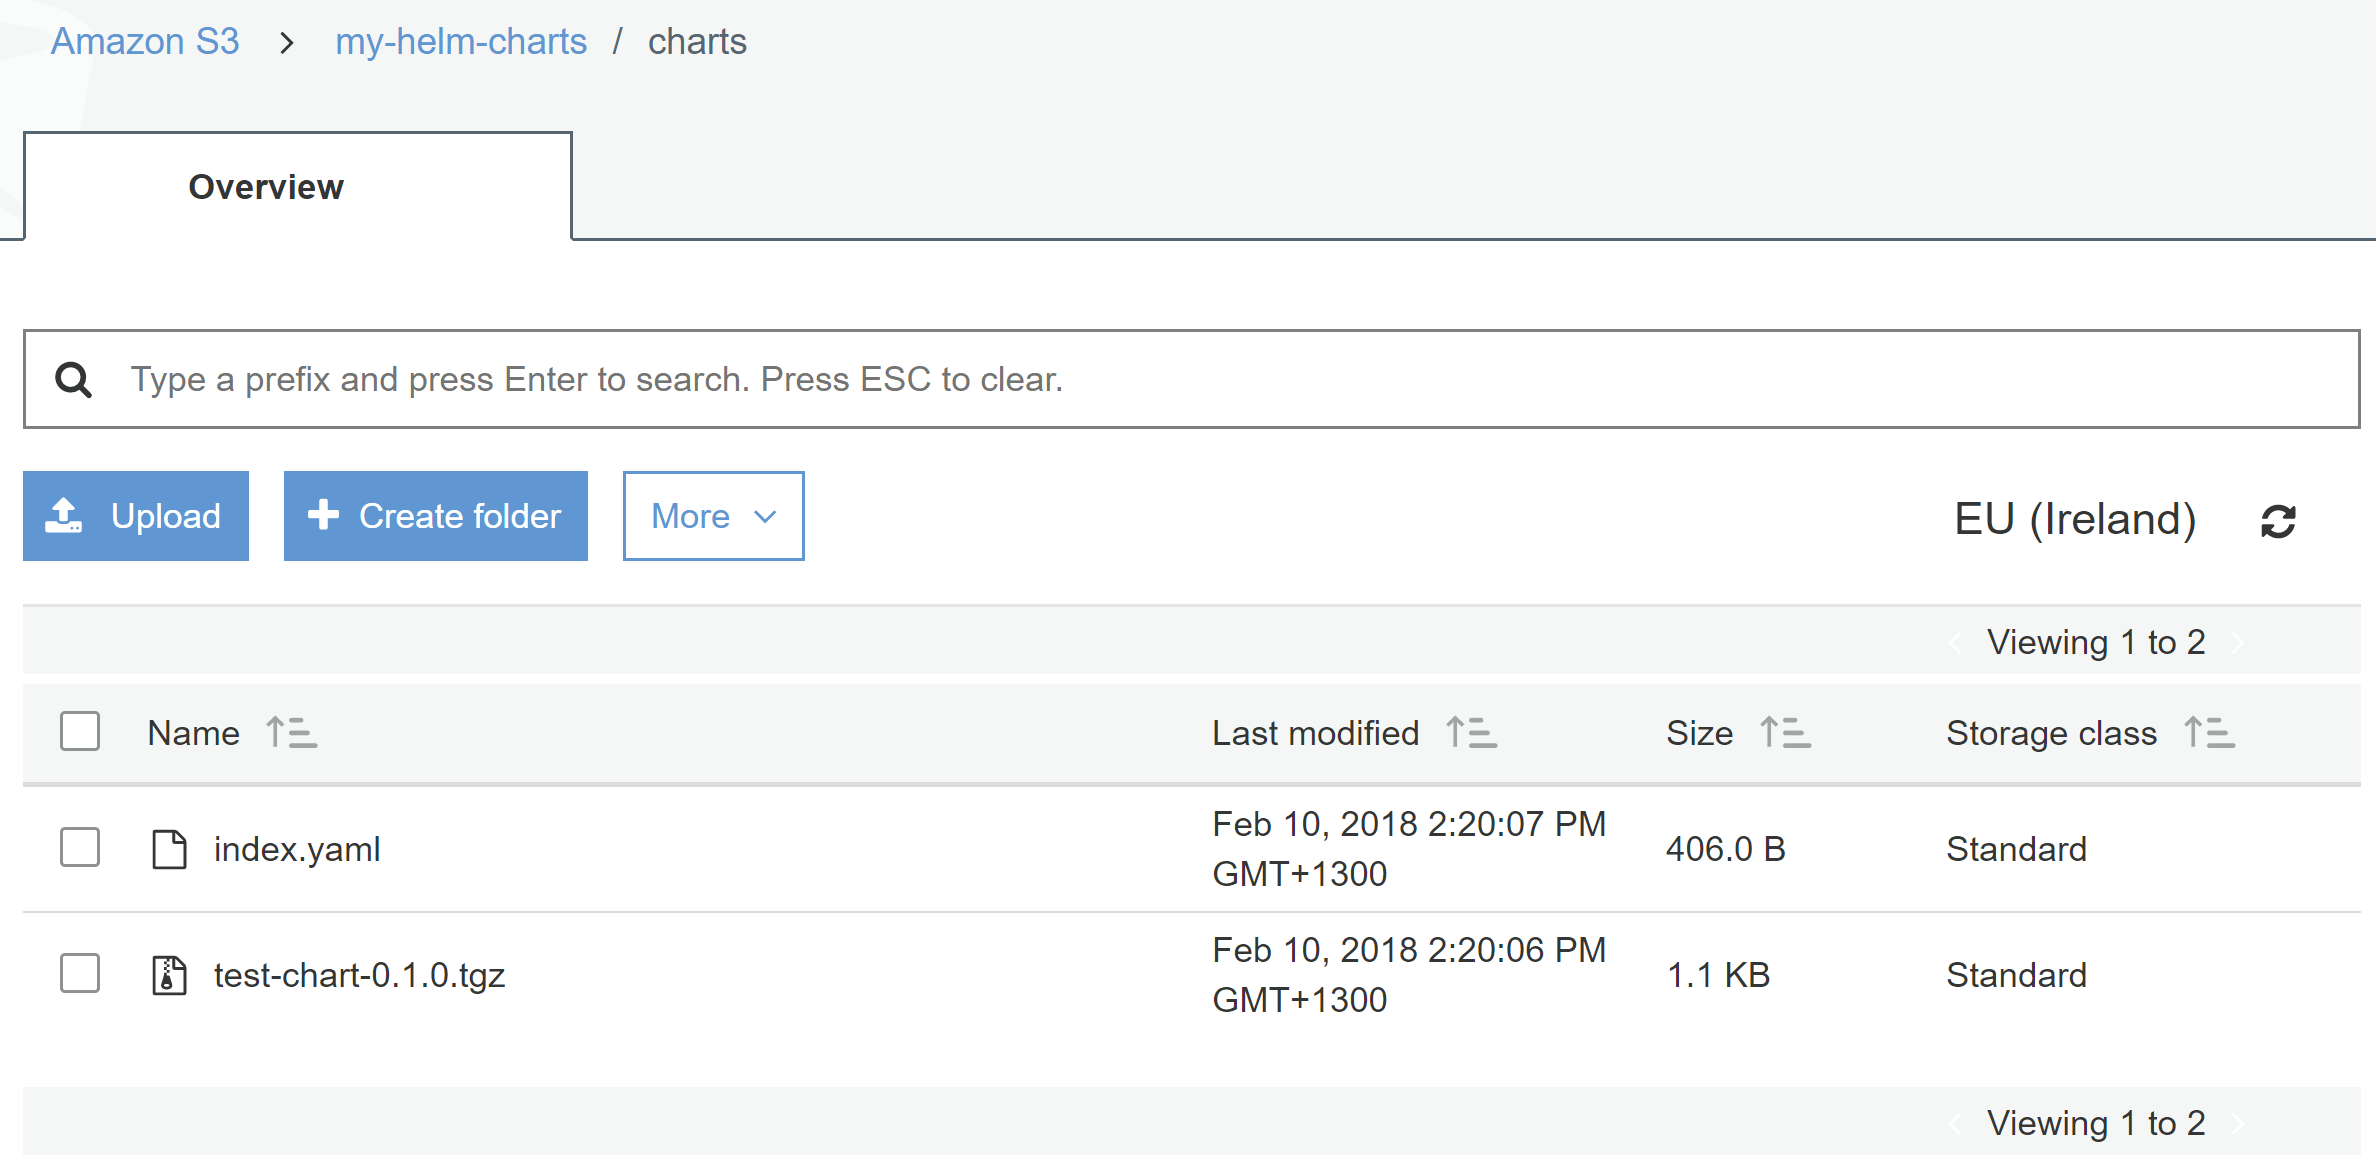
If you check your S3 bucket after pushing the chart, you'll see that the tgz file has been uploaded:

How to create a Helm chart repository using Amazon S3

That's it, you've pushed a chart to an S3 repository!

Searching and installing from the repository

If you do a search for a test chart using helm search you can see your chart listed:

$ helm search test-chart
NAME                    CHART VERSION   APP VERSION     DESCRIPTION  
my-charts/test-chart    0.1.0           1.0             A Helm chart for Kubernetes  

You can fetch and/or unpack the chart locally using helm fetch my-charts/test-chart or you can jump straight to installing it using:

$ helm install my-charts/test-chart
NAME:   rafting-crab  
LAST DEPLOYED: Sat Feb 10 15:53:34 2018  
NAMESPACE: default  
STATUS: DEPLOYED

RESOURCES:  
==> v1/ConfigMap
NAME               DATA  AGE  
mychart-configmap  1     0s  

To remove the test chart from the repository, you provide the chart name and version you wish to delete:

$ helm s3 delete test-chart --version 0.1.0 my-charts

That's basically all there is to it! You now have a central repository on S3 for storing your charts. You can fetch, search, and install charts from your repository, just as you would any other.

A warning - make sure you version your charts correctly

Helm charts should be versioned using Semantic versioning, so if you make a change to a chart, you should be sure to bump the version before pushing it to your repository. You should treat the chart name + version as immutable.

Unfortunately, there's currently nothing in the tooling to enforce this, and prevent you overwriting an existing chart with a chart with the same name and version number. There's an open issue to address this in the S3 plugin, but in the mean time, just be careful, and potentially enable versioning of files in S3 to catch any issues.
As of version 0.6.0, the plugin will block overwriting a chart if it already exists.

In a similar vein, you may want to disable the ability to delete charts from a repository. I feel like it falls under the same umbrella as immutability of charts in general - you don't want to break downstream charts that have taken a dependency on your chart.

Summary

In this post I showed how to create a Helm chart repository in S3 using the Helm S3 plugin. I showed how to prepare an S3 bucket as a Helm repository, and how to push a chart to it. Finally, I showed how to search and install charts from the S3 repository.
.

Creating a .NET Core global CLI tool for squashing images with the TinyPNG API

$
0
0
Creating a .NET Core global CLI tool for squashing images with the TinyPNG API

In this post I describe a .NET Core CLI global tool I created that can be used to compress images using the TinyPNG developer API. I'll give some background on .NET Core CLI tools, describe the changes to tooling in .NET Core 2.1, and show some of the code required to build your own global tools. You can find the code for the tool in this post at https://github.com/andrewlock/dotnet-tinify.

The code for my global tool was heavily based on the dotnet-serve tool by Nate McMaster. If you're interested in global tools, I strongly suggest reading his post on them, as it provides background, instructions, and an explanation of what's happening under the hood. He's also created a CLI template you can install to get started.

.NET CLI tools prior to .NET Core 2.1

The .NET CLI (which can be used for .NET Core and ASP.NET Core development) includes the concept of "tools" that you can install into your project. This includes things like the EF Core migration tool, the user-secrets tool, and the dotnet watch tool.

Prior to .NET Core 2.1, you need to specifically install these tools in every project where you want to use them. Unfortunately, there's no tooling for doing this either in the CLI or in Visual Studio. Instead, you have to manually edit your .csproj file and add a DotNetCliToolReference:

<ItemGroup>  
    <DotNetCliToolReference Include="Microsoft.DotNet.Watcher.Tools" Version="2.0.0" />
</ItemGroup>  

The tools themselves are distributed as NuGet packages, so when you run a dotnet restore on the project, it will restore the tool at the same time.

Adding tool references like this to every project has both upsides and downsides. On the one hand, adding them to the project file means that everyone who clones your repository from source control will automatically have the correct tools installed. Unfortunately, having to manually add this line to every project means that I rarely bother installing non-essential-but-useful tools like dotnet watch anymore.

.NET Core 2.1 global tools

In .NET Core 2.1, a feature was introduced that allows you to globally install a .NET Core CLI tool. Rather than having to install the tool manually in every project, you install it once globally on your machine, and then you can run the tool from any project.

You can think of this as synonymous with npm -g global packages

The intention is to expose all the first-party CLI tools (such as dotnet-user-secrets and dotnet-watch) as global tools, so you don't have to remember to explicitly install them into your projects. Obviously this has the downside that all your team have to have the same tools (and potentially the same version of the tools) installed already.

You can install a global tool using the .NET Core 2.1 SDK (preview 1). For example, to install Nate's dotnet serve tool, you just need to run:

dotnet install tool --global dotnet-serve  

You can then run dotnet serve from any folder.

In the next section I'll describe how I built my own global tool dotnet-tinify that uses the TinyPNG api to compress images in a folder.

Compressing images using the TinyPNG API

Images make up a huge proportion of the size of a website - a quick test on the Amazon home page shows that 94% of the page's size is due to images. That means it's important to make sure your images aren't using more data than they need too, as it will slow down your page load times.

Page load times are important when you're running an ecommerce site, but they're important everywhere else too. I'm much more likely to abandon a blog if it takes 10 seconds to load the page, than if it pops in instantly.

Before I publish images on my blog, I always wake sure they're as small as they can be. That means resizing them as necessary, using the correct format (.png for charts etc, .jpeg for photos), but also squashing them further.

Different programs will save images with different quality, different algorithms, and different metadata. You can often get smaller images without a loss in quality by just stripping the metadata and using a different compression algorithm. When I as using a Mac, I typically used ImageOptim; now I typically use the TinyPNG website.

Creating a .NET Core global CLI tool for squashing images with the TinyPNG API

To improve my workflow, rather than manually uploading and downloading images, I decided a global tool would be perfect. I could install it once, and run dotnet tinify . to squash all the images in the current folder.

Creating a .NET Core global tool

Creating a .NET CLI global tool is easy - it's essentially just a console app with a few additions to the .csproj file. Create a .NET Core Console app, for example using dotnet new console, and update your .csproj to add the IsPackable and PackAsTool elements:

<Project Sdk="Microsoft.NET.Sdk">

  <PropertyGroup>
    <OutputType>Exe</OutputType>
    <IsPackable>true</IsPackable>
    <PackAsTool>true</PackAsTool>
    <TargetFramework>netcoreapp2.1</TargetFramework>
  </PropertyGroup>

</Project>

It's as easy as that!

You can add NuGet packages to your project, reference other projects, anything you like; it's just a .NET Core console app! In the final section of this post I'll talk briefly about the dontet-tinify tool I created.

dotnet-tinify: a global tool for squashing images

To be honest, creating the tool for dotnet-tinify really didn't take long. Most of the hard work had already been done for me, I just plugged the bits together.

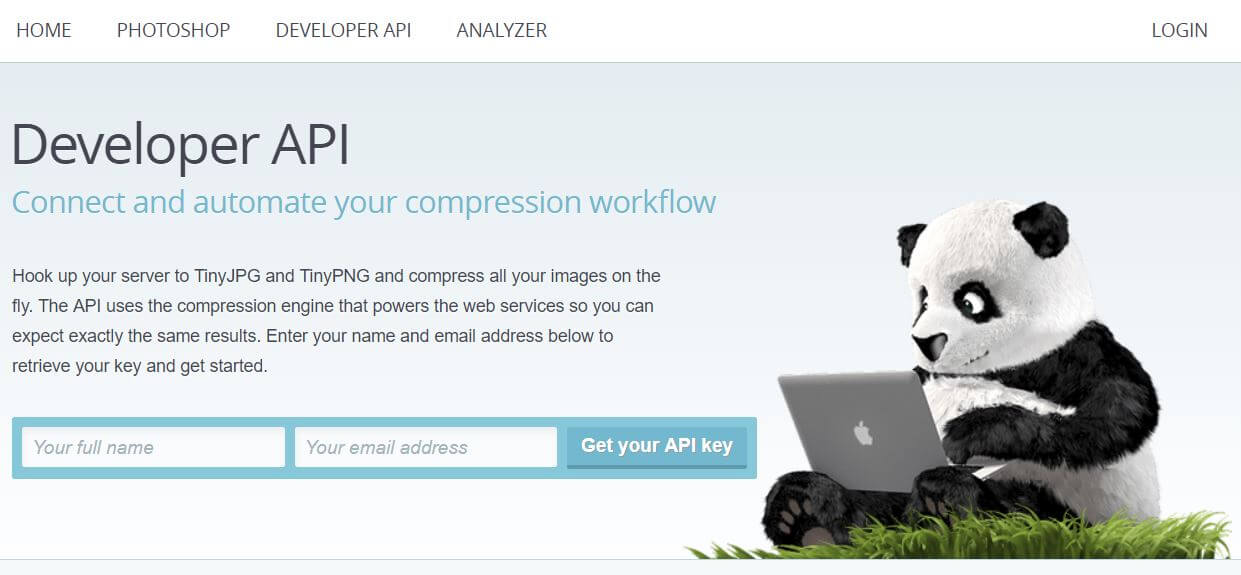
TinyPNG provides a developer API you can use to access their service. It has an impressive array of client libraries to choose from (e.g HTTP, Ruby, PHP, Node.js, Python, Java and .NET), and is even free to use for the first 500 compressions per month. To get started, head to https://tinypng.com/developers and signup (no credit card) to get an API key:

Creating a .NET Core global CLI tool for squashing images with the TinyPNG API

Given there's already an official client library (and it's .NET Standard 1.3 too!) I decided to just use that in dotnet-tinify. Compressing an image is essentially a 4 step process:

1. Set the API key on the static Tinify object:

Tinify.Key = apiKey;  

2. Validate the API key

await Tinify.Validate();  

3. Load a file

var source = Tinify.FromFile(file);  

4. Compress the file and save it to disk

await source.ToFile(file);  

There's loads more you can with the API: resizing images, loading and saving to buffers, saving directly to s3. For details, take a look at the documentation.

With the functionality aspect of the tool sorted, I needed a way to pass the API key and path to the files to compress to the tool. I chose to use Nate McMaster's CommandLineUtils fork, McMaster.Extensions.CommandLineUtils, which is one of many similar libraries you can use to handle command-line parsing and help message generation.

You can choose to use either the builder API or an attribute API with the CommandLineUtils package, so you can choose whichever makes you happy. With a small amount of setup I was able to get easy command line parsing into strongly typed objects, along with friendly help messages on how to use the tool with the --help argument:

> dotnet tinify --help
Usage: dotnet tinify [arguments] [options]

Arguments:  
  path  Path to the file or directory to squash

Options:  
  -?|-h|--help            Show help information
  -a|--api-key <API_KEY>  Your TinyPNG API key

You must provide your TinyPNG API key to use this tool  
(see https://tinypng.com/developers for details). This
can be provided either as an argument, or by setting the  
TINYPNG_APIKEY environment variable. Only png, jpeg, and  
jpg, extensions are supported  

And that's it, the tool is finished. It's very basic at the moment (no tests 😱!), but currently that's all I need. I've pushed an early package to NuGet and the code is on GitHub so feel free to comment / send issues / send PRs.

You can install the tool using

dotnet install tool --global dotnet-tinify  

You need to set your tiny API key in the TINYPNG_APIKEY environment for your machine (e.g. by executing setx TINYPNG_APIKEY abc123 in a command prompt), or you can pass the key as an argument to the dotnet tinify command (see below)

Typical usage might be

  • dotnet tinify image.png - compress image.png in the current directory
  • dotnet tinify . - compress all the png and jpeg images in the current directory
  • dotnet tinify "C:\content" - compress all the png and jpeg images in the "C:\content" path
  • dotnet tinify image.png -a abc123 - compress image.png , providing your API key as an argument

So give it a try, and have a go at writing your own global tool, it's probably easier than you think!

Summary

In this post I described the upcoming .NET Core global tools, and how they differ from the existing .NET Core CLI tools. I then described how I created a .NET Core global tool to compress my images using the TinyPNG developer API. Creating a global tool is as easy as setting a couple of properties in your .csproj file, so I strongly suggest you give it a try. You can find the dotnet-tinify tool I created on NuGet or on GitHub. Thanks to Nate McMaster for (heavily) inspiring this post!


Implementing custom token providers for passwordless authentication in ASP.NET Core Identity

$
0
0
Implementing custom token providers for passwordless authentication in ASP.NET Core Identity

This post was inspired by Scott Brady's recent post on implementing "passwordless authentication" using ASP.NET Core Identity.. In this post I show how to implement his "optimisation" suggestions to reduce the lifetime of "magic link" tokens.

I start by providing some some background on the use case, but I strongly suggest reading Scott's post first if you haven't already, as mine builds strongly on his. I'll show:

I'll start with the scenario: passwordless authentication.

Passwordless authentication using ASP.NET Core Identity

Scott's post describes how to recreate a login workflow similar to that of Slack's mobile app, or Medium:

Implementing custom token providers for passwordless authentication in ASP.NET Core Identity

Instead of providing a password, you enter your email and they send you a magic link:

Implementing custom token providers for passwordless authentication in ASP.NET Core Identity

Clicking the link automatically, logs you into the app. In nhis post, Scott shows how you can recreate the "magic link" login workflow using ASP.NET Core Identity. In this post, I want to address the very final section in his post, titled Optimisations:Existing Token Lifetime.

Scott points out that the implementation he provided uses the default token provider, the DataProtectorTokenProvider to generate tokens, which generates large, long-lived tokens, something like the following:

CfDJ8GbuL4IlniBKrsiKWFEX/Ne7v/fPz9VKnIryTPWIpNVsWE5hgu6NSnpKZiHTGZsScBYCBDKx/  
oswum28dUis3rVwQsuJd4qvQweyvg6vxTImtXSSBWC45sP1cQthzXodrIza8MVrgnJSVzFYOJvw/V  
ZBKQl80hsUpgZG0kqpfGeeYSoCQIVhm4LdDeVA7vJ+Fn7rci3hZsdfeZydUExnX88xIOJ0KYW6UW+  
mZiaAG+Vd4lR+Dwhfm/mv4cZZEJSoEw==  

By default, these tokens last for 24 hours. For a passwordless authentication workflow, that's quite a lot longer than we'd like. Medium uses a 15 minute expiry for example.

Scott describes several options you could use to solve this:

  • Change the default lifetime for all tokens that use the default token provider
  • Use a different token provider, for example one of the TOTP-based providers
  • Create a custom data-protection base token provider with a different token lifetime

All three of these approaches work, so I'll discuss each of them in turn.

Changing the default token lifetime

When you generate a token in ASP.NET Core Identity, by default you will use the DataProtectorTokenProvider. We'll take a closer look at this class shortly, but for now it's sufficient to know it's used by workflows such as password reset (when you click the "forgot your password?" link) and for email confirmation.

The DataProtectorTokenProvider depends on a DataProtectionTokenProviderOptions object which has a TokenLifespan property:

public class DataProtectionTokenProviderOptions  
{
    public string Name { get; set; } = "DataProtectorTokenProvider";
    public TimeSpan TokenLifespan { get; set; } = TimeSpan.FromDays(1);
}

This property defines how long tokens generated by the provider are valid for. You can change this value using the standard ASP.NET Core Options framework inside your Startup.ConfigureServices method:

public class Startup  
{
    public void ConfigureServices(IServiceCollection services)
    {
        services.Configure<DataProtectionTokenProviderOptions>(
            x => x.TokenLifespan = TimeSpan.FromMinutes(15));

        // other services configuration
    }
    public void Configure() { /* pipeline config */ }
}

In this example, I've configured the token lifespan to be 15 minutes using a lambda, but you could also configure it by binding to IConfiguration etc.

The downside to this approach, is that you've now reduced the token lifetime for all workflows. 15 minutes might be fine for password reset and passwordless login, but it's potentially too short for email confirmation, so you might run into issues with lots of rejected tokens if you choose to go this route.

Using a different provider

As well as the default DataProtectorTokenProvider, ASP.NET Core Identity uses a variety of TOTP-based providers for generating short multi-factor authentication codes. For example, it includes providers for sending codes via email or via SMS. These providers both use the base TotpSecurityStampBasedTokenProvider to generate their tokens. TOTP codes are typically very short-lived, so seem like they would be a good fit for the passwordless login scenario.

Given we're emailing the user a short-lived token for signing in, the EmailTokenProvider might seem like a good choice for our paswordless login. But the EmailTokenProvider is designed for providing 2FA tokens, and you probably shouldn't reuse providers for multiple purposes. Instead, you can create your own custom TOTP provider based on the built-in types, and use that to generate tokens.

Creating a custom TOTP token provider for passwordless login

Creating your own token provider sounds like a scary (and silly) thing to do, but thankfully all of the hard work is already available in the ASP.NET Core Identity libraries. All you need to do is derive from the abstract TotpSecurityStampBasedTokenProvider<> base class, and override a couple of simple methods:

public class PasswordlessLoginTotpTokenProvider<TUser> : TotpSecurityStampBasedTokenProvider<TUser>  
    where TUser : class
{
    public override Task<bool> CanGenerateTwoFactorTokenAsync(UserManager<TUser> manager, TUser user)
    {
        return Task.FromResult(false);
    }

    public override async Task<string> GetUserModifierAsync(string purpose, UserManager<TUser> manager, TUser user)
    {
        var email = await manager.GetEmailAsync(user);
        return "PasswordlessLogin:" + purpose + ":" + email;
    }
}

I've set CanGenerateTwoFactorTokenAsync() to always return false, so that the ASP.NET Core Identity system doesn't try to use the PasswordlessLoginTotpTokenProvider to generate 2FA codes. Unlike the SMS or Authenticator providers, we only want to use this provider for generating tokens as part of our passwordless login workflow.

The GetUserModifierAsync() method should return a string consisting of

... a constant, provider and user unique modifier used for entropy in generated tokens from user information.

I've used the user's email as the modifier in this case, but you could also use their ID for example.

You still need to register the provider with ASP.NET Core Identity. In traditional ASP.NET Core fashion, we can create an extension method to do this (mirroring the approach taken in the framework libraries):

public static class CustomIdentityBuilderExtensions  
{
    public static IdentityBuilder AddPasswordlessLoginTotpTokenProvider(this IdentityBuilder builder)
    {
        var userType = builder.UserType;
        var totpProvider = typeof(PasswordlessLoginTotpTokenProvider<>).MakeGenericType(userType);
        return builder.AddTokenProvider("PasswordlessLoginTotpProvider", totpProvider);
    }
}

and then we can add our provider as part of the Identity setup in Startup:

public class Startup  
{
    public void ConfigureServices(IServiceCollection services)
    {
        services.AddIdentity<IdentityUser, IdentityRole>()
            .AddEntityFrameworkStores<IdentityDbContext>() 
            .AddDefaultTokenProviders()
            .AddPasswordlessLoginTotpTokenProvider(); // Add the custom token provider
    }
}

To use the token provider in your workflow, you need to provide the key "PasswordlessLoginTotpProvider" (that we used when registering the provider) to the UserManager.GenerateUserTokenAsync() call.

var token = await userManager.GenerateUserTokenAsync(  
                user, "PasswordlessLoginTotpProvider", "passwordless-auth");

If you compare that line to Scott's post, you'll see that we're passing "PasswordlessLoginTotpProvider" as the provider name instead of "Default".

Similarly, you'll need to pass the new provider key in the call to VerifyUserTokenAsync:

var isValid = await userManager.VerifyUserTokenAsync(  
                  user, "PasswordlessLoginTotpProvider", "passwordless-auth", token);

If you're following along with Scott's post, you will now be using tokens witth a much shorter lifetime than the 1 day default!

Creating a data-protection based token provider with a different token lifetime

TOTP tokens are good for tokens with very short lifetimes (nominally 30 seconds), but if you want your link to be valid for 15 minutes, then you'll need to use a different provider. The default DataProtectorTokenProvider uses the ASP.NET Core Data Protection system to generate tokens, so they can be much more long lived.

If you want to use the DataProtectorTokenProvider for your own tokens, and you don't want to change the default token lifetime for all other uses (email confirmation etc), you'll need to create a custom token provider again, this time based on DataProtectorTokenProvider.

Given that all you're trying to do here is change the passwordless login token lifetime, your implementation can be very simple. First, create a custom Options object, that derives from DataProtectionTokenProviderOptions, and overrides the default values:

public class PasswordlessLoginTokenProviderOptions : DataProtectionTokenProviderOptions  
{
    public PasswordlessLoginTokenProviderOptions()
    {
        // update the defaults
        Name = "PasswordlessLoginTokenProvider";
        TokenLifespan = TimeSpan.FromMinutes(15);
    }
}

Next, create a custom token provider, that derives from DataProtectorTokenProvider, and takes your new Options object as a parameter:

public class PasswordlessLoginTokenProvider<TUser> : DataProtectorTokenProvider<TUser>  
where TUser: class  
{
    public PasswordlessLoginTokenProvider(
        IDataProtectionProvider dataProtectionProvider,
        IOptions<PasswordlessLoginTokenProviderOptions> options) 
        : base(dataProtectionProvider, options)
    {
    }
}

As you can see, this class is very simple! Its token generating code is completely encapsulated in the base DataProtectorTokenProvider<>; all you're doing is ensuring the PasswordlessLoginTokenProviderOptions token lifetime is used instead of the default.

You can again create an extension method to make it easier to register the provider with ASP.NET Core Identity:

public static class CustomIdentityBuilderExtensions  
{
    public static IdentityBuilder AddPasswordlessLoginTokenProvider(this IdentityBuilder builder)
    {
        var userType = builder.UserType;
        var provider= typeof(PasswordlessLoginTokenProvider<>).MakeGenericType(userType);
        return builder.AddTokenProvider("PasswordlessLoginProvider", provider);
    }
}

and add it to the IdentityBuilder instance:

public class Startup  
{
    public void ConfigureServices(IServiceCollection services)
    {
        services.AddIdentity<IdentityUser, IdentityRole>()
            .AddEntityFrameworkStores<IdentityDbContext>() 
            .AddDefaultTokenProviders()
            .AddPasswordlessLoginTokenProvider(); // Add the token provider
    }
}

Again, be sure you update the GenerateUserTokenAsync and VerifyUserTokenAsync calls in your authentication workflow to use the correct provider name ("PasswordlessLoginProvider" in this case). This will give you almost exactly the same tokens as in Scott's original example, but with the TokenLifespan reduced to 15 minutes.

Summary

You can implement passwordless authentication in ASP.NET Core Identity using the approach described in Scott Brady's post, but this will result in tokens and magic-links that are valid for a long time period: 1 day by default. In this post I showed three different ways you can reduce the token lifetime: you can change the default lifetime for all tokens; use very short-lived tokens by creating a TOTP provider; or use the ASP.NET Core Data Protection system to create medium-length lifetime tokens.

Using an IActionFilter to read action method parameter values in ASP.NET Core MVC

$
0
0
Using an IActionFilter to read action method parameter values in ASP.NET Core MVC

In this post I shown how you can use an IActionFilter in ASP.NET Core MVC to read the method parameters for an action method before it executes. I'll show two different approaches to solve the problem, depending on your requirements.

In the first approach, you know that the parameter you're interested in (a string parameter called returnUrl for this post) is always passed as a top level argument to the action, e.g.

public class AccountController  
{
    public IActionResult Login(string returnUrl)
    {
        return View();
    }
}

In the second approach, you know that the returnUrl parameter will be in the request, but you don't know that it will be passed as a top-level parameter to a method. For example:

public class AccountController  
{
    public IActionResult Login(string returnUrl)
    {
        return View();
    }

    public IActionResult Login(LoginInputModel model)
    {
        var returnUrl = model.returnUrl
        return View();
    }
}

The action filters I describe in this post can be used for lots of different scenarios. To give a concrete example, I'll describe the original use case that made me investigate the options. If you're just interested in the implementation, feel free to jump ahead.

Background: why would you want to do this?

I was recently working on an IdentityServer 4 application, in which we wanted to display a slightly different view depending on which tenant a user was logging in to. OpenID Connect allows you to pass additional information as part of an authentication request as acr_values in the querystring. One of the common acr_values is tenant - it's so common that IdentityServer provides specific methods for pulling the tenant from the request URL.

When an unauthenticated user attempts to use a client application that relies on IdentityServer for authentication, the client app calls the Authorize endpoint, which is part of the IdentityServer middleware. As the user is not yet authenticated, they are redirected to the login page for the application, with the returnUrl parameter pointing back to the middleware authorize endpoint:

Using an IActionFilter to read action method parameter values in ASP.NET Core MVC

After the user has logged in, they'll be redirected to the IdentityServer Authorize endpoint, which will return an access/id token back to the original client.

In my scenario, I needed to determine the tenant that the original client provided in the request to the Authorize endpoint. That information is available in the returnUrl parameter passed to the login page. You can use the IdentityServer Interaction Service (IIdentityServerInteractionService) to decode the returnUrl parameter and extract the tenant with code similar to the following:

public class AccountController  
{
    private readonly IIdentityServerInteractionService _service;
    public AccountController(IIdentityServerInteractionService  service)
    {
        _service = service;
    }

    public IActionResult Login(string returnUrl)
    {
        var context = await _service.GetAuthorizationContextAsync(returnUrl);
        ViewData["Tenant"] = context?.Tenant;
        return View();
    }
}

You could then use the ViewData in a Razor view to customise the display. For example, in the following _Layout.cshtml, the Tenant name is added to the page as a class on the <body> tag.

@{
    var tenant = ViewData["Tenant"] as string;
    var tenantClass = "tenant-" + (string.IsNullOrEmpty(tenant) ? "unknown" : tenant);
}
<!DOCTYPE html>  
<html>  
  <head></head>
  <body class="@tenantClass">
    @RenderBody
  </body>
</html>  

This works fine, but unfortunately it means you need to duplicate the code to extract the tenant in every action method that has a returnUrl - for example the GET and POST version of the login methods, all the 2FA action methods, the external login methods etc.

var context = await _service.GetAuthorizationContextAsync(returnUrl);  
ViewData["Tenant"] = context?.Tenant;  

Whenever you have a lot of duplication in your action methods, it's worth thinking whether you can extract that work into a filter (or alternatively, push it down into a command handler using a mediator).

Now we have the background, lets look at creating an IActionFilter to handle this for us.

Creating an IActionFilter that reads action method parameters

One of the good things about using an IActionFilter (as opposed to some other MVC Filter) is that it executes after model binding, but before the action method has been executed. That gives you a ton of context to work with.

The IActionFilter below reads an action method's parameters, looks for one called returnUrl and sets it as an item in ViewData. There's a bunch of assumptions in this code, so I'll walk through it below.

public class SetViewDataFilter : IActionFilter  
{
    public void OnActionExecuting(ActionExecutingContext context)
    {
        if (context.ActionArguments.TryGetValue("returnUrl", out object value))
        {
            // NOTE: this assumes all your controllers derive from Controller.
            // If they don't, you'll need to set the value in OnActionExecuted instead
            // or use an IAsyncActionFilter
            if (context.Controller is Controller controller)
            {
                controller.ViewData["ReturnUrl"] = value.ToString();
            }
        }
    }

    public void OnActionExecuted(ActionExecutedContext context) { }
}

The ActionExecutingContext object contains details about the action method that's about to be executed, model binding details, the ModelState - just about anything you could want! In this filter, I'm calling ActionArguments and looking for a parameter named returnUrl. This is a case-insensitive lookup, so any method parameters called returnUrl, returnURL, or RETURNURL would all be a match. If the action method has a match, we extract the value (as an object) into the value variable.

Note that we are getting the value after it's been model bound to the action method's parameter. We didn't need to inspect the querystring, form data, or route values; however the MVC middleware managed it, we get the value.

We've extracted the value of the returnUrl parameter, but now we need to store it somewhere. ASP.NET Core doesn't have any base-class requirements for your MVC controllers, so unfortunately you can't easily get a reference to the ViewData collection. Having said that, if all your controllers derive from the Controller base class, then you could cast to the type and access ViewData as I have in this simple example. This may work for you, it depends on the conventions you follow, but if not, I show an alternative later.

You can register your action filter as a global filter when you call AddMvc in Startup.ConfigureServices. Be sure to also register the filter as a service with the DI container

public void ConfigureServices(IServiceCollection services)  
{
    services.AddTransient<SetViewDataFilter>();
    services.AddMvc(options =>
    {
        options.Filters.AddService<SetViewDataFilter>();
    });
}

In this example, I chose to not make the filter an attribute. If you want to use SetViewDataFilter to decorate specific action methods, you should derive from ActionFilterAttribute instead.

In this example, SetViewDataFilter implements the synchronous version of IActionFilter, so unfortunately it's not possible to use IdentityServer's interaction service to obtain the Tenant from the returnUrl (as it requires an async call). We can get round that by implementing IAsyncActionFilter instead.

Converting to an asynchronous filter with IAsyncActionFilter

If you need to make async calls in your action filters, you'll need to implement the asynchronous interface, IAsyncActionFilter. Conceptually, this combines the two action filter methods (OnActionExecuting() and OnActionExecuted()) into a single OnActionExecutionAsync().

When your filter executes, you're provided the ActionExecutingContext as before, but also an ActionExecutionDelegate delegate, which represents the rest of the MVC filter pipeline. This lets you control exactly when the rest of the pipeline executes, as well as allowing you to make async calls.

Lets rewrite the action filter, and extend it to actually lookup the tenant with IdentityServer:

public class SetViewDataFilter : IAsyncActionFilter  
{
    readonly IIdentityServerInteractionService _service;
    public SetViewDataFilter(IIdentityServerInteractionService service)
    {
        _service = service;
    }

    public async Task OnActionExecutionAsync(ActionExecutingContext context, ActionExecutionDelegate next)
    {
        var tenant = await GetTenant(context);

        // Execute the rest of the MVC filter pipeline
        var resultContext = await next();

        if (resultContext.Result is ViewResult view)
        {
            view.ViewData["Tenant"] = tenant;
        }
    }

    async Task<string> GetTenant(ActionExecutingContext context)
    {
        if (context.ActionArguments.TryGetValue("returnURl", out object value)
            && value is string returnUrl)
        {
            var authContext = await _service.GetAuthorizationContextAsync(returnUrl);
            return authContext?.Tenant;
        }

        // no string parameter called returnUrl
        return null;
    }
}

I've moved the code to extract the returnUrl parameter from the action context into it's own method, in which we also use the IIdentityServerInteractionService to check the returnUrl is valid, and to fetch the provided tenant (if any).

I've also used a slightly different construct to pass the value in the ViewData. Instead of putting requirements on the base class of the controller, I'm checking that the result of the action method was a ViewResult, and setting the ViewData that way. This seems like a better option - if we're not returning a ViewResult then ViewData is a bit pointless anyway!

This action filter is very close to what I used to meet my requirements, but it makes one glaring assumption: that action methods always have a string parameter called returnUrl. Unfortunately, that may not be the case, for example:

public class AccountController  
{
    public IActionResult Login(LoginInputModel model)
    {
        var returnUrl = model.ReturnUrl
        return View();
    }
}

Even though the LoginInputModel has a ReturnUrl parameter that would happily bind to a returnUrl parameter in the querystring, our action filter will fail to retrieve it. That's because we're looking specifically at the action arguments for a parameter called returnUrl, but we only have model. We're going to need a different approach to satisfy both action methods.

Using the ModelState to build an action filter

It took me a little while to think of a solution to this issue. I toyed with the idea of introducing an interface IReturnUrl, and ensuring all the binding models implemented it, but that felt very messy to me, and didn't feel like it should be necessary. Alternatively, I could have looked for a parameter called model and used reflection to check for a ReturnUrl property. That didn't feel right either.

I knew the model binder would treat string returnUrl and LoginInputModel.ReturnUrl the same way: they would both be bound correctly if I passed a querystring parameter of ?returnUrl=/the/value. I just needed a way of hooking into the model binding directly, instead working with the final method parameters.

The answer was to use context.ModelState. ModelState contains a list of all the values that MVC attempted to bind to the request. You typically use it at the top of an MVC action to check that model binding and validation was successful using ModelState.IsValid, but it's also perfect for my use case.

Based on the async version of our attribute you saw previously, I can update the GetTenant method to retrieve values from the ModelState instead of the action arguments:

async Task<string> GetTenantFromAuthContext(ActionExecutingContext context)  
{
    if (context.ModelState.TryGetValue("returnUrl", out var modelState)
        && modelState.RawValue is string returnUrl
        && !string.IsNullOrEmpty(returnUrl))
    {
        var authContext = await _interaction.GetAuthorizationContextAsync(returnUrl);
        return authContext?.Tenant;
    }

    // reutrnUrl wasn't in the request
    return null;
}

And that's it! With this quick change, I can retrieve the tenant both for action methods that have a string returnUrl parameter, and those that have a model with a ReturnUrl property.

Summary

In this post I showed how you can create an action filter to read the values of an action method before it executes. I then showed how to create an asynchronous version of an action filter using IAsyncActionFilter, and how to access the ViewData after an action method has executed. Finally, I showed how you can use the ModelState collection to access all model-bound values, instead of only the top-level parameters passed to the action method.

Optimising ASP.NET Core apps in Docker - avoiding manually copying csproj files (Part 2)

$
0
0
Optimising ASP.NET Core apps in Docker - avoiding manually copying csproj files (Part 2)

This is a follow-up to my recent posts on building ASP.NET Core apps in Docker:

In this post I expand on a comment Aidan made on my last post:

Something that we do instead of the pre-build tarball step is the following, which relies on the pattern of naming the csproj the same as the directory it lives in. This appears to match the structure of your project, so it should work for you too.

I'll walk through the code he provides to show how it works, and how to use it to build a standard ASP.NET Core application with Docker. The technique in this post can be used instead of the tar-based approach from my previous post, as long as your solution conforms to some standard conventions.

I'll start by providing some background to why it's important to optimise the order of your Dockerfile, the options I've already covered, and the solution provided by Aidan in his comment.

Background - optimising your Dockerfile for dotnet restore

When building ASP.NET Core apps using Docker, it's important to consider the way Docker caches layers to build your app. I discussed this process in a previous post on building ASP.NET Core apps using Cake in Docker, so if that's new to you, i suggest checking it out.

A common way to take advantage of the build cache when building your ASP.NET Core app, is to copy across only the .csproj, .sln and nuget.config files for your app before doing dotnet restore, instead of copying the entire source code. The NuGet package restore can be one of the slowest parts of the build, and it only depends on these files. By copying them first, Docker can cache the result of the restore, so it doesn't need to run again if all you do is change a .cs file for example.

Due to the nature of Docker, there are many ways to achieve this, and I've discussed two of them previously, as summarised below.

Option 1 - Manually copying the files across

The easiest, and most obvious way to copy all the .csporj files from the Docker context into the image is to do it manually using the Docker COPY command. For example:

# Build image
FROM microsoft/aspnetcore-build:2.0.6-2.1.101 AS builder  
WORKDIR /sln

COPY ./aspnetcore-in-docker.sln ./NuGet.config  ./  
COPY ./src/AspNetCoreInDocker.Lib/AspNetCoreInDocker.Lib.csproj  ./src/AspNetCoreInDocker.Lib/AspNetCoreInDocker.Lib.csproj  
COPY ./src/AspNetCoreInDocker.Web/AspNetCoreInDocker.Web.csproj  ./src/AspNetCoreInDocker.Web/AspNetCoreInDocker.Web.csproj  
COPY ./test/AspNetCoreInDocker.Web.Tests/AspNetCoreInDocker.Web.Tests.csproj  ./test/AspNetCoreInDocker.Web.Tests/AspNetCoreInDocker.Web.Tests.csproj

RUN dotnet restore  

Unfortunately, this has one major downside: You have to manually reference every .csproj (and .sln) file in the Dockerfile.

Ideally, you'd be able to do something like the following, but the wildcard expansion doesn't work like you might expect:

# Copy all csproj files (WARNING, this doesn't work!)
COPY ./**/*.csproj ./  

That led to my alternative solution: creating a tar-ball of the .csproj files and expanding them inside the image.

Option 2 - Creating a tar-ball of the project files

In order to create a general solution, I settled on an approach that required scripting steps outside of the Dockerfile. For details, see my previous post, but in summary:

1. Create a tarball of the project files using

find . -name "*.csproj" -print0 \  
    | tar -cvf projectfiles.tar --null -T -`

2. Expand the tarball in the Dockerfile

FROM microsoft/aspnetcore-build:2.0.6-2.1.101 AS builder  
WORKDIR /sln

COPY ./aspnetcore-in-docker.sln ./NuGet.config  ./  
COPY projectfiles.tar .  
RUN tar -xvf projectfiles.tar

RUN dotnet restore  

3. Delete the tarball once build is complete

rm projectfiles.tar  

This process works, but it's messy. It involves running bash scripts both before and after docker build, which means you can't do things like build automatically using DockerHub. This brings us to the hybrid alternative, proposed by Aidan.

The new-improved solution

The alternative solution actually uses the wildcard technique I previously dismissed, but with some assumptions about your project structure, a two-stage approach, and a bit of clever bash-work to work around the wildcard limitations.

I'll start by presenting the complete solution, and I'll walk through and explain the steps later.

FROM microsoft/aspnetcore-build:2.0.6-2.1.101 AS builder  
WORKDIR /sln

COPY ./*.sln ./NuGet.config  ./

# Copy the main source project files
COPY src/*/*.csproj ./  
RUN for file in $(ls *.csproj); do mkdir -p src/${file%.*}/ && mv $file src/${file%.*}/; done

# Copy the test project files
COPY test/*/*.csproj ./  
RUN for file in $(ls *.csproj); do mkdir -p test/${file%.*}/ && mv $file test/${file%.*}/; done

RUN dotnet restore

# Remainder of build process

This solution is much cleaner than my previous tar-based effort, as it doesn't require any external scripting, just standard docker COPY and RUN commands. It gets around the wildcard issue by copying across csproj files in the src directory first, moving them to their correct location, and then copying across the test project files.

This requires a project layout similar to the following, where your project files have the same name as their folders. For the Dockerfile in this post, it also requires your projects to all be located in either the src or test sub-directory:

Optimising ASP.NET Core apps in Docker - avoiding manually copying csproj files (Part 2)

Step-by-step breakdown of the new solution

Just to be thorough, I'll walk through each stage of the Dockerfile below.

1. Set the base image

The first steps of the Dockerfile are the same for all solutions: it sets the base image, and copies across the .sln and NuGet.config file.

FROM microsoft/aspnetcore-build:2.0.6-2.1.101 AS builder  
WORKDIR /sln

COPY ./*.sln ./NuGet.config  ./  

After this stage, your image will contain 2 files:

Optimising ASP.NET Core apps in Docker - avoiding manually copying csproj files (Part 2)

2. Copy src .csproj files to root

In the next step, we copy all the .csproj files from the src folder, and dump them in the root directory.

COPY src/*/*.csproj ./  

The wildcard expands to match any .csproj files that are one directory down, in the src folder. After it runs, your image contains the following file structure:

Optimising ASP.NET Core apps in Docker - avoiding manually copying csproj files (Part 2)

3. Restore src folder hierarchy

The next stage is where the magic happens. We take the flat list of csproj files, and move them back to their correct location, nested inside sub-folders of src.

RUN for file in $(ls *.csproj); do mkdir -p src/${file%.*}/ && mv $file src/${file%.*}/; done  

I'll break this command down, so we can see what it's doing

  1. for file in $(ls *.csproj); do ...; done - List all the .csproj files in the root directory. Loop over them, and assign the file variable to the filename. In our case, the loop will run twice, once with AspNetCoreInDocker.Lib.csproj and once with AspNetCoreInDocker.Web.csproj.

  2. ${file%.*} - use bash's string manipulation library to remove the extension from the filename, giving AspNetCoreInDocker.Lib and AspNetCoreInDocker.Web.

  3. mkdir -p src/${file%.*}/ - Create the sub-folders based on the file names. the -p parameter ensures the src parent folder is created if it doesn't already exist.

  4. mv $file src/${file%.*} - Move the csproj file into the newly created sub-folder.

After this stage executes, your image will contain a file system like the following:

Optimising ASP.NET Core apps in Docker - avoiding manually copying csproj files (Part 2)

4. Copy test .csproj files to root

Now the src folder is successfully copied, we can work on the test folder. The first step is to copy them all into the root directory again:

COPY test/*/*.csproj ./  

Which gives a hierarchy like the following:

Optimising ASP.NET Core apps in Docker - avoiding manually copying csproj files (Part 2)

5. Restore test folder hierarchy

The final step is to restore the test folder as we did in step 3. We can use pretty much the same code as in step 3, but with src replaced by test:

RUN for file in $(ls *.csproj); do mkdir -p test/${file%.*}/ && mv $file test/${file%.*}/; done  

After this stage we have our complete skeleton project, consisting of just our sln, NuGet.config, and .csproj files, all in their correct place.

Optimising ASP.NET Core apps in Docker - avoiding manually copying csproj files (Part 2)

That leaves us free to build and restore the project while taking advantage of Docker's layer-caching optimisations, without having to litter our Dockerfile with specific project names, or use outside scripting to create a tar-ball.

Summary

For performance purposes, it's important to take advantage of Docker's caching mechanisms when building your ASP.NET Core applications. Some of the biggest gains can be had by caching the restore phase of the build process.

In this post I showed an improved way to achieve this without having to resort to external scripting using tar, or having to list every .csproj file in your Dockerfile. This solution was based on a comment by Aidan on my previous post, so a big thanks to him!

Creating a generalised Docker image for building ASP.NET Core apps using ONBUILD

$
0
0
Creating a generalised Docker image for building ASP.NET Core apps using ONBUILD

This is a follow-up to my recent posts on building ASP.NET Core apps in Docker:

In this post I'll show how to create a generalised Docker image that can be used to build multiple ASP.NET Core apps. If your app conforms to a standard format (e.g. projects in the src directory, test projects in a test directory) then you can use it as the base image of a Dockerfile to create very simple Docker images for building your own apps.

As an example, if you use the Docker image described in this post (andrewlock/aspnetcore-build:2.0.7-2.1.105), you can build your ASP.NET Core application using the following Docker image:

# Build image
FROM andrewlock/aspnetcore-build:2.0.7-2.1.105 as builder

# Publish
RUN dotnet publish "./src/AspNetCoreInDocker.Web/AspNetCoreInDocker.Web.csproj" -c Release -o "../../dist" --no-restore

#App image
FROM microsoft/aspnetcore:2.0.7  
WORKDIR /app  
ENV ASPNETCORE_ENVIRONMENT Local  
ENTRYPOINT ["dotnet", "AspNetCoreInDocker.Web.dll"]  
COPY --from=builder /sln/dist .  

This multi-stage build image can build a complete app - the builder only has two commands, a FROM statement, and a single RUN statement to publish the app. The runtime image build itself is the same as it would be without the generalised build image. If you wish to use the builder image yourself, you can use the andrewlock/aspnetcore-build repository, available on Docker Hub.

In this post I'll describe the motivation for creating the generalised image, how to use Docker's ONBUILD command, and how the generalised image itself works.

The Docker build image to generalise

When you build an ASP.NET Core application (whether "natively" or in Docker), you typically move through the following steps:

  • Restore the NuGet packages
  • Build the libraries, test projects, and app
  • Test the test projects
  • Publish the app

In Docker, these steps are codified in a Dockerfile by the layers you add to your image. A basic, non-general, Dockerfile to build your app could look something like the following:

Note, this doesn't include the optimisation described in my earlier post or the follow up:

FROM microsoft/aspnetcore-build:2.0.7-2.1.105 AS builder  
WORKDIR /sln  

# Copy solution folders and NuGet config
COPY ./*.sln ./NuGet.config  ./

# Copy the main source project files
COPY ./src/AspNetCoreInDocker.Lib/AspNetCoreInDocker.Lib.csproj ./src/AspNetCoreInDocker.Lib/AspNetCoreInDocker.Lib.csproj  
COPY ./src/AspNetCoreInDocker.Web/AspNetCoreInDocker.Web.csproj ./src/AspNetCoreInDocker.Web/AspNetCoreInDocker.Web.csproj

# Copy the test project files
COPY test/AspNetCoreInDocker.Web.Tests/AspNetCoreInDocker.Web.Tests.csproj test/AspNetCoreInDocker.Web.Tests/AspNetCoreInDocker.Web.Tests.csproj

# Restore to cache the layers
RUN dotnet restore

# Copy all the source code and build
COPY ./test ./test  
COPY ./src ./src  
RUN dotnet build -c Release --no-restore

# Run dotnet test on the solution
RUN dotnet test "./test/AspNetCoreInDocker.Web.Tests/AspNetCoreInDocker.Web.Tests.csproj" -c Release --no-build --no-restore

RUN dotnet publish "./src/AspNetCoreInDocker.Web/AspNetCoreInDocker.Web.csproj" -c Release -o "../../dist" --no-restore

#App image
FROM microsoft/aspnetcore:2.0.7  
WORKDIR /app  
ENV ASPNETCORE_ENVIRONMENT Local  
ENTRYPOINT ["dotnet", "AspNetCoreInDocker.Web.dll"]  
COPY --from=builder /sln/dist .  

This Dockerfile will build and test a specific ASP.NET Core app, but there are a lot of hard-coded paths in there. When you create a new app, you can copy and paste this Dockerfile, but you'll need to tweak all the commands to use the correct paths.

By the time you get to your third copy-and-paste (and your n-th inevitable typo, you'll be wondering if there's a better, more general, way to achievev the same result. That's where Docker's ONBUILD command comes in. We can use it to create a generalised "builder" image for building our apps, and remove a lot of the repetition in the process.

The ONBUILD Docker command

In the Dockerfile shown above, the COPY and RUN commands are all executed in the context of your app. For normal builds, that's fine - the files that you want to copy are in the current directory. You're defining the commands to be run when you call docker build ..

But we're trying to build a generalised "builder" image that we can use as the base for building other ASP.NET Core apps. Instead of defining the commands we want to execute when building our "builder" file, the commands should be run when an image that uses our "builder" as a base is built.

The Docker documentation describes it as a "trigger" - you're defining a command to be triggered when the downstream build runs. I think of ONBUILD as effectively automating copy-and-paste; the ONBUILD command is copy-and-pasted into the downstream build.

For example, consider this simple builder Dockerfile which uses ONBUILD:

FROM microsoft/aspnetcore-build:2.0.7-2.1.105 AS builder  
WORKDIR /sln

ONBUILD COPY ./test ./test  
ONBUILD COPY ./src ./src

ONBUILD RUN dotnet build -c Release  

This simple Dockerfile doesn't have any optimisations, but it uses ONBUILD to register triggers for downstream builds. Imagine you build this image using docker build . -tag andrewlock/testbuild. That creates a builder image called andrewlock/testbuild.

The ONBUILD commands don't actually run when you build the "builder" image, they only run when you build the downstream image.

You can then use this image as a basic "builder" image for your ASP.NET Core apps. For example, you could use the following Dockerfile to build your ASP.NET Core app:

FROM andrewlock/testbuild

ENTRYPOINT ["dotnet", "./src/MyApp/MyApp.dll"]  

Note, for simplicity this example doesn't publish the app, or use multi-stage builds to optimise the runtime container size. Be sure to use those optimisations in production.

That's a very small Dockerfile for building and running a whole app! The use of ONBUILD means that our downstream Dockerfile is equivalent to:

FROM microsoft/aspnetcore-build:2.0.7-2.1.105 AS builder  
WORKDIR /sln

COPY ./test ./test  
COPY ./src ./src

RUN dotnet build -c Release

ENTRYPOINT ["dotnet", "./src/MyApp/MyApp.dll"]  

When you build this Dockerfile, the ONBUILD commands will be triggered in the current directory, and the app will be built. You only had to include the "builder" base image, and you got all that for free.

That's the goal I want to achieve with a generalised builder image. You should be able to include the base image, and it'll handle all your app building for you. In the next section, I'll show the solution I came up with, and walk through the layers it contains.

The generalised Docker builder image

The image I've come up with, is very close to the example shown at the start of this post. It uses the dotnet restore optimisation I described in my previous post, along with a workaround to allow running all the test projects in a solution:

# Build image
FROM microsoft/aspnetcore-build:2.0.7-2.1.105 AS builder  
WORKDIR /sln

ONBUILD COPY ./*.sln ./NuGet.config  ./

# Copy the main source project files
ONBUILD COPY src/*/*.csproj ./  
ONBUILD RUN for file in $(ls *.csproj); do mkdir -p src/${file%.*}/ && mv $file src/${file%.*}/; done

# Copy the test project files
ONBUILD COPY test/*/*.csproj ./  
ONBUILD RUN for file in $(ls *.csproj); do mkdir -p test/${file%.*}/ && mv $file test/${file%.*}/; done 

ONBUILD RUN dotnet restore

ONBUILD COPY ./test ./test  
ONBUILD COPY ./src ./src  
ONBUILD RUN dotnet build -c Release --no-restore

ONBUILD RUN find ./test -name '*.csproj' -print0 | xargs -L1 -0 dotnet test -c Release --no-build --no-restore  

If you've read my previous posts, then much of this should look familiar (with extra ONBUILD prefixes), but I'll walk through each layer below.

FROM microsoft/aspnetcore-build:2.0.7-2.1.105 AS builder  
WORKDIR /sln  

This defines the base image and working directory for our builder, and hence for the downstream apps. I've used the microsoft/aspnetcore-builder image, as we're going to build ASP.NET Core apps.

Note, the microsoft/aspnetcore-builder image is being retired in .NET Core 2.1 - you will need to switch to the microsoft/dotnet image instead.

The next line shows our first use of ONBUILD:

ONBUILD COPY ./*.sln ./NuGet.config ./*.props ./*.targets  ./  

This will copy the .sln file, NuGet.config, and any .props or .targets files in the root folder of the downstream build.

# Copy the main source project files
ONBUILD COPY src/*/*.csproj ./  
ONBUILD RUN for file in $(ls *.csproj); do mkdir -p src/${file%.*}/ && mv $file src/${file%.*}/; done

# Copy the test project files
ONBUILD COPY test/*/*.csproj ./  
ONBUILD RUN for file in $(ls *.csproj); do mkdir -p test/${file%.*}/ && mv $file test/${file%.*}/; done  

The Dockerfile uses the optimisation described in my previous post to copy the .csproj files from the src and test directories. As we're creating a generalised builder, we have to use an approach like this in which we don't explicitly specify the filenames.

ONBUILD RUN dotnet restore

ONBUILD COPY ./test ./test  
ONBUILD COPY ./src ./src  
ONBUILD RUN dotnet build -c Release --no-restore  

The next section is the meat of the Dockerfile - we restore the NuGet packages, copy the source code across, and then build the app (using the release configuration).

ONBUILD RUN find ./test -name '*.csproj' -print0 | xargs -L1 -0 dotnet test -c Release --no-build --no-restore  

Which brings us to the final statement in the Dockerfile, in which we run all the test projects in the test directory. Unfortunately, due to limitations with dotnet test, this line is a bit of a hack.

Ideally, we'd be able to call dotnet test on the solution file, and it would test all the projects that are test projects. However, this won't give you the result you want - it will try to test non-test projects which will give you errors. There are several different issues looking at this problem, along with some workarounds, but most of them require changes to the app itself, or the addition of extra files. I decided to use a simple scripting approach based on this comment instead.

Using find with xargs is a common approach in Linux to execute a command against a number of different files.

The find command lists all the .csproj files in the test sub-directory, i.e. our test project files. The -print0 argument means that each filename is suffixed with a null character. The

The xargs command takes each filename provided by the file command and executes it with the command dotnet test -c Release --no-build --no-restore. The additional -0 argument indicates that we're using a null character delimiter, and the -L1 argument indicates we should only use a single filename with each dotnet test command.

This approach isn't especially elegant, but it does the job, and it means we can avoid having to explicitly specify the paths to the test project.

That's as much as we can do in the builder image - the publishing step is very specific to each app, so it's not feasible to include that in the builder. Instead, you have to specify that step in your own downstream Dockerfile, as shown in the next section.

Using the generalised build image

You can use the generalised Docker image, to create much simpler Dockerfiles for your downstream apps. You can use andrewlock/aspnetcore-build as your base image, then all you need to do is publish your app, and copy it to the runtime image. The following shows an example of what this might look like, for a simple ASP.NET Core app.

# Build image
FROM andrewlock/aspnetcore-build:2.0.7-2.1.105 as builder

# Publish
RUN dotnet publish "./src/AspNetCoreInDocker.Web/AspNetCoreInDocker.Web.csproj" -c Release -o "../../dist" --no-restore

#App image
FROM microsoft/aspnetcore:2.0.7  
WORKDIR /app  
ENV ASPNETCORE_ENVIRONMENT Local  
ENTRYPOINT ["dotnet", "AspNetCoreInDocker.Web.dll"]  
COPY --from=builder /sln/dist .  

This obviously only works if you apps use the same conventions as the builder app assumes, namely:

  • Your app and library projects are in a src subdirectory
  • Your test projectts are in a test subdirectory
  • All project files have the same name as their containing folders
  • There is only a single solution file

If these conventions don't match your requirements, then my builder image won't work for you. But now you know how to create your own builder images using the ONBUILD command.

Summary

In this post I showed how you could use the Docker ONBUILD command to create custom app-builder Docker images. I showed an example image that uses a number of optimisations to create a generalised ASP.NET Core builder image which will restore, build, and test your ASP.NET Core app, as long as it conforms to a number of standard conventions.

Version vs VersionSuffix vs PackageVersion: What do they all mean?

$
0
0
Version vs VersionSuffix vs PackageVersion: What do they all mean?

In this post I look at the various different version numbers you can set for a .NET Core project, such as Version, VersionSuffix, and PackageVersion. For each one I'll describe the format it can take, provide some examples, and what it's for.

This post is very heavily inspired by Nate McMaster's question (which he also answered) on Stack Overflow. I'm mostly just reproducing it here so I can more easily find it again later!

Version numbers in .NET

.NET loves version numbers - they're sprinkled around everywhere, so figuring out what version of a tool you have is sometimes easier said than done.

Leaving aside the tooling versioning, .NET also contains a plethora of version numbers for you to add to your assemblies and NuGet packages. There are at least seven different version numbers you can set when you build your assemblies. In this post I'll describe what they're for, how you can set them, and how you can read/use them.

The version numbers available to you break logically into two different groups. The first group, below, exist only as MSBuild properties. You can set them in your csproj file, or pass them as command line arguments when you build your app, but their values are only used to control other properties; as far as I can tell, they're not visible directly anywhere in the final build output:

So what are they for then? They control the default values for the version numbers which are visible in the final build output.

I'll explain each number in turn, then I'll explain how you can set the version numbers when you build your app.

VersionPrefix

  • Format: major.minor.patch[.build]
  • Examples: 0.1.0, 1.2.3, 100.4.222, 1.0.0.3
  • Default: 1.0.0
  • Typically used to set the overall SemVer version number for your app/library

You can use VersionPrefx to set the "base" version number for your library/app. It indirectly controls all of the other version numbers generated by your app (though you can override it for other specific versions). Typically, you would use a SemVer 1.0 version number with three numbers, but technically you can use between 1 and 4 numbers. If you don't explicitly set it, VersionPrefix defaults to 1.0.0.

VersionSuffix

  • Format: Alphanumberic (+ hyphen) string: [0-9A-Za-z-]*
  • Examples: alpha, beta, rc-preview-2-final
  • Default: (blank)
  • Sets the pre-release label of the version number

VersionSuffix is used to set the pre-release label of the version number, if there is one, such as alpha or beta. If you don't set VersionSuffix, then you won't have any pre-release labels. VersionSuffix is used to control the Version property, and will appear in PackageVersion and InformationalVersion.

Version

  • Format: major.minor.patch[.build][-prerelease]
  • Examples: 0.1.0, 1.2.3.5, 99.0.3-rc-preview-2-final
  • Default: VersionPrefix-VersionSuffix (or just VersionPrefix if VersionSuffix is empty)
  • The most common property set in a project, used to generate versions embedded in assembly.

The Version property is the value most commonly set when building .NET Core applications. It controls the default values of all the version numbers embedded in the build output, such as PackageVersion and AssemblyVersion so it's often used as the single source of the app/library version.

By default, Version is formed from the combination of VersionPrefix and VersionSuffix, or if VersionSuffix is blank, VersionPrefix only. For example,

  • If VersionPrefix = 0.1.0 and VersionSuffix = beta, then Version = 0.1.0-beta
  • If VersionPrefix = 1.2.3 and VersionSuffix is empty, then Version = 1.2.3

Alternatively, you can explicitly overwrite the value of Version. If you do that, then the values of VersionPrefix and VersionSuffix are effectively unused.

The format of Version, as you might expect, is a combination of the VersionPrefix and VersionSuffix formats. The first part is typically a SemVer three-digit string, but it can be up to four digits. The second part, the pre-release label, is an alphanumeric-plus-hyphen string, as for VersionSuffix.

AssemblyVersion

  • Format: major.minor.patch.build
  • Examples: 0.1.0.0, 1.2.3.4, 99.0.3.99
  • Default: Version without pre-release label
  • The main value embedded into the generated .dll. An important part of assembly identity.

Every assembly you produce as part of your build process has a version number embedded in it, which forms an important part of the assembly's identity. It's stored in the assembly manifest and is used by the runtime to ensure correct versions are loaded etc.

The AssemblyVersion is used along with name, public key token and culture information only if the assemblies are strong-named signed. If assemblies are not strong-named signed, only file names are used for loading. You can read more about assembly versioning in the docs.

The value of AssemblyVersion defaults to the value of Version, but without the pre-release label, and expanded to 4 digits. For example:

  • If Version = 0.1.2, AssemblyVersion = 0.1.2.0
  • If Version = 4.3.2.1-beta, AssemblyVersion = 4.3.2.1
  • If Version = 0.2-alpha, AssemblyVersion = 0.2.0.0

The AssemblyVersion is embedded in the output assembly as an attribute, System.Reflection.AssemblyVersionAttribute. You can read this value by inspecting the executing Assembly object:

using System;  
using System.Reflection;

class Program  
{
    static void Main(string[] args)
    {
        var assembly = Assembly.GetExecutingAssembly();
        var assemblyVersion = assembly.GetName().Version;
        Console.WriteLine($"AssemblyVersion {assemblyVersion}");
    }
}

FileVersion

  • Format: major.minor.patch.build
  • Examples: 0.1.0.0, 1.2.3.100
  • Default: AssemblyVersion
  • The file-system version number of the .dll file, that doesn't have to match the AssemblyVersion, but usually does.

The file version is literally the version number exposed by the DLL to the file system. It's the number displayed in Windows explorer, which often matches the AssemblyVersion, but it doesn't have to. The FileVersion number isn't part of the assembly identity as far as the .NET Framework or runtime are concerned.

Version vs VersionSuffix vs PackageVersion: What do they all mean?

When strong naming was more heavily used, it was common to keep the same AssemblyVersion between different builds and increment FileVersion instead, to avoid apps having to update references to the library so often.

The FileVersion is embedded in the System.Reflection.AssemblyFileVersionAttribute in the assembly. You can read this attribute from the assembly at runtime, or you can use the FileVersionInfo class by passing the full path of the assembly (Assembly.Location) to the FileVersionInfo.GetVersionInfo() method:

using System;  
using System.Diagnostics;  
using System.Reflection;

class Program  
{
    static void Main(string[] args)
    {
        var assembly = Assembly.GetExecutingAssembly();
        var fileVersionInfo = FileVersionInfo.GetVersionInfo(assembly.Location);
        var fileVersion = fileVersionInfo.FileVersion;
        Console.WriteLine($"FileVersion {fileVersion}");
    }
}

InformationalVersion

  • Format: anything
  • Examples: 0.1.0.0, 1.2.3.100-beta, So many numbers!
  • Default: Version
  • Another information number embedded into the DLL, can contain any text.

The InformationalVersion is a bit of an odd-one out, in that it doesn't need to contain a "traditional" version number per-se, it can contain any text you like, though by default it's set to Version That makes it generally less useful for programmatic uses, though the value is still displayed in Windows explorer:

Version vs VersionSuffix vs PackageVersion: What do they all mean?

The InformationalVersion is embedded into the assembly as a System.Reflection.AssemblyInformationalVersionAttribute, so you can read it at runtime using the following:

using System;  
using System.Reflection;

class Program  
{
    static void Main(string[] args)
    {
        var assembly = Assembly.GetExecutingAssembly();
        var informationVersion = assembly.GetCustomAttribute<AssemblyInformationalVersionAttribute>().InformationalVersion;
        Console.WriteLine($"InformationalVersion  {informationVersion}");
    }
}

PackageVersion

  • Format: major.minor.patch[.build][-prerelease]
  • Examples: 0.1.0, 1.2.3.5, 99.0.3-rc-preview-2-final
  • Default: Version
  • Used to generate the NuGet package version when building a package using dotnet pack

PackageVersion is the only version number that isn't embedded in the output dll directly. Instead, it's used to control the version number of the NuGet package that's generated when you call dotnet pack.

By default, PackageVersion takes the same value as Version, so it's typically a three value SemVer version number, with or without a pre-release label. As with all the other version numbers, it can be overridden at build time, so it can differ from all the other assembly version numbers.

How to set the version number when you build your app/library

That's a lot of numbers, and you can technically set every one to a different value! But if you're a bit overwhelmed, don't worry. It's likely that you'll only want to set one or two values: either VersionPrefix and VersionSuffix, or Version directly.

You can set the value of any of these numbers in several ways. I'll walk through them below.

Setting an MSBuild property in your csproj file

With .NET Core, and the simplification of the .csproj project file format, adding properties to your project file is no longer an arduous task. You can set any of the version numbers I've described in this post by setting a property in your .csproj file.

For example, the following .csproj file sets the Version number of a console app to 1.2.3-beta, and adds a custom InformationalVersion:

<Project Sdk="Microsoft.NET.Sdk">

  <PropertyGroup>
    <OutputType>Exe</OutputType>
    <TargetFramework>netcoreapp2.0</TargetFramework>
    <Version>1.2.3-beta</Version>
    <InformationalVersion>This is a prerelease package</InformationalVersion>
  </PropertyGroup>

</Project>  

Overriding values when calling dotnet build

As well as hard-coding the version numbers into your project file, you can also pass them as arguments when you build your app using dotnet build.

If you just want to override the VersionSuffix, you can use the --version-suffix argument for dotnet build. For example:

dotnet build --configuration Release --version-suffix preview2-final  

If you want to override any other values, you'll need to use the MSBuild property format instead. For example, to set the Version number:

dotnet build --configuration Release /p:Version=1.2.3-preview2-final  

Similarly, if you're creating a NuGet package with dotnet pack, and you want to override the PackageVersion, you'll need to use MSBuild property overrides

dotnet pack --no-build /p:PackageVersion=9.9.9-beta  

Using assembly attributes

Before .NET Core, the standard way to set the AssemblyVersion, FileVersion, and InformationalVersion were through attributes, for example:

[assembly: AssemblyVersion("1.2.3.4")]
[assembly: AssemblyFileVersion("6.6.6.6")]
[assembly: AssemblyInformationalVersion("So many numbers!")]

However, if you try to do that with a .NET Core project you'll be presented with errors!

> Error CS0579: Duplicate 'System.Reflection.AssemblyFileVersionAttribute' attribute
> Error CS0579: Duplicate 'System.Reflection.AssemblyInformationalVersionAttribute' attribute
> Error CS0579: Duplicate 'System.Reflection.AssemblyVersionAttribute' attribute

As the SDK sets these attributes automatically as part of the build, you'll get build time errors. Simply delete the assembly attributes, and use the MSBuild properties instead.

Summary

In this post I described the difference between the various version numbers you can set for your apps and libraries in .NET Core. There's an overwhelming number of versions to choose from, but generally it's best to just set the Version and use it for all of the version numbers.

Creating NuGet packages in Docker using the .NET Core CLI

$
0
0
Creating NuGet packages in Docker using the .NET Core CLI

This is the next post in a series on building ASP.NET Core apps in Docker. In this post, I discuss how you can create NuGet packages when you build your app in Docker using the .NET Core CLI.

There's nothing particularly different about doing this in Docker compared to another system, but there are a couple of gotchas with versioning you can run into if you're not careful.

Previous posts in this series:

Creating NuGet packages with the .NET CLI

The .NET Core SDK and new "SDK style" .csproj format makes it easy to create NuGet packages from your projects, without having to use NuGet.exe, or mess around with .nuspec files. You can use the dotnet pack command to create a NuGet package by providing the path to a project file.

For example, imagine you have a library in your solution you want to package:

Creating NuGet packages in Docker using the .NET Core CLI

You can pack this project by running the following command from the solution directory - the .csproj file is found and a NuGet package is created. I've used the -c switch to ensure we're building in Release mode:

dotnet pack ./src/AspNetCoreInDocker -c Release  

By default, this command runs dotnet restore and dotnet build before producing the final NuGet package, in the bin folder of your project:

Creating NuGet packages in Docker using the .NET Core CLI

If you've been following along with my previous posts, you'll know that when you build apps in Docker, you should think carefully about the layers that are created in your image. In previous posts I described how to structure your projects so as to take advantage of this layer caching. In particular, you should ensure the dotnet restore happens early in the Docker layers, so that is is cached for subsequent builds.

You will typically run dotnet pack at the end of a build process, after you've confirmed all the tests for the solution pass. At that point, you will have already run dotnet restore and dotnet build so, running it again is unnecessary. Luckily, dotnet pack includes switches to do just this:

dotnet pack ./src/AspNetCoreInDocker -c Release --no-build --no-restore  

If your project has multiple projects that you want to package, you can pass in the path to a solution file, or just call dotnet pack in the solution directory:

dotnet pack -c Release --no-build --no-restore  

This will attempt to package all projects in your solution. If you don't want to package a particular project, you can add <IsPackable>false</IsPackable> to the project's .csproj file. For example:

<Project Sdk="Microsoft.NET.Sdk">

  <PropertyGroup>
    <TargetFramework>netstandard2.0</TargetFramework>
    <IsPackable>false</IsPackable>
  </PropertyGroup>

</Project>  

That's pretty much all there is to it. You can add this command to the end of your Dockerfile, and NuGet packages will be created for all your packable projects. There's one major point I've left out with regard to creating packages - setting the version number.

Setting the version number for your NuGet packages

Version numbers seem to be a continual bugbear of .NET; ASP.NET Core has gone through so many numbering iterations and mis-aligned versions that it can be hard for newcomers to figure out what's going on.

Sadly, the same is almost true when it comes to versioning of your .NET Project dlls. There are no less than seven different version properties you can apply to your project. Each of these has slightly different rules, and meaning, as I discussed in a previous post.

Luckily, you can typically get away with only worrying about one: Version.

As I discussed in my previous post, the MSBuild Version property is used as the default value for the various version numbers that are embedded in your assembly: AssemblyVersion, FileVersion, and InformationalVersion, as well as the NuGet PackageVersion when you pack your library. When you're building NuGet packages to share with other applications, you will probably want to ensure that these values are all updated.

Creating NuGet packages in Docker using the .NET Core CLI

There's two primary ways you can set the Version property for your project

  • Set it in your .csproj file
  • Provide it at the command line when you dotnet build your app.

Which you choose is somewhat a matter of preference - if in your .csproj, then the build number is checked into source code and will picked up automatically by the .NET CLI. However, be aware that if you're building in Docker (and have been following my optimisation series), then updating the .csproj will break your layer cache, so you'll get a slower build immediately after bumping the version number.

<Project Sdk="Microsoft.NET.Sdk">

  <PropertyGroup>
    <TargetFramework>netstandard2.0</TargetFramework>
    <Version>0.1.0</Version>
  </PropertyGroup>

</Project>  

One reason to provide the Version number on the command line is if your app version comes from a CI build. If you create a NuGet package in AppVeyor/Travis/Jenkins with every checkin, then you might want your version numbers to be provided by the CI system. In that case, the easiest approach is to set the version at runtime.

In principle, setting the Version just requires passing the correct argument to set the MSBuild property when you call dotnet:

RUN dotnet build /p:Version=0.1.0 -c Release --no-restore  
RUN dotnet pack /p:Version=0.1.0 -c Release --no-restore --no-build  

However, if you're using a CI system to build your NuGet packages, you need some way of updating the version number in the Dockerfile dynamically. There's several ways you could do this, but one way is to use a Docker build argument.

Build arguments are values passed in when you call docker build. For example, I could pass in a build argument called Version when building my Dockerfile using:

docker build --build-arg Version="0.1.0" .  

Note that as you're providing the version number on the command line when you call docker build you can pass in a dynamic value, for example an Environment Variable set by your CI system.

In order for your Dockerfile to use the provided build argument, you need to declare it using the ARG instruction:

ARG Version  

To put that into context, the following is a very basic Dockerfile that uses a version provided in --build-args when building the app

FROM microsoft/dotnet:2.0.3-sdk AS builder

ARG Version  
WORKDIR /sln

COPY . .

RUN dotnet restore -c Release  
RUN dotnet build /p:Version=$Version -c Release --no-restore  
RUN dotnet pack /p:Version=$Version -c Release --no-restore --no-build  

Warning: This Dockerfile is VERY basic - don't use it for anything other than as an example of using ARG!

After building this Dockerfile you'll have an image that contains the NuGet packages for your application. It's then just a case of using dotnet nuget push to publish your package to a NuGet server. I won't go into details on how to do that in this post, so check the documentation for details.

Summary

Building NuGet packages in Docker is much like building them anywhere else with dotnet pack. The main things you need to take into account are optimising your Dockerfile to take advantage of layer caching, and how to set the version number for the generated packages. In this post I described how to use the --build-args argument to update the Version property at build time, to give the smallest possible effect on your build cache.

Setting ASP.NET Core version numbers for a Docker ONBUILD builder image

$
0
0
Setting ASP.NET Core version numbers for a Docker ONBUILD builder image

In a previous post, I showed how you can create NuGet packages when you build your app in Docker using the .NET Core CLI. As part of that, I showed how to set the version number for the package using MSBuild commandline switches.

That works well when you're directly calling dotnet build and dotnet pack yourself, but what if you want to perform those tasks in a "builder" Dockerfile, like I showed previously. In those cases you need to use a slightly different approach, which I'll describe in this post.

I'll start with a quick recap on using an ONBUILD builder, and how to set the version number of an app, and then I'll show the solution for how to combine the two. In particular, I'll show how to create a builder and a "downstream" app's Dockerfile where

  • Calling docker build with --build-arg Version=0.1.0 on your app's Dockerfile, will set the version number for your app in the builder image
  • You can provide a default version number in your app's Dockerfile, which is used if you don't provide a --build-arg
  • If the downstream image does not set the version, the builder Dockerfile uses a default version number.

Previous posts in this series:

Using ONBUILD to create builder images

The ONBUILD command allows you to specify a command that should be run when a "downstream" image is built. This can be used to create "builder" images that specify all the steps to build an application or library, reducing the boilerplate in your application's Dockerfile.

For example, in a previous post I showed how you could use ONBUILD to create a generic ASP.NET Core builder Dockerfile, reproduced below:

# Build image
FROM microsoft/aspnetcore-build:2.0.7-2.1.105 AS builder  
WORKDIR /sln

ONBUILD COPY ./*.sln ./NuGet.config  ./

# Copy the main source project files
ONBUILD COPY src/*/*.csproj ./  
ONBUILD RUN for file in $(ls *.csproj); do mkdir -p src/${file%.*}/ && mv $file src/${file%.*}/; done

# Copy the test project files
ONBUILD COPY test/*/*.csproj ./  
ONBUILD RUN for file in $(ls *.csproj); do mkdir -p test/${file%.*}/ && mv $file test/${file%.*}/; done 

ONBUILD RUN dotnet restore

ONBUILD COPY ./test ./test  
ONBUILD COPY ./src ./src  
ONBUILD RUN dotnet build -c Release --no-restore

ONBUILD RUN find ./test -name '*.csproj' -print0 | xargs -L1 -0 dotnet test -c Release --no-build --no-restore  

By basing your app Dockerfile on this image (in the FROM statement), your application would be automatically restored, built and tested, without you having to include those steps yourself. Instead, your app image could be very simple, for example:

# Build image
FROM andrewlock/aspnetcore-build:2.0.7-2.1.105 as builder

# Publish
RUN dotnet publish "./AspNetCoreInDocker.Web/AspNetCoreInDocker.Web.csproj" -c Release -o "../dist" --no-restore

#App image
FROM microsoft/aspnetcore:2.0.7  
WORKDIR /app  
ENV ASPNETCORE_ENVIRONMENT Local  
ENTRYPOINT ["dotnet", "AspNetCoreInDocker.Web.dll"]  
COPY --from=builder /sln/dist .  

Setting the version number when building your application

You often want to set the version number of a library or application when you build it - you might want to record the app version in log files when it runs for example. Also, when building NuGet packages you need to be able to set the package version number. There are a variety of different version numbers available to you (as I discussed in a previous post), all of which can be set from the command line when building your application.

In my last post I described how to set version numbers using MSBuild switches. For example, to set the Version MSBuild property when building (which, when set, updates all the other version numbers of the assembly) you could use the following command

dotnet build /p:Version=0.1.2-beta -c Release --no-restore  

Setting the version in this way is the same whether you're running it from the command line, or in Docker. However, in your Dockerfile, you will typically want to pass the version to set as a build argument. For example, the following command:

docker build --build-arg Version="0.1.0" .  

could be used to set the Version property to 0.1.0 by using the ARG command, as shown in the following Dockerfile:

FROM microsoft/dotnet:2.0.3-sdk AS builder

ARG Version  
WORKDIR /sln

COPY . .

RUN dotnet restore  
RUN dotnet build /p:Version=$Version -c Release --no-restore  
RUN dotnet pack /p:Version=$Version -c Release --no-restore --no-build  

Using ARGs in a parent Docker image that uses ONBUILD

The two techniques described so far work well in isolation, but getting them to play nicely together requires a little bit more work. The initial problem is to do with the way Docker treats builder images that use ONBUILD.

To explore this, imagine you have the following, simple, builder image, tagged as andrewlock/testbuild:

FROM microsoft/aspnetcore-build:2.0.7-2.1.105 AS builder  
WORKDIR /sln

ONBUILD COPY ./test ./test  
ONBUILD COPY ./src ./src

ONBUILD RUN dotnet build -c Release  

Warning: This Dockerfile has no optimisations, don't use it for production!

As a first attempt, you might try just adding the ARG command to your downstream image, and passing the --build-arg in. The following is a very simple Dockerfile that uses the builder, and accepts an argument.

# Build image
FROM andrewlock/testbuild as builder

ARG Version

# Publish
RUN dotnet publish "./AspNetCoreInDocker.Web/AspNetCoreInDocker.Web.csproj" -c Release -o --no-restore  

Calling docker build --build-arg Version="0.1.0" . will build the image, and set the $Version parameter in the downstream dockerfile to 0.1.0, but that won't be used in the builder Dockerfile at all, so it would only be useful if you're running dotnet pack in your downstream image for example.

Instead, you can use a couple of different characteristics about Dockerfiles to pass values up from your downstream app's Dockerfile to the builder Dockerfile.

  • Any ARG defined before the first FROM is "global", so it's not tied to a builder stage. Any stage that wants to use it, still needs to declare its own ARG command
  • You can provide default values to ARG commands using the format ARG value=default
  • You can combine ONBUILD with ARG

Lets combine all these features, and create our new builder image.

A builder image that supports setting the version number

I've cut to the chase a bit here - needless to say I spent a while fumbling around, trying to get the Dockerfiles doing what I wanted. The solution shown in this post is based on the excellent description in this issue.

The annotated builder image is as follows. I've included comments in the file itself, rather than breaking it down afterwards. As before, this is a basic builder image, just to demonstrate the concept. For a Dockerfile with all the optimisations see my builder image on Dockerhub.

FROM microsoft/aspnetcore-build:2.0.7-2.1.105 AS builder  

# This defines the `ARG` inside the build-stage (it will be executed after `FROM`
# in the child image, so it's a new build-stage). Don't set a default value so that
# the value is set to what's currently set for `BUILD_VERSION`
ONBUILD ARG BUILD_VERSION

# If BUILD_VERSION is set/non-empty, use it, otherwise use a default value
ONBUILD ARG VERSION=${BUILD_VERSION:-1.0.0}

WORKDIR /sln

ONBUILD COPY ./test ./test  
ONBUILD COPY ./src ./src

ONBUILD RUN dotnet build -c Release /p:Version=$VERSION  

I've actually defined two arguments here, BUILD_VERSION and VERSION. We do this to ensure that we can set a default version in the builder image, while also allowing you to override it from the downstream image or by using --build-arg.

Those two additional ONBUILD ARG lines are all you need in your builder Dockerfile. You need to either update your downstream app's Dockerfile as shown below, or use --build-arg to set the BUILD_VERSION argument for the builder to use.

If you want to set the version number with --build-arg

If you just want to provide the version number as a --build-arg value, then you don't need to change your downstream image. You could use the following:

FROM andrewlock/testbuild as builder  
RUN dotnet publish "./AspNetCoreInDocker.Web/AspNetCoreInDocker.Web.csproj" -c Release -o --no-restore  

And then set the version number when you build:

docker build --build-arg BUILD_VERSION="0.3.4-beta" .  

That would pass the BUILD_VERSION value up to the builder image, which would in turn pass it to the dotnet build command, setting the Version property to 0.3.4-beta.

If you don't provide the --build-arg argument, the builder image will use its default value (1.0.0) as the build number.

Note that this will overwrite any version number you've set in your csproj files, so this approach is only any good for you if you're relying on a CI process to set your version numbers

If you want to set a default version number in your downstream Dockerfile

If you want to have the version number of your app checked in to source, then you can set a version number in your downstream Dockerfile. Set the BUILD_VERSION argument before the first FROM command in your app's Dockerfile:

ARG BUILD_VERSION=0.2.3  
FROM andrewlock/testbuild as builder  
RUN dotnet publish "./AspNetCoreInDocker.Web/AspNetCoreInDocker.Web.csproj" -c Release -o --no-restore  

Running docker build . on this file will ensure that the libraries built in the builder file have a version of 0.2.3.

If you wish to overwrite this at runtime you can simply pass in the build argument as before:

docker build --build-arg BUILD_VERSION="0.3.4-beta" .  

And there you have it! ONBUILD playing nicely with ARG. If you decide to adopt this pattern in your builder images, just be aware that you will no longer be able to change the version number by setting it in your csproj files.

Summary

In this post I described how you can use ONBUILD and ARG to dynamically set version numbers for your .NET libraries when you're using a generalised builder image. For an alternative description (and the source of this solution), see this issue on GitHub and the provided examples.


Pushing NuGet packages built in Docker by running the container

$
0
0
Pushing NuGet packages built in Docker by running the container

In a previous post I described how you could build NuGet packages in Docker. One of the advantages of building NuGet packages in Docker is that you can don't need any dependencies installed on the build-server itself, you can install all the required dependencies in the Docker container instead. One of the disadvantages of this approach is that getting at the NuGet packages after they've been built is more tricky - you have to run the image to get at the files.

Given that constraint, it's likely that if you're building your apps in Docker, you'll also want to push your NuGet packages to a feed (e.g. nuget.org or myget.org from Docker.

In this post I show how to create a Dockerfile for building your NuGet packages which you can then run as a container to push them to a NuGet feed.

Previous posts in this series:

Building your NuGet packages in Docker

I've had a couple of questions since my posting on building NuGet packages in Docker as to why you would want to do this. Given Docker is for packaging and distributing apps, isn't it the wrong place for building NuGet packages?

While Docker images are a great way for distributing an app, one of their biggest selling points is the ability to isolate the dependencies of the app it contains from the host operating system which runs the container. For example, I can install a specific version of Node in the Docker container, without having to install Node on the build server.

That separation doesn't just apply when you're running your application, but also when building your application. To take an example from the .NET world - if I want to play with some pre-release version of the .NET SDK, I can install it into a Docker image and use that to build my app. If I wasn't using Docker, I would have to install it directly on the build server, which would affect everything it built, not just my test app. If there was a bug in the preview SDK it could potentially compromise the build-process for production apps too.

I could also use a global.json file to control the version of the SDK used to build each application.

The same argument applies to building NuGet packages in Docker as well as apps. By doing so, you isolate the dependencies required to package your libraries from those installed directly on the server.

For example, consider this simple Dockerfile. It uses the .NET Core 2.1 release candidate SDK (as it uses the 2.1.300-rc1-sdk base image), but you don't need to have that installed on your machine to be able to build and produce the required NuGet packages.

FROM microsoft/dotnet:2.1.300-rc1-sdk AS builder

ARG Version  
WORKDIR /sln

COPY . .

RUN dotnet restore  
RUN dotnet build /p:Version=$Version -c Release --no-restore  
RUN dotnet pack /p:Version=$Version -c Release --no-restore --no-build -o /sln/artifacts  

This Dockerfile doesn't have any optimisations, but it will restore and build a .NET solution in the root directory. It will then create NuGet packages and output them to the /sln/artifacts directory. You can set the version of the package by providing the Version as a build argument, for example:

docker build --build-arg Version=0.1.0 -t andrewlock/test-app .  

If the solution builds successfully, you'll have a Docker image that contains the NuGet .nupkg files, but they're not much good sat there. Instead, you'll typically want to push them to a NuGet feed. There's a couple of ways you could do that, but in the following example I show how to configure your Dockerfile so that it pushes the files when you docker run the image.

Pushing NuGet packages when a container is run

Before I show the code, a quick reminder on terminology:

  • An image is essentially a static file that is built from a Dockerfile. You can think of it as a mini hard-drive, containing all the files necessary to run an application. But nothing is actually running; it's just a file.
  • A container is what you get if you run an image.

The following Dockerfile expands on the previous one, so that when you run the image, it pushes the .nupkgs built in the previous stage to the nuget.org feed.

FROM microsoft/dotnet:2.1.300-rc1-sdk AS builder

ARG Version  
WORKDIR /sln

COPY . .

RUN dotnet restore  
RUN dotnet build /p:Version=$Version -c Release --no-restore  
RUN dotnet pack /p:Version=$Version -c Release --no-restore --no-build -o /sln/artifacts 

ENTRYPOINT ["dotnet", "nuget", "push", "/sln/artifacts/*.nupkg"]  
CMD ["--source", "https://api.nuget.org/v3/index.json"]  

This Dockerfile makes use of both ENTRYPOINT and CMD commands. For an excellent description of the differences between them, and when to use one over the other, see this article. In summary, I've used ENTRYPOINT to define the executable command to run and it's constant arguments, and CMD to specify the optional arguments. When you run the image built using this Dockerfile (andrewlock/test-app for example) it will combine ENTRYPOINT and CMD to give the final command to run.

For example, if you run:

docker run --rm --name push-packages andrewlock/test-app  

then the Docker container will execute the following command in the container:

dotnet nuget push /sln/artifacts/*.nupkg --source https://api.nuget.org/v3/index.json  

When pushing files to nuget.org, you will typically need to provide an API key using the --api-key argument, so running the container as it is will give a 401 Unauthorized response. To provide the extra arguments to the dotnet nuget push command, add them at the end of your docker run statement:

docker run --rm --name push-packages andrewlock/test-app --source https://api.nuget.org/v3/index.json --api-key MY-SECRET-KEY  

When you pass additional arguments to the docker run command, they replace any arguments embedded in the image with CMD, and are appended to the ENTRYPOINT, to give the final command:

dotnet nuget push /sln/artifacts/*.nupkg --source https://api.nuget.org/v3/index.json --api-key MY-SECRET-KEY  

Note that I had to duplicate the --source argument in order to add the additional --api-key argument. When you provide additional arguments to the docker run command, it completely overridees the CMD arguments, so if you need them, you must repeat them when you call docker run.

Why push NuGet packages on run instead of on build?

The example I've shown here, using dotnet run to push NuGet packages to a NuGet feed, is only one way you can achieve the same goal. Another valid approach would be to call dotnet nuget push inside the Dockerfile itself, as part of the build process. For example, you could use the following Dockerfile:

FROM microsoft/dotnet:2.1.300-rc1-sdk AS builder

ARG Version  
ARG NUGET_KEY  
ARG NUGET_URL=https://api.nuget.org/v3/index.json  
WORKDIR /sln

COPY . .

RUN dotnet restore  
RUN dotnet build /p:Version=$Version -c Release --no-restore  
RUN dotnet pack /p:Version=$Version -c Release --no-restore --no-build -o /sln/artifacts  
RUN dotnet nuget push /sln/artifacts/*.nupkg --source NUGET_URL --api-key $NUGET_KEY  

In this example, building the image itself would push the artifacts to your NuGet feed:

docker build --build-arg Version=0.1.0 --build arg NUGET_KEY=MY-SECRET-KEY  .  

So why choose one approach over the other? It's a matter of preference really.

Oftentimes I have a solution that consists of both libraries to push to NuGet and applications to package and deploy as Dockerfiles. In those cases, my build scripts tend to look like the following:

  1. Restore, build and test the whole solution in a shared Dockerfile
  2. Publish each of the apps to their own images
  3. Pack the libraries in an image
  4. Test the app images
  5. Push the app Docker images to the Docker repository
  6. Push the NuGet packages to the NuGet feed by running the Docker image

Moving the dotnet nuget push out of docker build and into docker run feels conceptually closer to the two-step approach taken for the app images. We don't build and push Docker images all in one step; there's a build phase and a push phase. The setup with NuGet adopts a similar approach. If I wanted to run some checks on the NuGet packages produced (e.g. testing they have been built with required attributes for example) then I could easily do that before they're pushed to NuGet.

Whichever approach you take, there's definitely benefits to building your NuGet packages in Docker.

Summary

In this post I showed how you can build NuGet packages in Docker, and then push them to your NuGet feed when you run the container. By using ENTRYPOINT and CMD you can provide default arguments to make it easier to run the container. You don't have to use this two-stage approach - you could push your NuGet packages as part of the docker build call. I prefer to separate the two processes to more closely mirror the process of building and publishing app Docker images.

Exploring the .NET Core 2.1 Docker files (updated): dotnet:runtime vs aspnetcore-runtime vs sdk

$
0
0
Exploring the .NET Core 2.1 Docker files (updated): dotnet:runtime vs aspnetcore-runtime vs sdk

This is an update to my previous post explaining the difference between the various Linux .NET docker files. Things have changed a lot in .NET Core 2.1, so that post is out of date!

When you build and deploy an application in Docker, you define how your image should be built using a Dockerfile. This file lists the steps required to create the image, for example: set an environment variable, copy a file, or run a script. Whenever a step is run, a new layer is created. Your final Docker image consists of all the changes introduced by these layers in your Dockerfile.

Typically, you don't start from an empty image where you need to install an operating system, but from a "base" image that contains an already configured OS. For .NET development, Microsoft provide a number of different images depending on what it is you're trying to achieve.

In this post, I look at the various Docker base images available for .NET Core development, how they differ, and when you should use each of them. I'm only going to look at the Linux amd64 images, but there are Windows container versions and even Linux arm32 images available too. At the time of writing (just after the .NET Core 2.1 release) the latest images available are 2.1.0 and 2.1.300 for the various runtime and SDK images respectively.

Note: You should normally be specific about exactly which version of a Docker image you build on in your Dockerfiles (e.g. don't use latest). For that reason, all the images I mention in this post use the current latest version numbers, 2.1.300 and 2.1.0

I'll start by briefly discussing the difference between the .NET Core SDK and the .NET Core Runtime, as it's an important factor when deciding which base image you need. I'll then walk through each of the images in turn, using the Dockerfiles for each to explain what they contain, and hence what you should use them for.

tl;dr; This is a pretty long post, so for convenience, here's some links to the relevant sections and a one-liner use case:

Note that all of these images use the microsoft/dotnet repository - the previous microsoft/aspnetcore and microsoft/aspnetcore-build repositories have both been deprecated. There is no true 2.1 equivalent to the old microsoft/aspnetcore-build:2.0.3 image which included Node, Bower, and Gulp, or the microsoft/aspnetcore-build:1.0-2.0 image which included multiple .NET Core SDKs. Instead, it's recommended you use MultiStage builds to achieve this instead.

The .NET Core Runtime vs the .NET Core SDK

One of the most often lamented aspects of .NET Core and .NET Core development, is around version numbers. There are so many different moving parts, and none of the version numbers match up, so it can be difficult to figure out what you need.

For example, on my dev machine I am building .NET Core 2.1 apps, so I installed the .NET Core 2.1 SDK to allow me to do so. When I look at what I have installed using dotnet --info, I get (a more verbose version) of the following:

> dotnet --info
.NET Core SDK (reflecting any global.json):
 Version:   2.1.300
 Commit:    adab45bf0c

Runtime Environment:  
 OS Name:     Windows
 OS Version:  10.0.17134

Host (useful for support):  
  Version: 2.1.0
  Commit:  caa7b7e2ba

.NET Core SDKs installed:
  1.1.9 [C:\Program Files\dotnet\sdk]
  ...
  2.1.300 [C:\Program Files\dotnet\sdk]

.NET Core runtimes installed:
  Microsoft.AspNetCore.All 2.1.0-preview1-final [C:\Program Files\dotnet\shared\Microsoft.AspNetCore.All]
  Microsoft.NETCore.App 2.1.0 [C:\Program Files\dotnet\shared\Microsoft.NETCore.App]

To install additional .NET Core runtimes or SDKs:  
  https://aka.ms/dotnet-download

There's a lot of numbers there, but the important ones are 2.1.300 which is the version of the command line tools or SDK I'm currently using, and 2.1.0 which is the version of the .NET Core runtime.

In .NET Core 2.1, dotnet --info lists all the runtimes and SDKs you have installed. I haven't shown all 20 I apparently have installed… I really need to claim some space back!

Whether you need the .NET Core SDK or the .NET Core runtime depends on what you're trying to do:

  • The .NET Core SDK - This is what you need to build .NET Core applications.
  • The .NET Core Runtime - This is what you need to run .NET Core applications.

When you install the SDK, you get the runtime as well, so on your dev machines you can just install the SDK. However, when it comes to deployment you need to give it a little more thought. The SDK contains everything you need to build a .NET Core app, so it's much larger than the runtime alone (122MB vs 22MB for the MSI files). If you're just going to be running the app on a machine (or in a Docker container) then you don't need the full SDK, the runtime will suffice, and will keep the image as small as possible.

For the rest of this post, I'll walk through the main Docker images available for .NET Core and ASP.NET Core. I assume you have a working knowledge of Docker - if you're new to Docker I suggest checking out Steve Gordon's excellent series on Docker for .NET developers.
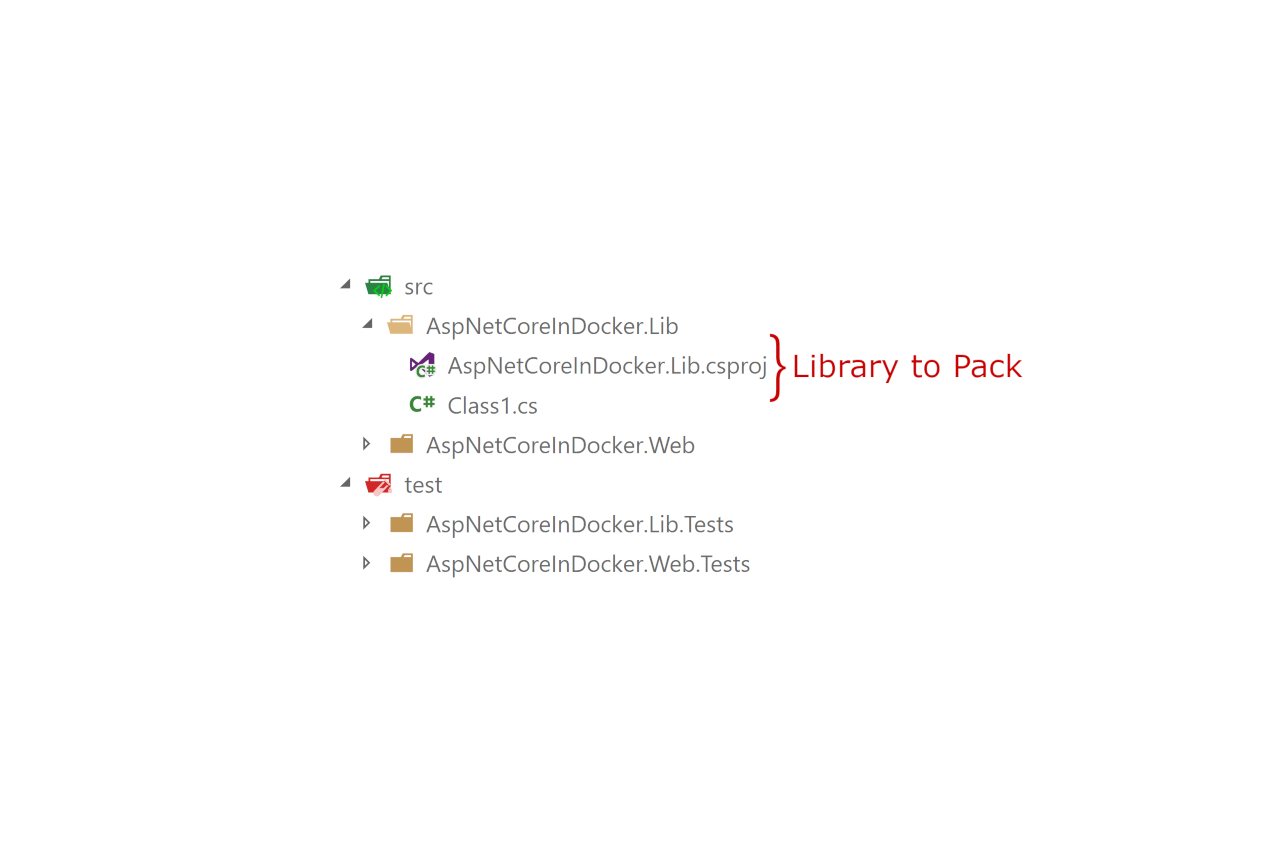
1. microsoft/dotnet:2.1.0-runtime-deps

  • Contains native dependencies
  • No .NET Core runtime or .NET Core SDK installed
  • Use for running Self-Contained Deployment apps

The first image we'll look at forms the basis for most of the other .NET Core images. It actually doesn't even have .NET Core installed. Instead, it consists of the base debian:stretch-slim image and has all the low-level native dependencies on which .NET Core depends.

The Docker images are currently all available in three flavours, depending on the OS image they're based on: debian:stretch-slim, ubuntu:bionic, and alpine:3.7. There are also ARM32 versions of the debian and ubuntu images. In this post I'm just going to look at the debian images, as they are the default.

The Dockerfile consists of a single RUN command that apt-get installs the required dependencies on top of the base image, and sets a few environment variables for convenience.

FROM debian:stretch-slim

RUN apt-get update \  
    && apt-get install -y --no-install-recommends \
        ca-certificates \
        \
# .NET Core dependencies
        libc6 \
        libgcc1 \
        libgssapi-krb5-2 \
        libicu57 \
        liblttng-ust0 \
        libssl1.0.2 \
        libstdc++6 \
        zlib1g \
    && rm -rf /var/lib/apt/lists/*

# Configure Kestrel web server to bind to port 80 when present
ENV ASPNETCORE_URLS=http://+:80 \  
    # Enable detection of running in a container
    DOTNET_RUNNING_IN_CONTAINER=true

What should you use it for?

The microsoft/dotnet:2.1.0-runtime-deps image is the basis for subsequent .NET Core runtime installations. Its main use is for when you are building self-contained deployments (SCDs). SCDs are apps that are packaged with the .NET Core runtime for the specific host, so you don't need to install the .NET Core runtime. You do still need the native dependencies though, so this is the image you need.

Note that you can't build SCDs with this image. For that, you'll need the SDK-based image described later in the post, microsoft/dotnet:2.1.300-sdk.

2. microsoft/dotnet:2.1.0-runtime

  • Contains .NET Core runtime
  • Use for running .NET Core console apps

The next image is one you'll use a lot if you're running .NET Core console apps in production. microsoft/dotnet:2.1.0-runtime builds on the runtime-deps image, and installs the .NET Core Runtime. It downloads the tar ball using curl, verifies the hash, unpacks it, sets up symlinks and removes the old installer.

You can view the Dockerfile for the image here:

FROM microsoft/dotnet:2.1-runtime-deps-stretch-slim

RUN apt-get update \  
    && apt-get install -y --no-install-recommends \
        curl \
    && rm -rf /var/lib/apt/lists/*

# Install .NET Core
ENV DOTNET_VERSION 2.1.0

RUN curl -SL --output dotnet.tar.gz https://dotnetcli.blob.core.windows.net/dotnet/Runtime/$DOTNET_VERSION/dotnet-runtime-$DOTNET_VERSION-linux-x64.tar.gz \  
    && dotnet_sha512='f93edfc068290347df57fd7b0221d0d9f9c1717257ed3b3a7b4cc6cc3d779d904194854e13eb924c30eaf7a8cc0bd38263c09178bc4d3e16281f552a45511234' \
    && echo "$dotnet_sha512 dotnet.tar.gz" | sha512sum -c - \
    && mkdir -p /usr/share/dotnet \
    && tar -zxf dotnet.tar.gz -C /usr/share/dotnet \
    && rm dotnet.tar.gz \
    && ln -s /usr/share/dotnet/dotnet /usr/bin/dotnet

What should you use it for?

The microsoft/dotnet:2.1.0-runtime image contains the .NET Core runtime, so you can use it to run any .NET Core 2.1 app such as a console app. You can't use this image to build your app, only to run it.

If you're running a self-contained app then you would be better served by the runtime-deps image. Similarly, if you're running an ASP.NET Core app, then you should use the microsoft/dotnet:2.1.0-aspnetcore-runtime image instead (up next), as it contains the shared runtime required for most ASP.NET Core apps.

3. microsoft/dotnet:2.1.0-aspnetcore-runtime

  • Contains .NET Core runtime and the ASP.NET Core shared framework
  • Use for running ASP.NET Core apps
  • Sets the default URL for apps to http://+:80

.NET Core 2.1 moves away from the runtime store feature introduced in .NET Core 2.0, and replaces it with a series of shared frameworks. This is a similar concept, but with some subtle benefits (to cloud providers in particular, e.g. Microsoft). I wrote a post about the shared framework and the associated Microsoft.AspNetCore.App metapackage here.

By installing the Microsoft.AspNetCore.App shared framework, all the packages that make up the metapackage are already available, so when your app is published, it can exclude those dlls from the output. This makes your published output smaller, and improves layer caching for Docker images.

The microsoft/dotnet:2.1.0-aspentcore-runtime image is very similar to the microsoft/dotnet:2.1.0-runtime image, but instead of just installing the .NET Core runtime and shared framework, it installs the .NET Core runtime and the ASP.NET Core shared framework, so you can run ASP.NET Core apps, as well as .NET Core console apps.

You can view the Dockerfile for the image here:

FROM microsoft/dotnet:2.1-runtime-deps-stretch-slim

RUN apt-get update \  
    && apt-get install -y --no-install-recommends \
        curl \
    && rm -rf /var/lib/apt/lists/*

# Install ASP.NET Core
ENV ASPNETCORE_VERSION 2.1.0

RUN curl -SL --output aspnetcore.tar.gz https://dotnetcli.blob.core.windows.net/dotnet/aspnetcore/Runtime/$ASPNETCORE_VERSION/aspnetcore-runtime-$ASPNETCORE_VERSION-linux-x64.tar.gz \  
    && aspnetcore_sha512='0f37dc0fabf467c36866ceddd37c938f215c57b10c638d9ee572316a33ae66f7479a1717ab8a5dbba5a8d2661f09c09fcdefe1a3f8ea41aef5db489a921ca6f0' \
    && echo "$aspnetcore_sha512  aspnetcore.tar.gz" | sha512sum -c - \
    && mkdir -p /usr/share/dotnet \
    && tar -zxf aspnetcore.tar.gz -C /usr/share/dotnet \
    && rm aspnetcore.tar.gz \
    && ln -s /usr/share/dotnet/dotnet /usr/bin/dotnet

What should you use it for?

Fairly obviously, for running ASP.NET Core apps! This is the image to use if you've published an ASP.NET Core app and you need to run it in production. It has the smallest possible footprint but all the necessary framework components and optimisations. You can't use it for building your app though, as it doesn't have the SDK installed. For that, you need the following image.

If you want to go really small, check out the new Alpine-based images - 163MB vs 255MB for the base image!

4. microsoft/dotnet:2.1.300-sdk

  • Contains .NET Core SDK
  • Use for building .NET Core and ASP.NET Core apps

All of the images shown so far can be used for running apps, but in order to build your app, you need the .NET Core SDK image. Unlike all the runtime images which use debian:stretch-slim as the base, the microsoft/dotnet:2.1.300-sdk image uses the buildpack-deps:stretch-scm image. According to the Docker Hub description, the buildpack image:

…includes a large number of "development header" packages needed by various things like Ruby Gems, PyPI modules, etc.…a majority of arbitrary gem install / npm install / pip install should be successful without additional header/development packages…

The stretch-scm tag also ensures common tools like curl, git, and ca-certificates are installed.

The microsoft/dotnet:2.1.300-sdk image installs the native prerequisites (as you saw in the microsoft/dotnet:2.1.0-runtime-deps image), and then installs the .NET Core SDK. Finally, it sets some environment variables and warms up the NuGet package cache by running dotnet help in an empty folder, which makes subsequent dotnet operations faster.

You can view the Dockerfile for the image here:

FROM buildpack-deps:stretch-scm

# Install .NET CLI dependencies
RUN apt-get update \  
    && apt-get install -y --no-install-recommends \
        libc6 \
        libgcc1 \
        libgssapi-krb5-2 \
        libicu57 \
        liblttng-ust0 \
        libssl1.0.2 \
        libstdc++6 \
        zlib1g \
    && rm -rf /var/lib/apt/lists/*

# Install .NET Core SDK
ENV DOTNET_SDK_VERSION 2.1.300

RUN curl -SL --output dotnet.tar.gz https://dotnetcli.blob.core.windows.net/dotnet/Sdk/$DOTNET_SDK_VERSION/dotnet-sdk-$DOTNET_SDK_VERSION-linux-x64.tar.gz \  
    && dotnet_sha512='80a6bfb1db5862804e90f819c1adeebe3d624eae0d6147e5d6694333f0458afd7d34ce73623964752971495a310ff7fcc266030ce5aef82d5de7293d94d13770' \
    && echo "$dotnet_sha512 dotnet.tar.gz" | sha512sum -c - \
    && mkdir -p /usr/share/dotnet \
    && tar -zxf dotnet.tar.gz -C /usr/share/dotnet \
    && rm dotnet.tar.gz \
    && ln -s /usr/share/dotnet/dotnet /usr/bin/dotnet

# Configure Kestrel web server to bind to port 80 when present
ENV ASPNETCORE_URLS=http://+:80 \  
    # Enable detection of running in a container
    DOTNET_RUNNING_IN_CONTAINER=true \
    # Enable correct mode for dotnet watch (only mode supported in a container)
    DOTNET_USE_POLLING_FILE_WATCHER=true \
    # Skip extraction of XML docs - generally not useful within an image/container - helps perfomance
    NUGET_XMLDOC_MODE=skip

# Trigger first run experience by running arbitrary cmd to populate local package cache
RUN dotnet help  

What should you use it for?

This image has the .NET Core SDK installed, so you can use it for building your .NET Core and ASP.NET Core apps. Technically you can also use this image for running your apps in production as the SDK includes the runtime, but you shouldn't do that in practice. As discussed at the beginning of this post, optimising your Docker images in production is important for performance reasons, but the microsoft/dotnet:2.1.300-sdk image weighs in at a hefty 1.73GB, compared to the 255MB for the microsoft/dotnet:2.1.0-runtime image.

To get the best of both worlds, you should use this image (or one of the later images) to build your app, and one of the runtime images to run your app in production. You can see how to do this using Docker multi-stage builds in Scott Hanselman's post here, or in my blog series here.

Summary

In this post I walked through some of the common Docker images used in .NET Core 2.1 development. Each of the images have a set of specific use-cases, and it's important you use the right one for your requirements. These images have changed since I wrote the previous version of this post; if you're using an earlier version of .NET Core check out that one instead.

Suppressing the startup and shutdown messages in ASP.NET Core

$
0
0
Suppressing the startup and shutdown messages in ASP.NET Core

In this post, I show how you can disable the startup message shown in the console when you run an ASP.NET Core application. This extra text can mess up your logs if you're using a collector that reads from the console, so it can be useful to disable in production. A similar approach can be used to disable the startup log messages when you're using the new IHostBuilder in ASP.NET Core 2.1.

This post will be less of a revelation after David Fowler dropped his list of new features in ASP.NET Core 2.1!. If you haven't seen that tweet yet, I recommend you check out this summary post by Scott Hanselman.

ASP.NET Core startup messages

By default, when you startup an ASP.NET Core application, you'll get a message something like the following, indicating the current environment, the content root path, and the URLs Kestrel is listening on:

Using launch settings from C:\repos\andrewlock\blog-examples\suppress-console-messages\Properties\launchSettings.json...  
Hosting environment: Development  
Content root path: C:\repos\andrewlock\blog-examples\suppress-console-messages  
Now listening on: https://localhost:5001  
Now listening on: http://localhost:5000  
Application started. Press Ctrl+C to shut down.  

This message, written by the WebHostBuilder, gives you a handy overview of your app, but it's written directly to the console, not through the ASP.NET Core Logging infrastructure provided by Microsoft.Extensions.Logging and used by the rest of the application.

When you're running in Docker particularly, it's common to write structured logs to the standard output (Console), and have another process read these logs and send them to a central location, using fluentd for example.

Unfortunately, while the startup information written the console can be handy, it's written in an unstructured format. If you're writing logs to the Console in a structured format for fluentd to read, then this extra text can pollute your nicely structured logs.

Suppressing the startup and shutdown messages in ASP.NET Core

The example shown above just uses the default ConsoleLoggingProvider rather than a more structured provider, but it highlights the difference between the messages written by the WebHostBuilder and those written by the logging infrastructure.

Luckily, you can choose to disable the startup messages (and the Application is shutting down... shutdown message).

Disabling the startup and shutdown messages in ASP.NET Core

Whether or not the startup messages are shown is controlled by a setting in your WebHostBuilder configuration. This is different to your app configuration, in that it describes the settings of the WebHost itself. This configuration controls things such as the environment name, the application name, and the ContentRoot path.

By default, these values can be set by using ASPNETCORE_ environment variables to control the values. For example, setting the ASPNETCORE_ENVIRONMENT variable to Staging will set the IHostingEnvironment.EnvironmentName to Staging.

The WebHostBuilder loads a whole number of settings from environment variables if they're available. You can use these to control a wide range of WebHost configuration options.

Disabling the messages using an environment variable

You can override lots of the default host configuration values by setting ASPNETCORE_ environment variables. In this case, the variable to set is ASPNETCORE_SUPPRESSSTATUSMESSAGES. If you set this variable to true on your machine, whether globally, or using launchSettings.json, then both the startup and shutdown messages are suppressed:

Suppressing the startup and shutdown messages in ASP.NET Core

Annoyingly, the Using launch settings... messages seems to still be shown. However, it's only shown when you use dotnet run. It won't show if you publish your app and use dotnet app.dll.

Disabling the messages using UseSetting

Environment variables aren't the only way to control the WebHostOptions configuration. You can provide your own configuration entirely by passing in a pre-built IConfiguration object for example, as I showed in a previous post using command line arguments.

However, if you only want to change the one setting, then creating a whole new ConfigurationBuilder may seem a bit like overkill. In that case, you could use the UseSetting method on WebHostBuilder.

Under the hood, if you call UseConfiguration() to provide a new IConfiguration object for your WebHostBuilder, you're actually making calls to UseSetting() for each key-value-pair in the provided configuration.

As shown below, you can use the UseSetting() method to set the SuppressStatusMessages value in the WebHost configuration. This will be picked up by the builder when you call Build() and the startup and shutdown messages will be suppressed.

public class Program  
{
    public static void Main(string[] args)
    {
        CreateWebHostBuilder(args).Build().Run();
    }

    public static IWebHostBuilder CreateWebHostBuilder(string[] args) =>
        WebHost.CreateDefaultBuilder(args)
            .UseSetting(WebHostDefaults.SuppressStatusMessagesKey, "True") // add this line
            .UseStartup<Startup>();
}

You may notice that I've used a strongly typed property on WebHostDefaults as the key. There are a whole range of other properties you can set directly in this way. You can see the WebHostDefaults class here, and the WebHostOptions class where the values are used here.

There's an even easier way to set this setting however, with the SuppressStatusMessages() extension method on IHostBuilder:

public static IWebHostBuilder CreateWebHostBuilder(string[] args) =>  
    WebHost.CreateDefaultBuilder(args)
        .SuppressStatusMessages(true) //disable the status messages
        .UseStartup<Startup>();

Under the hood, this extension method sets the WebHostDefaults.SuppressStatusMessagesKey setting for you, so it's probably the preferable approach to use!

I had missed this approach originally, I only learned about it from this helpful twitter thread from David Fowler.

Disabling messages for HostBuilder in ASP.NET Core 2.1

ASP.NET Core 2.1 introduces the concept of a generic Host and HostBuilder, analogous to the WebHost and WebHostBuilder typically used to build ASP.NET Core applications. Host is designed to be used to build non-HTTP apps. You could use it to build .NET Core services for example. Steve Gordon has an excellent introduction I suggest looking into if HostBuilder is new to you.

The following program is a very basic example of creating a simple service, registering an IHostedService to run in the background for the duration of the app's lifetime, and adding a logger to write to the console. The PrintTextToConsoleService class refers to the service in Steve's post.

public class Program  
{
    public static void Main(string[] args)
    {
        // CreateWebHostBuilder(args).Build().Run();
        CreateHostBuilder(args).Build().Run();
    }

    public static IHostBuilder CreateHostBuilder(string[] args) => 
        new HostBuilder()
            .ConfigureLogging((context, builder) => builder.AddConsole())
            .ConfigureServices(services => services.AddSingleton<IHostedService, PrintTextToConsoleService>());
}

When you run this app, you will get similar startup messages written to the console:

Application started. Press Ctrl+C to shut down.  
Hosting environment: Production  
Content root path: C:\repos\andrewlock\blog-examples\suppress-console-messages\bin\Debug\netcoreapp2.1\  
info: suppress_console_messages.PrintTextToConsoleService[0]  
      Starting
info: suppress_console_messages.PrintTextToConsoleService[0]  
      Background work with text: 14/05/2018 11:27:16 +00:00
info: suppress_console_messages.PrintTextToConsoleService[0]  
      Background work with text: 14/05/2018 11:27:21 +00:00

Even though the startup messages look very similar, you have to go about suppressing them in a very different way. Instead of setting environment variables, using a custom IConfiguration object, or the UseSetting() method, you must explicitly configure an instance of the ConsoleLifetimeOptions object.

You can configure the ConsoleLifetimeOptions in the ConfigureServices method using the IOptions pattern, in exactly the same way you'd configure your own strongly-typed options classes. That means you can load the values from configuration if you like, but you could also just configure it directly in code:

public static IHostBuilder CreateHostBuilder(string[] args) =>  
    new HostBuilder()
        .ConfigureLogging((context, builder) => builder.AddConsole())
        .ConfigureServices(services =>
        {
            services.Configure<ConsoleLifetimeOptions>(options =>  // configure the options
                options.SuppressStatusMessages = true);            // in code
            services.AddSingleton<IHostedService, PrintTextToConsoleService>();
        });

With the additional configuration above, when you run your service, you'll no longer get the unstructured text written to the console.

Summary

By default, ASP.NET Core writes environment and configuration information to the console on startup. By setting the supressStartupMessages webhost configuration value to true, you can prevent these messages being output. For the HostBuilder available in ASP.NET Core 2.1, you need to configure the ConsoleLifetimeOptions object to set SuppressStatusMessages = true.

Writing logs to Elasticsearch with Fluentd using Serilog in ASP.NET Core

$
0
0
Writing logs to Elasticsearch with Fluentd using Serilog in ASP.NET Core

For apps running in Kubernetes, it's particularly important to be storing log messages in a central location. I'd argue that this is important for all apps, whether or not you're using Kubernetes or docker, but the ephemeral nature of pods and containers make the latter cases particularly important.

If you're not storing logs from your containers centrally, then if a container crashes and is restarted, the logs may be lost forever.

There are lots of ways you can achieve this. You could log to Elasticsearch or Seq directly from your apps, or to an external service like Elmah.io for example. One common approach is to use Fluentd to collect logs from the Console output of your container, and to pipe these to an Elasticsearch cluster.

By default, Console log output in ASP.NET Core is formatted in a human readable format. If you take the Fluentd/Elasticsearch approach, you'll need to make sure your console output is in a structured format that Elasticsearch can understand, i.e. JSON.

In this post, I describe how you can add Serilog to your ASP.NET Core app, and how to customise the output format of the Serilog Console sink so that you can pipe your console output to Elasticsearch using Fluentd.

Note that it's also possible to configure Serilog to write directly to Elasticsearch using the Elasticsearch sink. If you're not using Fluentd, or aren't containerising your apps, that's a great option.

Writing logs to the console output

When you create a new ASP.NET Core application from a template, your program file will looks something like this (in .NET Core 2.1 at least):

public class Program  
{
    public static void Main(string[] args)
    {
        CreateWebHostBuilder(args).Build().Run();
    }

    public static IWebHostBuilder CreateWebHostBuilder(string[] args) =>
        WebHost.CreateDefaultBuilder(args)
            .UseStartup<Startup>();
}

The static helper method WebHost.CreateDefaultBuilder(args) creates a WebHostBuilder and wires up a number of standard configuration options. By default, it configures the Console and Debug logger providers:

.ConfigureLogging((hostingContext, logging) =>
{
    logging.AddConfiguration(hostingContext.Configuration.GetSection("Logging"));
    logging.AddConsole();
    logging.AddDebug();
})

If you run your application from the command line using dotnet run, you'll see logs appear in the console for each request. The following shows the logs generated by two requests from a browser - one for the home page, and one for the favicon.ico.

Writing logs to Elasticsearch with Fluentd using Serilog in ASP.NET Core

Unfortunately, the Console logger doesn't provider much flexibility in how the logs are written. You can optionally include scopes, or disable the colours, but that's about it.

An alternative to the default Microsoft.Extensions.Logging infrastructure in ASP.NET Core is to use Serilog for your logging, and connect it as a standard ASP.NET Core logger.

Adding Serilog to an ASP.NET Core app

Serilog is a mature open source project, that predates all the logging infrastructure in ASP.NET Core. In many ways, the ASP.NET Core logging infrastructure seems modelled after Serilog: Serilog has similar configuration options and pluggable "sinks" to control where logs are written.

The easiest way to get started with Serilog is with the Serilog.AspNetCore NuGet package. Add it to your application with:

dotnet add package Serilog.AspNetCore  

You'll also need to add one or more "sink" packages, to control where logs are written. In this case, I'm going to install the Console sink, but you could add others too, if you want to write to multiple destinations at once.

dotnet add package Serilog.Sinks.Console  

The Serilog.AspNetCore package provides an extension method, UseSerilog() on the WebHostBuilder instance. This replaces the default ILoggerFactory with an implementation for Serilog. You can pass in an existing Serilog.ILogger instance, or you can configure a logger inline. For example, the following code configures the minimum log level that will be written (info) and registers the console sink:

public static IWebHostBuilder CreateWebHostBuilder(string[] args) =>  
    WebHost.CreateDefaultBuilder(args)
        .UseSerilog((ctx, config) =>
        {
            config
                .MinimumLevel.Information()
                .Enrich.FromLogContext()
                .WriteTo.Console();
        })
        .UseStartup<Startup>();
}

Running the app again when you're using Serilog instead of the default loggers gives the following console output:

Writing logs to Elasticsearch with Fluentd using Serilog in ASP.NET Core

The output is similar to the default logger, but importantly it's very configurable. You can change the output template however you like. For example, you could show the name of the class that generated the log by including the SourceContext parameter.

For more details and samples for the Serilog.AspNetCore package, see the GitHub repository. For console formatting options, see the Serilog.Sinks.Console repository.

As well as simple changes to the output template, the Console sink allows complete control over how the message is rendered. We'll use that capability to render the logs as JSON for Fluentd, instead of a human-friendly format.

Customising the output format of the Serilog Console Sink to write JSON

To change how the data is rendered, you can add a custom ITextFormatter. Serilog includes a JsonFormatter you can use, but it's suggested that you consider the Serilog.Formatting.Compact package instead:

CompactJsonFormatter significantly reduces the byte count of small log events when compared with Serilog's default JsonFormatter, while remaining human-readable. It achieves this through shorter built-in property names, a leaner format, and by excluding redundant information.”

We're not going to use this package for our Fluentd/Elasticsearch use case, but I'll show how to plug it in here in any case. Add the package using dotnet add package Serilog.Formatting.Compact, create a new instance of the formatter, and pass it to the WriteTo.Console() method in your UseSerilog() call:

.UseSerilog((ctx, config) =>
{
    config
        .MinimumLevel.Information()
        .Enrich.FromLogContext()
        .WriteTo.Console(new CompactJsonFormatter());
})

Now if you run your application, you'll see the logs written to the console as JSON:

Writing logs to Elasticsearch with Fluentd using Serilog in ASP.NET Core

This formatter may be useful to you, but in my case, I wanted the JSON to be written so that Elasticsearch could understand it. You can see that the compact JSON format (pretty-printed below) uses, as promised, compact names for the timestamp (@t), message template (@mt) and the rendered message (@r):

{
  "@t": "2018-05-17T10:23:47.0727764Z",
  "@mt": "{HostingRequestStartingLog:l}",
  "@r": [
    "Request starting HTTP\/1.1 GET http:\/\/localhost:5000\/  "
  ],
  "Protocol": "HTTP\/1.1",
  "Method": "GET",
  "ContentType": null,
  "ContentLength": null,
  "Scheme": "http",
  "Host": "localhost:5000",
  "PathBase": "",
  "Path": "\/",
  "QueryString": "",
  "HostingRequestStartingLog": "Request starting HTTP\/1.1 GET http:\/\/localhost:5000\/  ",
  "EventId": {
    "Id": 1
  },
  "SourceContext": "Microsoft.AspNetCore.Hosting.Internal.WebHost",
  "RequestId": "0HLDRS135F8A6:00000001",
  "RequestPath": "\/",
  "CorrelationId": null,
  "ConnectionId": "0HLDRS135F8A6"
}

For the simplest Fluentd/Elasticsearch integration, I wanted the JSON to be output using standard Elasticsearch names such as @timestamp for the timestamp. Luckily, all that's required is to replace the formatter.

Using an Elasticsearch compatible JSON formatter

The Serilog.Sinks.Elasticsearch package contains exactly the formatter we need, the ElasticsearchJsonFormatter. This renders data using standard Elasticsearch fields like @timestamp and fields.

Unfortunately, currently the only way to add the formatter to your project short of copying and pasting the source code (check the license first!) is to install the whole Serilog.Sinks.Elasticsearch package, which has quite a few dependencies.

Ideally, I'd like to see the formatter as its own independent package, like Serilog.Formatting.Compact is. I've raised an issue and will update this post if there's movement.

If that's not a problem for you (it wasn't for me, as I already had a dependency on Elasticsearch.Net, then adding the Elasticsearch Sink to access the formatter is the easiest solution. Add the sink using dotnet add package Serilog.Sinks.ElasticSearch, and update your Serilog configuration to use the ElasticsearchJsonFormatter:

.UseSerilog((ctx, config) =>
{
    config
        .MinimumLevel.Information()
        .Enrich.FromLogContext()
        .WriteTo.Console(new ElasticsearchJsonFormatter();
})

Once you've connected this formatter, the console output will contain the common Elasticsearch fields like @timestamp, as shown in the following (pretty-printed) output:

{
  "@timestamp": "2018-05-17T22:31:43.9143984+12:00",
  "level": "Information",
  "messageTemplate": "{HostingRequestStartingLog:l}",
  "message": "Request starting HTTP\/1.1 GET http:\/\/localhost:5000\/  ",
  "fields": {
    "Protocol": "HTTP\/1.1",
    "Method": "GET",
    "ContentType": null,
    "ContentLength": null,
    "Scheme": "http",
    "Host": "localhost:5000",
    "PathBase": "",
    "Path": "\/",
    "QueryString": "",
    "HostingRequestStartingLog": "Request starting HTTP\/1.1 GET http:\/\/localhost:5000\/  ",
    "EventId": {
      "Id": 1
    },
    "SourceContext": "Microsoft.AspNetCore.Hosting.Internal.WebHost",
    "RequestId": "0HLDRS5H8TSM4:00000001",
    "RequestPath": "\/",
    "CorrelationId": null,
    "ConnectionId": "0HLDRS5H8TSM4"
  },
  "renderings": {
    "HostingRequestStartingLog": [
      {
        "Format": "l",
        "Rendering": "Request starting HTTP\/1.1 GET http:\/\/localhost:5000\/  "
      }
    ]
  }
}

Now logs are being rendered in a format that can be piped straight from Fluentd into Elasticsearch. We can just write to the console.

Switching between output formatters based on hosting environment

A final tip. What if you want to have human readable console output when developing locally, and only use the JSON formatter in Staging or Production?

This is easy to achieve as the UseSerilog extension provides access to the IHostingEnvironment via the WebHostBuilderContext. For example, in the following snippet I configure the app to use the human-readable console in development, and to use the JSON formatter in other environments.

.UseSerilog((ctx, config) =>
{
    config
        .MinimumLevel.Information()
        .Enrich.FromLogContext();

    if (ctx.HostingEnvironment.IsDevelopment())
    {
        config.WriteTo.Console();
    }
    else
    {
        config.WriteTo.Console(new ElasticsearchJsonFormatter());
    }
})

Instead of environment, you could also switch based on configuration values available via the IConfiguration object at ctx.Configuration.

Summary

Storing logs in a central location is important, especially if you're building containerised apps. One possible solution to this is to output your logs to the console, have Fluentd monitor the console, and pipe the output to an Elasticsearch cluster. In this post I described how to add Serilog logging to your ASP.NET Core application and configure it to write logs to the console in the JSON format that Elasticsearch expects.

Building ASP.NET Core apps on both Windows and Linux using AppVeyor

$
0
0
Building ASP.NET Core apps on both Windows and Linux using AppVeyor

Nearly two years ago I wrote a post about using AppVeyor to build and publish your first .NET Core NuGet package. A lot has changed with ASP.NET Core since then, but by-and-large the process is still the same. I've largely moved to using Cake to build my apps, but I still use AppVeyor, with the appveyor.yml file essentially unchanged, short of updating the image to Visual Studio 2017.

Recently, AppVeyor announced the general availability of AppVeyor for Linux. This is a big step, previously AppVeyor was Windows only so you had to use a different service if you wanted CI on Linux (I have been using Travis). While Travis has been fine for my needs, I find it noticeably slower to start than AppVeyor. It would also be nice to consolidate on a single CI solution.

In this post, I'll take an existing appveyor.yml file, and update it to build on both Windows and Linux with appveyor. For this post I'm only looking at building .NET Core projects, i.e. I'm not targeting the full .NET Framework at all.

The Windows only AppVeyor build script

AppVeyor provides several ways to configure a project for CI builds. The approach I use for projects hosted on GitHub, described in my previous post, is to add an appveyor.yml file in the root of my GitHub repository. This file also disables the automatic detection AppVeyor can perform to try and build your project automatically, and instead provides a build script for it to use.

The build script in this case is very simple. As I said previously, I tend to use Cake for my builds these days, but that's somewhat immaterial. The important point is we have a build script that AppVeyor can run to build the project.

For reference, this is the script I'll be using. The Exec function ensures any errors are bubbled up correctly. Otherwise I'm litteraly just calling dotnet pack in the root directory (which does an implicit dotnet restore and dotnet test)

function Exec  
{
    [CmdletBinding()]
    param(
        [Parameter(Position=0,Mandatory=1)][scriptblock]$cmd,
        [Parameter(Position=1,Mandatory=0)][string]$errorMessage = ($msgs.error_bad_command -f $cmd)
    )
    & $cmd
    if ($lastexitcode -ne 0) {
        throw ("Exec: " + $errorMessage)
    }
}

if(Test-Path .\artifacts) { Remove-Item .\artifacts -Force -Recurse }

$revision = @{ $true = $env:APPVEYOR_BUILD_NUMBER; $false = 1 }[$env:APPVEYOR_BUILD_NUMBER -ne $NULL];
$revision = "beta-{0:D4}" -f [convert]::ToInt32($revision, 10)

exec { & dotnet pack .t -c Release -o .\artifacts --version-suffix=$revision }  

The appveyor.yml file to build the app is shown below. The important points are:

  • We're using the Visual Studio 2017 build image
  • Only building the master branch (and PRs to it)
  • Run Build.ps1 to build the project
  • For tagged commits, deploy the NuGet packages to www.nuget.org
version: '{build}'  
image: Visual Studio 2017  
pull_requests:  
  do_not_increment_build_number: true
branches:  
  only:
  - master
nuget:  
  disable_publish_on_pr: true
build_script:  
- ps: .\Build.ps1
test: off  
artifacts:  
- path: .\artifacts\**\*.nupkg
  name: NuGet
deploy:  
- provider: NuGet
  name: production
  api_key:
    secure: nyE3SEqDxSkfdsyfsdjmfdshjk767fYuUB7NwjOUwDi3jXQItElcp2h
  on:
    branch: master
    appveyor_repo_tag: true

You can see an example of this configuration in a test GitHub repository (tagged 0.1.0-beta)

Updating the appveyor.yml to build on Linux

Now you know what we're starting from, I'l update it to allow building on Linux. The getting started guide on AppVeyor's site is excellent, so it didn't take me long to get up and running.

I've listed the final appveyor.yml at the end of this post, but I'll walk through each of the changes I made to the previous appveyor.yml to get builds working. Applying this to your own appveyor.yml will hopefully just be a case of working through each step in turn.

1. Add the ubuntu image

AppVeyor let you specify multiple images in your appveyor.yml. AppVeyor will run builds against each image; every configuration must pass for the overall build to pass. In the previous configuration, I was using a single image, Visual Studio 2017:

image: Visual Studio 2017  

You can update this to use Ubuntu too, by using a list instead of a single value:

image:  
  - Visual Studio 2017
  - Ubuntu

Remember: YAML is sensitive to both case and white-space, so be careful when updating your appveyor.yml!

2. Update your build script (optional)

The ubuntu image comes pre-installed with a whole host of tools, one of which is PowerShell Core. That means there's a strong possibility that your PowerShell build script (like the one I showed earlier) will work on Linux too!

For me, this example of moving from Windows to Linux and having your build scripts just work, is one of the biggest selling points for PowerShell Core.

However, if your build scripts don't work on Linux, you might need to run a different script on Linux than in Windows. You can achieve this by using different prefixes for each environment: ps for Windows, sh for Linux. You also need to tell AppVeyor not to try and run the PowerShell commands on linux.

Previously, the build_script section looked like this:

build_script:  
- ps: .\Build.ps1

Updating to run a bash script on Linux, and setting the APPVEYOR_YML_DISABLE_PS_LINUX environment variable, the whole build section looks like this:

environment:  
  APPVEYOR_YML_DISABLE_PS_LINUX: true

build_script:  
- ps: .\Build.ps1
- sh: ./build.sh

Final tip - remember, paths in Linux are case sensitive, so make sure the name of your build script matches the actual name and casing of the real file path. Windows is much more forgiving in that respect!

3. Conditionally deploy artifacts (optional)

As part of my CI process, I automatically push any NuGet packages to MyGet/NuGet when the build passes if the commit has a tag. That's handled by the deploy section of appveyor.yml.

However, if we're running appveyor builds on both Linux and Windows, I don't want both builds to try and push to NuGet. Instead, I pick just one to do so (in this case Ubuntu - either will do).

To conditionally run sections of appveyor.yml, you must use the slightly-awkward "matrix specialisation" syntax. That turns the deploy section of appveyor.yml from this:

deploy:  
- provider: NuGet
  name: production
  api_key:
    secure: nyE3SEqDxSkHrLGAQJBMh2Oo6deEnWCEKoHCVafYuUB7NwjOUwDi3jXQItElcp2h
  on:
    branch: master
    appveyor_repo_tag: true

to this:

for:  
-
  matrix:
    only:
      - image: Ubuntu

  deploy:
  - provider: NuGet
    name: production
    api_key:
      secure: nyE3SEqDxSkHrLGAQJBMh2Oo6deEnWCEKoHCVafYuUB7NwjOUwDi3jXQItElcp2h
    on:
      branch: master
      appveyor_repo_tag: true

Important points:

  • Remember, YAML is case and whitespace sensitive
  • Add the for/matrix/only section
  • Indent the whole deploy section so it is level with matrix.

That last point is critical, so here it is in image form, with indent guides:

Building ASP.NET Core apps on both Windows and Linux using AppVeyor

And that's all there is to it - you should now have cross-platform builds!

Building ASP.NET Core apps on both Windows and Linux using AppVeyor

The final appveyor.yml for multi-platform builds

For completion sake, a complete, combined appveyor.yml is shown below. This differs slightly from the example in my test repository on GitHub but it highlights all of the features I've talked about.

version: '{build}'  
image:  
  - Visual Studio 2017
  - Ubuntu
pull_requests:  
  do_not_increment_build_number: true
branches:  
  only:
  - master
nuget:  
  disable_publish_on_pr: true

environment:  
  APPVEYOR_YML_DISABLE_PS_LINUX: true
build_script:  
- ps: .\Build.ps1
- sh: ./build.sh

test: off  
artifacts:  
- path: .\artifacts\**\*.nupkg
  name: NuGet

for:  
-
  matrix:
    only:
      - image: Ubuntu

  deploy:
  - provider: NuGet
    name: production
    api_key:
      secure: nyE3SEqDxSkHrLGAQJBMh2Oo6deEnWCEKoHCVafYuUB7NwjOUwDi3jXQItElcp2h
    on:
      branch: master
      appveyor_repo_tag: true

Summary

Appveyor recently announced the general availability of Appveyor for Linux. This means you can now run CI builds on AppVeyor, whereas previously you were limited to Windows only. If you wish to run builds on both Windows and Linux, you need to update your appveyor.yml to handle the fact that the configuration is controlling two different builds.

Viewing all 743 articles
Browse latest View live