One of the great selling points of the .NET Core framework is its cross-platform credentials. Similar to most .NET developers I imagine, the vast majority of my development time has been on Windows. As a Mac user, however, I have been experimenting with creating ASP.NET applications directly in OS X.
In this post I'll describe the process of installing PostgreSQL, adding Entity Framework (EF) Core to your application, building a model, and running migrations to create your database. You can find the source code for the final application on GitHub.
Prerequisites
There are a number of setup steps I'm going to assume here in order to keep the post to a sensible length.
- Install the .NET Core SDK for OS X from dot.net. This will also encourage you to install Homebrew in order to update your openssl installation. I recommend you do this as we'll be using Homebrew again later.
- Install Visual Studio Code. This great cross platform editor is practically a requirement when doing .NET development where Visual Studio isn't available. You should also install the C# extension.
- (Optional) Install Yeoman ASP.NET templates (and npm). Although not required, installing Yeoman and the .NET Core templates can get you up and running with a new web application faster. Yeoman uses npm and can be directly integrated into VS Code using an extension.
- Create a new application. In this post I have created a basic MVC application without any authentication/identity or entity framework models in it.
Installing PostgreSQL
There are a number of Database Providers you can use with Entity Framework core today, with more on the way. I chose to go with PostgreSQL as it's a mature, cross-platform database (and I want to play with Marten later!)
The easiest way to install PostgreSQL on OS X is to use Homebrew. Hopefully you already have it installed as part of installing the .NET Core SDK. If you'd rather use a graphical installer there are a number of possibilities listed on their downloads page.
Running the following command will download and install PostgreSQL along with any dependencies.
$ brew install postgresql
Assuming all goes well, the database manager should be installed. You have a couple of options for running it; you can either run the database on demand in the foreground of a terminal tab, or you can have it run automatically on restart as a background service. To run as a service, use:
$ brew services start postgresql
I chose to run in the foreground, as I'm just using it for experimental development at the moment. You can do so with:
$ postgres -D /usr/local/var/postgres
In order to use Entity Framework migrations, you need a user with the createdb permission. When PostgreSQL is installed, a new super-user role should be created automatically in your provider with your current user's login details. We can check this by querying the pg_roles table.
To run queries against the database you can use the psql interactive terminal. In a new tab, run the following command to view the existing roles, which should show your username and that you have the createdb permission.
$ psql postgres -c "SELECT rolname, rolcreatedb::text FROM pg_roles"

 rolname | rolcreatedb
---------+-------------
 Sock    | true
(1 row)
Installing EF Core into your project
Now we have PostgreSQL installed, we can go about adding Entity Framework Core to our ASP.NET Core application. First we need to install the required libraries into our project.json. The only NuGet package directly required to use PostgreSQL is the Npgsql provider, but we need the additional EF Core libraries in order to run migrations against the database. Note that the Tools library should go in the tools section of your project.json, while the others should go in the dependencies section.
{
  dependencies: {
    "Npgsql.EntityFrameworkCore.PostgreSQL": "1.0.0",
    "Microsoft.EntityFrameworkCore.Design": "1.0.0-preview2-final"
  },

  tools: {
    "Microsoft.EntityFrameworkCore.Tools": {
      "version": "1.0.0-preview2-final",
      "imports": "portable-net45+win8+dnxcore50"
    }
  }
}
Migrations allow us to use a code-first approach to creating the database. This means we can create our models in code, generate a migration, and run that against PostgreSQL. The migrations will then create the database if it doesn't already exist and update the tables to match our model as required.
The first step is to create our entity models and db context. in this post I am using a simple model consisting of an Author which may have many Articles.
using Microsoft.EntityFrameworkCore;

public class Author
{
    public int Id { get; set; }
    public string FirstName { get; set; }
    public string LastName { get; set; }

    public List<Article> Articles { get; set; } = new List<Article>();
}

public class Article
{
    public int Id { get; set; }
    public string Title { get; set; }
    public string Url { get; set; }
    public string Body { get; set; }

    public int AuthorId { get; set; }
    public Author Author { get; set; }
}

public class ArticleContext : DbContext
{
    public ArticleContext(DbContextOptions<ArticleContext> options)
        : base(options)
    { }

    public DbSet<Article> Articles { get; set; }
    public DbSet<Author> Authors { get; set; }
}
Our entity models are just simple POCO objects, which use the default conventions for the Primary Key and relationships. The DbContext can be used to customise your model, and to expose the DbSet<T>s which are used to query the database.
Now our model is designed, we need to setup our app to use the ArticleContext and our database. Add a section in your appsettings.json, or use any other configuration method to setup a connection string. The connection string should contain the name of the database to be created, in this case, DemoArticlesApp. The username and password will be your local OS X account's details.
{
  "DbContextSettings" :{
    "ConnectionString" : "User ID=Sock;Password=password;Host=localhost;Port=5432;Database=DemoArticlesApp;Pooling=true;"
  }
}
Finally, update the ConfigureServices method of your Startup class to inject your ArticleContext when requested, and to use the connection string specified in your configuration.
public void ConfigureServices(IServiceCollection services)
{
    // Add framework services.
    services.AddMvc();

    var connectionString = Configuration["DbContextSettings:ConnectionString"];
    services.AddDbContext<ArticleContext>(
        opts => opts.UseNpgsql(connectionString)
    );
}
Generate Migrations using EF Core Tools
Now we have our instance of PostgreSQL started and our models built, we can use the EF Core tools to scaffold our migrations and update our database! When using Visual Studio, you would typically run entity framework migration code from the Package Manager Console, and that is still possible. However now we have the dotnet CLI we are also able to hook into the command support and run our migrations directly on the command line.
Note, before running these commands you must make sure you are in the root of your project, i.e. the same folder that contains your project.json.
We add our first migration and give it a descriptive name, InitialMigration using the ef migrations add command:
$ dotnet ef migrations add InitialMigration

Project adding-ef-core-on-osx (.NETCoreApp,Version=v1.0) will be compiled because inputs were modified
Compiling adding-ef-core-on-osx for .NETCoreApp,Version=v1.0
Compilation succeeded.
    0 Warning(s)
    0 Error(s)
Time elapsed 00:00:01.5865396

Done. To undo this action, use 'dotnet ef migrations remove'
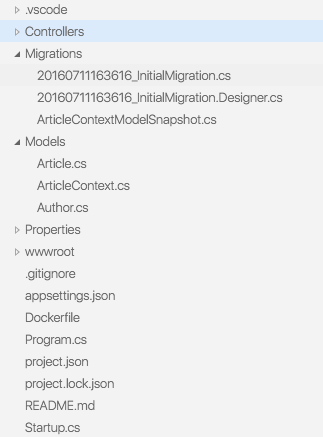
This first builds your project, and then generates the migration files. As this is the first migration, it will also create the Migrations folder in your project, and add the new migrations to it.

You are free to look at the scaffolding code that was generated to make sure you are happy with what will be executed on the database. If you want to change something, you can remove the last migration with the command:
$ dotnet ef migrations remove
You can then fix any bugs, and add the initial migration again.
The previous step generated the code necessary to create our migrations, but it didn't touch the database itself. We can apply the generated migration to the database using the command ef database update:
$ dotnet ef database update

Project adding-ef-core-on-osx (.NETCoreApp,Version=v1.0) will be compiled because Input items added from last build
Compiling adding-ef-core-on-osx for .NETCoreApp,Version=v1.0
Compilation succeeded.
    0 Warning(s)
    0 Error(s)
Time elapsed 00:00:01.9422901

Done.
All done! Our database has been created (as it didn't previously exist) and the tables for our entities have been created. To prove it for yourself run the following command, replacing DemoArticlesApp with the database name you specified earlier in your connection string:
$ psql DemoArticlesApp -c "SELECT table_name FROM Information_Schema.tables where table_schema='public'"

      table_name
-----------------------
 __EFMigrationsHistory
 Authors
 Articles
(3 rows)
Here we can see the Authors and Articles tables which correspond to their model equivalents. There is also an __EFMigrationsHistory which is used by Entity Framework core to keep track of which migrations have been applied.
Injecting your DbContext into MVC Controllers
Now we have both our app and our database configured, lets put the two to use. I've created a couple of simple WebApi controllers to allow getting and posting Authors and Articles. To hook this up to the database, we inject an instance of our ArticlesContext to use for querying and updates. Only the AuthorsController is shown below, but the Articles controller is very similar.
using System.Collections.Generic;
using System.Linq;
using AddingEFCoreOnOSX.Models;
using Microsoft.AspNetCore.Mvc;

namespace AddingEFCoreOnOSX.Controllers
{
    [Route("api/[controller]")]
    public class AuthorsController : Controller
    {
        private readonly ArticleContext _context;
        public AuthorsController(ArticleContext context)
        {
            _context = context;
        }

        // GET: api/authors
        public IEnumerable<Author> Get()
        {
            return _context.Authors.ToList();
        }

        // GET api/authors/5
        [HttpGet("{id}")]
        public Author Get(int id)
        {
            return _context.Authors.FirstOrDefault(x => x.Id == id);
        }

        // POST api/authors
        [HttpPost]
        public IActionResult Post([FromBody]Author value)
        {
            _context.Authors.Add(value);
            _context.SaveChanges();
            return StatusCode(201, value);
        }
    }
}
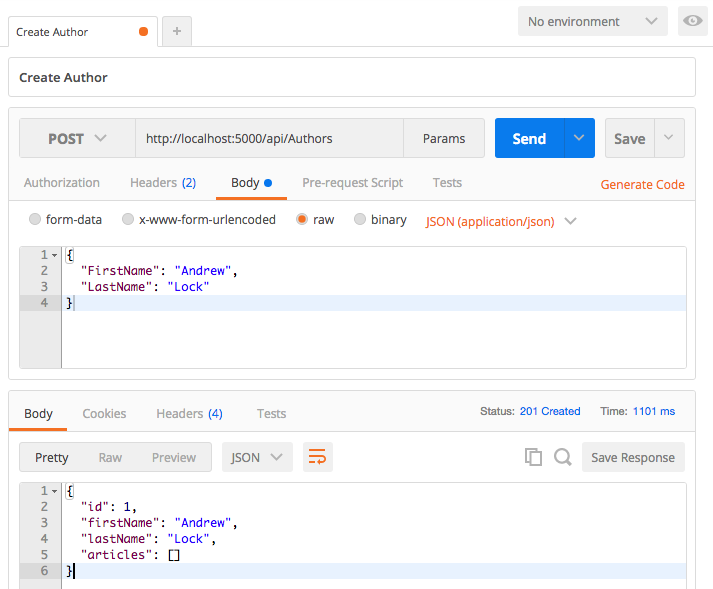
This is a very simple controller. We can create a new Author by POSTing appropriate data to /api/authors (created using PostMan):

We can then fetch our list of authors with a GET to `/api/authors:

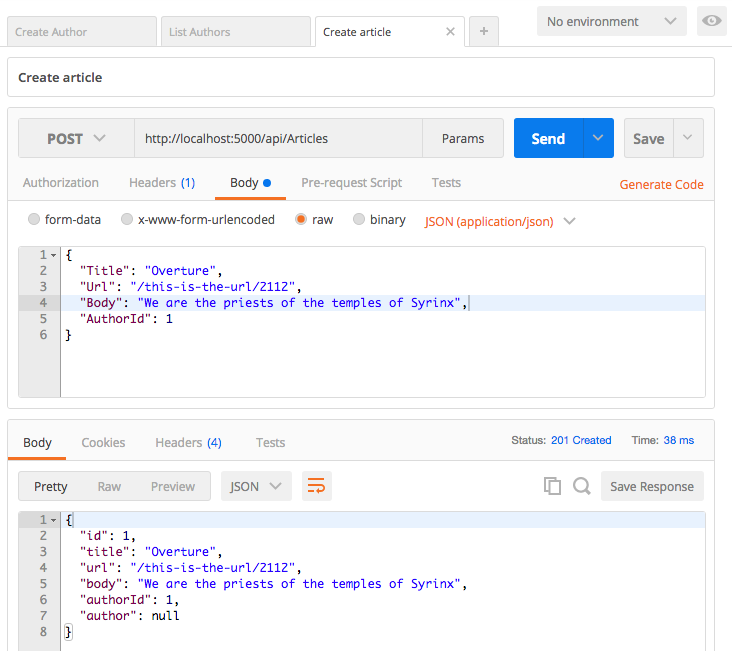
Similarly, we can create and list a new Article with a POST and GET to /api/articles:


Summary
In this post I showed how to install PostgreSQL on OS X. I then built an Entity Framework Core entity model in my project, and added the required DbContext and settings. I used the dotnet CLI to generate migrations for my model and then applied these to the database. Finally, I injected the DbContext into my MVC Controllers to query the newly created database .